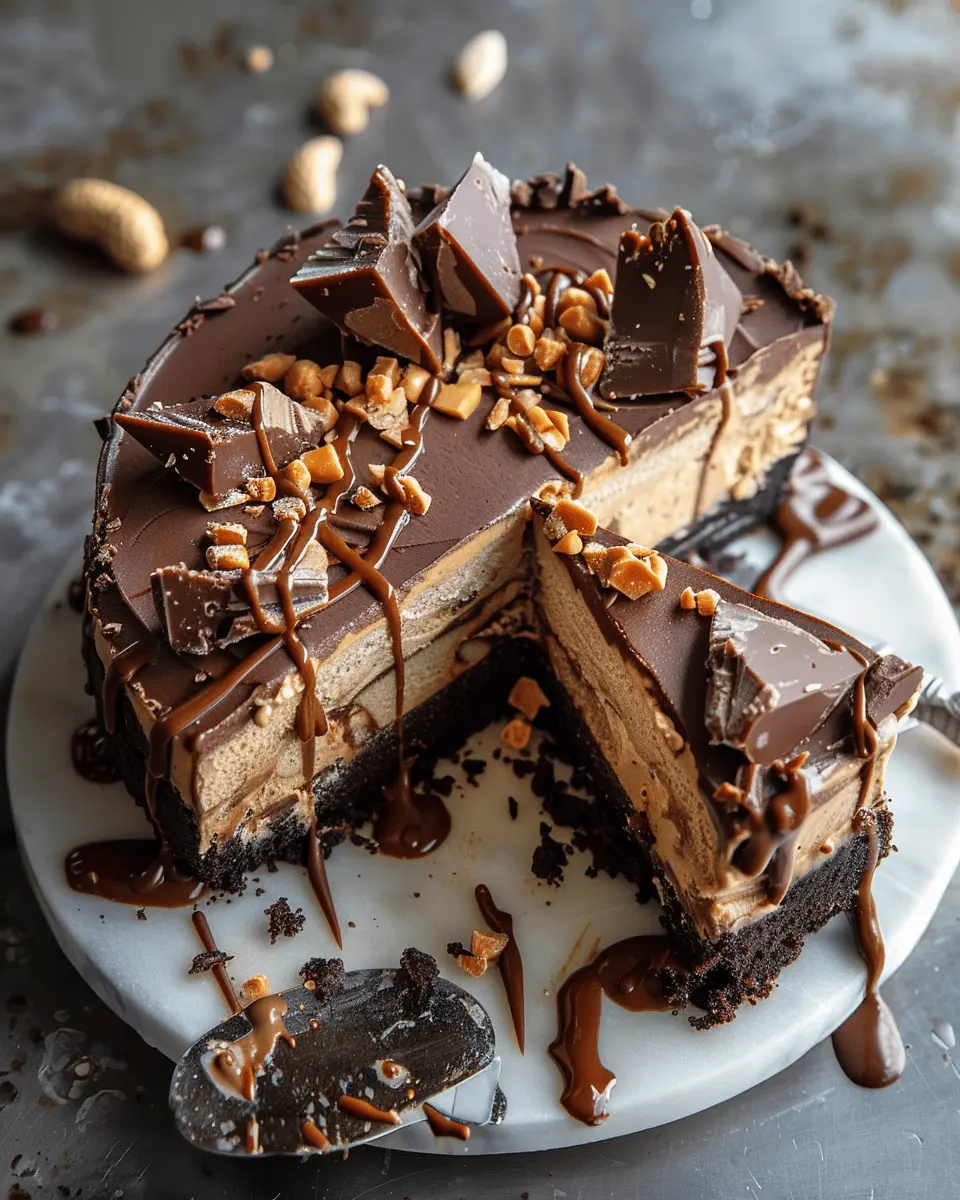
Introduction to Nonnie’s Chocolate Peanut Butter Ice Cream Cake
When it comes to delightful desserts, Nonnie’s chocolate peanut butter ice cream cake truly stands out. This decadent creation blends creamy ice cream with the rich flavors of chocolate and peanut butter, resulting in a treat that feels indulgent yet surprisingly simple to make. But what really makes this cake special? Let’s dive into its backstory and discover why it has become a beloved staple in many households.
What’s the story behind Nonnie’s cake?
This cake has roots that are deeply personal, often passed down through generations. Nonnie, the original creator, was known for her ability to whip up desserts that brought families together. Whether it was a summer barbecue or a cozy winter gathering, her special cake seemed to find its way to every celebration. Inspired by her penchant for flavor combinations, this particular cake was born out of her love for chocolate and peanut butter—a duo that many find irresistible.
Not only is it a hit among dessert lovers, but it also boasts a simplicity that fits into today’s fast-paced lifestyles. With just six ingredients, preparing Nonnie’s chocolate peanut butter ice cream cake feels like a weekend breeze. You might find yourself wondering how something so delicious can be so easy. The secret lies in the quality of the ingredients and the love put into creating it.
One of the most wonderful aspects of this cake is its versatility. You can easily customize it with different flavors or toppings, such as crushed nuts or drizzles of caramel. It’s perfect for any occasion, whether you’re celebrating a birthday, hosting a dinner party, or simply treating yourself after a long work week.
As you embark on your journey to create this cake, you’ll not only be following a recipe but also partaking in a tradition that emphasizes love, comfort, and satisfaction. Whether shared with friends or savored alone, this cake serves as a reminder that some of the best moments in life are sweet. So, are you ready to bring a piece of Nonnie’s legacy into your kitchen? Let’s get started!
Ingredients for Nonnie’s Chocolate Peanut Butter Ice Cream Cake
To create the delectable Nonnie’s chocolate peanut butter ice cream cake, you’ll need just a handful of ingredients that blend beautifully to deliver an irresistible treat. Here’s what you’ll gather:
- Chocolate Cake Mix: Opt for your favorite brand. A rich chocolate base is essential to make the cake truly delectable.
- Peanut Butter: Choose creamy or crunchy, depending on your texture preference. This will add that signature flavor everyone loves.
- Ice Cream: Vanilla is a classic choice, but feel free to mix it up with chocolate or peanut butter ice cream for an extra punch.
- Turkey Bacon: A surprising but delightful addition! Cooked and crumbled, it enhances the cake’s texture with a subtle crunch.
- Chocolate Syrup: For drizzling, this will elevate the dessert visually and add an extra layer of chocolatey goodness.
- Whipped Topping: A light topping that provides a perfect contrast to the rich flavors below.
Gather these ingredients, and you’re well on your way to serving up a slice of joy! If you’re looking for more dessert inspiration, check out recipes on Food Network or Bon Appétit for delicious ideas.
Preparing Nonnie’s Chocolate Peanut Butter Ice Cream Cake
Creating Nonnie’s chocolate peanut butter ice cream cake is a delightful adventure that combines rich flavors and a simple process. Whether you’re preparing it for a special occasion or just treating yourself to a sweet indulgence, you’re in for a treat. Here’s a step-by-step guide to ensure everything goes smoothly.
Get Your Equipment Ready
Before diving into the deliciousness, gather your equipment. Here’s what you’ll need:
- 9-inch springform pan: This will hold your cake together beautifully.
- Mixing bowl: For combining ingredients.
- Whisk or electric mixer: To blend your ice cream and peanut butter effortlessly.
- Microwave-safe bowl: For your chocolate magic shell.
- Spatula: For smoothing out layers.
- Parchment paper (optional): To line the bottom of your pan for easier removal.
Having your tools at hand will streamline the process, making it both efficient and enjoyable. Plus, don’t forget to preheat your freezer ahead of time—this little step can save you some wait time later!
Make the Crust
The crust is the foundation of Nonnie’s chocolate peanut butter ice cream cake. It’s simple, yet incredibly important! Here’s how you do it:
- Ingredients:
- 1 ½ cups of chocolate cookie crumbs
- ½ cup of melted butter
- Instructions:
- In a bowl, combine the chocolate cookie crumbs with melted butter.
- Press the mixture firmly into the bottom of your springform pan, making sure it’s evenly spread. This will ensure every bite has that tasty crunch!
After you’ve pressed it down nicely, place it in the freezer for about 10 minutes to set before moving on to the next steps.
Combine Ice Cream and Peanut Butter
Next, let’s get to the fun part! Mixing together your ice cream and peanut butter creates that creamy, dreamy filling.
- Ingredients:
- 1 quart of vanilla ice cream
- 1 cup of creamy peanut butter
- Instructions:
- In a mixing bowl, let your ice cream soften for a few minutes.
- Add the peanut butter and blend with your whisk or mixer until smooth. The combination becomes a velvety filling that’s simply irresistible!
Don’t hesitate to add a bit more peanut butter if you’re a fan of that nutty flavor. The mixture should be creamy enough to hold its shape but still soft enough to spread easily.
Freeze for the First Time
Now that you have your crust and filling ready, it’s time to assemble the cake. Spread the peanut butter ice cream mixture over the crust, smoothing the top with your spatula.
- Once smoothed, cover with plastic wrap and freeze for at least 4 hours or until firm.
This initial freeze is crucial. It helps keep the cake layers distinct and prepares it for the luxurious chocolate shell to come.
Create the Chocolate Magic Shell
While everything is firming up, let’s prepare the chocolate magic shell! It adds a wonderful contrast to the creamy ice cream.
- Ingredients:
- 1 cup of chocolate chips
- 2 tablespoons of coconut oil (or any neutral oil)
- Instructions:
- In your microwave-safe bowl, melt the chocolate chips and coconut oil together in 30-second intervals, stirring until smooth.
- Let it cool slightly before pouring it over the cake. This keeps the ice cream from melting too quickly!
Final Freeze and Serve
After pouring your chocolate shell over the cake, it’s time for the final freeze.
- Return it to the freezer for another 2 hours. Once set, unwrap carefully and release the sides of the springform pan.
Before serving, let it sit at room temperature for a few minutes—this makes slicing easier. A garnish of crushed peanuts or whipped topping can elevate your presentation. Enjoy every moment with friends and family while they marvel at your creation.
This Nonnie’s chocolate peanut butter ice cream cake is bound to become a favorite, leaving everyone craving seconds. Happy baking!
Variations on Nonnie’s Chocolate Peanut Butter Ice Cream Cake
Nonnie’s chocolate peanut butter ice cream cake is a delightful treat, but why stop there? With a few simple variations, you can elevate this classic dessert into something truly personal and unique.
Crunchy Variations with Different Nuts
For those looking to add a bit of crunch and flavor to Nonnie’s chocolate peanut butter ice cream cake, consider incorporating different nuts. Here are some fantastic options:
- Almonds: Slice them thinly for a delicate crunch that complements the creaminess.
- Pecans: Their rich, buttery flavor pairs beautifully with chocolate and peanut butter.
- Hazelnuts: Try toasting them lightly before adding for an extra layer of flavor.
Mix and match these nuts to create your ideal combination. You could even experiment with nut butters—think cashew or macadamia for a twist!
Drizzled Toppings and Extra Flavors
Want to take your cake to the next level? Drizzling toppings is a surefire way to do so. Here are some delightful options:
- Melted Chocolate: A classic choice that enhances the chocolate flavor. Simply melt some dark chocolate and drizzle it generously on top.
- Caramel Sauce: The sweetness of caramel can create a beautiful balance against the richness of the cake.
- Peanut Butter Drizzle: Consider warming up some peanut butter for an indulgent sauce that feels extra luxurious.
Additionally, you can play around with flavors:
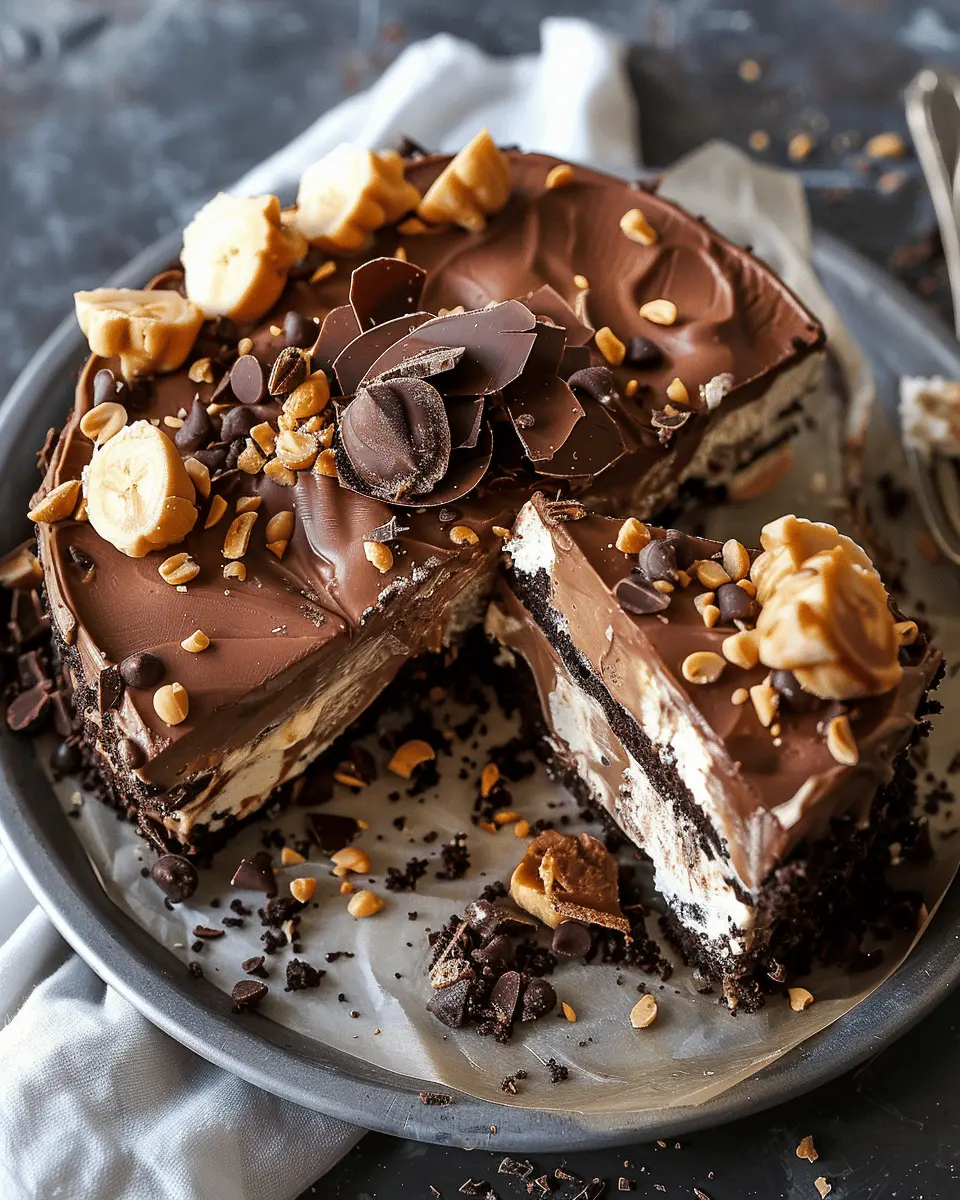
- A sprinkle of sea salt can accentuate the sweetness nicely.
- Top with fresh strawberries or bananas for a fruity contrast.
With these variations, you can transform Nonnie’s chocolate peanut butter ice cream cake into a multi-layered experience that suits any occasion. Enjoy the process of experimenting, and don’t forget to share your creations! For more dessert ideas, check out Food Network’s dessert section for inspiration.
Cooking Tips and Notes for Nonnie’s Chocolate Peanut Butter Ice Cream Cake
Creating Nonnie’s chocolate peanut butter ice cream cake is a delightful experience, and a few tips can make it even more enjoyable!
Get the Right Ingredients
Use high-quality peanut butter and chocolate ice cream for the best flavor. Many brands offer natural options that’ll elevate your dessert. Also, if you prefer a smooth texture, try a creamy peanut butter rather than a crunchy one.
Layer it Up
To achieve well-defined layers, let the cake freeze for at least an hour after assembling. This will help each layer set properly, making it easier to slice later. If possible, let it sit out for 5-10 minutes before serving to soften slightly—trust me, the texture will be divine!
Personal Touches
Feel free to customize the cake with your favorite toppings like chopped nuts or even a drizzle of chocolate syrup. You could also swap out peanut butter for their favorite nut spread!
For more tips on making ice cream cakes, check this resource from Serious Eats, which offers valuable insights on incorporating different flavors and methods for freeze desserts. Enjoy every bite of this rich, indulgent treat!

Serving Suggestions for Nonnie’s Chocolate Peanut Butter Ice Cream Cake
When it comes to enjoying Nonnie’s chocolate peanut butter ice cream cake, serving it right can elevate your dessert experience to new heights! Here are some delightful suggestions to make this treat even more memorable.
Pairing with Fresh Fruits
Consider serving your cake with fresh fruits like sliced strawberries or bananas. The natural sweetness and acidity of the fruits can beautifully balance the rich chocolate and creaminess of the peanut butter. If you’re feeling adventurous, a fruit compote could add a wonderful pop of flavor!
Adding Crunch with Nuts
For some added texture, sprinkle chopped nuts such as peanuts or almonds on top of the cake. Not only does this add a pleasing crunch, but it also enhances the nutty notes of the peanut butter. Plus, it makes the cake look more appetizing!
The Right Beverage
Complement your dessert with a steaming cup of coffee or a chilled glass of almond milk. The bitterness of coffee can create a fantastic contrast to the sweetness of the cake, making every bite a celebration of flavors.
Presentation Matters
Don’t forget about presentation! A simple dusting of cocoa powder or drizzling some chocolate sauce can make your Nonnie’s chocolate peanut butter ice cream cake shine like a star at any gathering.
By following these serving suggestions, you can take your dessert experience from good to phenomenal! Need more ideas? Check out this guide on dessert pairings. Enjoy!
Time Breakdown for Nonnie’s Chocolate Peanut Butter Ice Cream Cake
Preparation Time
Creating Nonnie’s chocolate peanut butter ice cream cake is a breeze! You’ll need about 20 minutes to gather your ingredients and put everything together. It’s a delightful way to channel your inner chef, even if you’re no pro.
Freezing Time
Patience is key here! After prepping, let the cake freeze for 4-6 hours. This step is crucial for achieving that perfect ice cream cake texture, so make sure to plan ahead.
Total Time
In total, you’re looking at around 5-6.5 hours for the entire process. While it might seem like a long time, most of that is just waiting. Just think of the sweet reward at the end—Nonnie’s delicious cake will be worth every minute! Feel free to check out sites like Food Network for tips on ice cream cakes to keep the inspiration flowing.
Nutritional Facts for Nonnie’s Chocolate Peanut Butter Ice Cream Cake
When indulging in Nonnie’s chocolate peanut butter ice cream cake, it’s always helpful to know what you’re treating your taste buds to, right? Here’s a quick breakdown of the nutritional facts to keep you informed.
Calories
Each slice of this decadent cake contains approximately 300 calories. Perfect for a sweet treat after dinner or a mid-day pick-me-up!
Sugar Content
With about 25 grams of sugar per serving, this cake satisfies your sweet tooth without compromising on flavor. While it’s a delightful dessert, moderation is key!
Suggested Serving Size
We recommend enjoying a serving size of about 1/8 of the cake, which balances indulgence with enjoyment. Sharing is caring—consider dividing it among friends for a fun dessert experience!
Incorporating a dessert like Nonnie’s chocolate peanut butter ice cream cake into your diet can be part of a balanced lifestyle. For more information on nutrition and dessert tips, check out the Harvard T.H. Chan School of Public Health for expert insights.
FAQs about Nonnie’s Chocolate Peanut Butter Ice Cream Cake
Can I use a different type of ice cream?
Absolutely! While Nonnie’s chocolate peanut butter ice cream cake is dazzling with chocolate and peanut butter flavors, feel free to get creative with your ice cream choices. Think about using vanilla, cookie dough, or even a fruity option like strawberry to mix things up. Just remember, the ice cream should be soft enough to spread easily for layering, so if you’re using a hard or premium brand, let it sit out for a few minutes!
How do I store leftovers?
If you’re lucky enough to have any leftovers of this decadent cake, proper storage is key! Simply cover the cake with plastic wrap and pop it in the freezer. This will keep it fresh and ready to enjoy later. Just a tip: Allow the cake to sit at room temperature for about 10 minutes before slicing to achieve the perfect texture.
What if I don’t have a springform pan?
No springform pan? No problem! You can still whip up Nonnie’s chocolate peanut butter ice cream cake in a standard cake pan. Just ensure you line the base and sides with parchment paper to make removal easier. Alternatively, you could layer it in a deep dish or use individual serving cups for a fun, customizable twist!
If you have more questions about the recipe or need tips, consider checking out resources like Serious Eats for expert advice on dessert preparation. Happy baking, and enjoy this delightful treat!
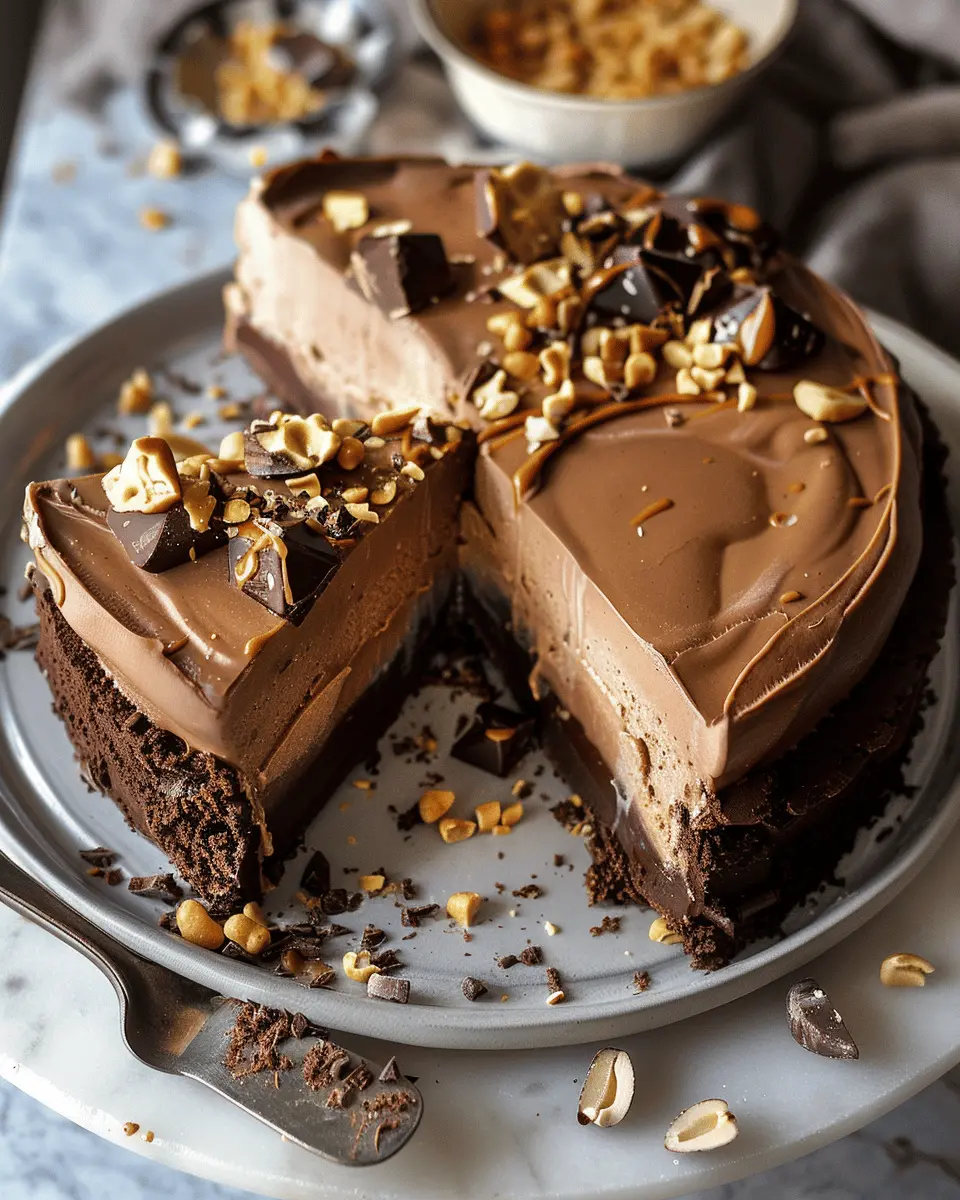
Conclusion on Nonnie’s Chocolate Peanut Butter Ice Cream Cake
When you take a bite of Nonnie’s chocolate peanut butter ice cream cake, you’re not just tasting a dessert; you’re experiencing a delightful blend of nostalgia and indulgence. This six-ingredient treat is simple yet incredibly satisfying, making it perfect for any occasion—from casual summer gatherings to festive celebrations.
As a young professional, it’s important to have recipes like this in your repertoire—quick to prepare, impressive to serve, and guaranteed to impress friends. Don’t hesitate to experiment with toppings or layer variations; after all, personal touches often create the best memories. Visit The Kitchn for more dessert inspiration and tips!
Nonnie’s chocolate peanut butter ice cream cake: Easy 6-Ingredient Treat
Nonnie’s 6 Ingredient Chocolate Peanut Butter Ice Cream Cake is a delicious and easy dessert that requires minimal ingredients.
- Prep Time: 20 minutes
- Cook Time: 0 minutes
- Total Time: 4 hours 20 minutes
- Yield: 8 servings 1x
- Category: Dessert
- Method: No-Bake
- Cuisine: American
Ingredients
- 2 cups chocolate ice cream
- 1 cup peanut butter
- 1 cup whipped cream
- 1 cup chocolate syrup
- 1 cup crushed cookies
- 1/2 cup chopped peanuts
Instructions
- In a mixing bowl, combine the chocolate ice cream and peanut butter until smooth.
- Layer the mixture in a cake pan.
- Top with whipped cream and chocolate syrup.
- Sprinkle crushed cookies and chopped peanuts on top.
- Freeze for at least 4 hours before serving.
Notes
- Let the cake sit at room temperature for a few minutes before slicing for easier serving.
- Feel free to add nuts or other toppings as desired.
Nutrition
- Serving Size: 1 slice
- Calories: 300
- Sugar: 20g
- Sodium: 150mg
- Fat: 18g
- Saturated Fat: 8g
- Unsaturated Fat: 8g
- Trans Fat: 0g
- Carbohydrates: 30g
- Fiber: 2g
- Protein: 5g
- Cholesterol: 30mg
Keywords: Nonnie's 6 Ingredient Chocolate Peanut Butter Ice Cream Cake