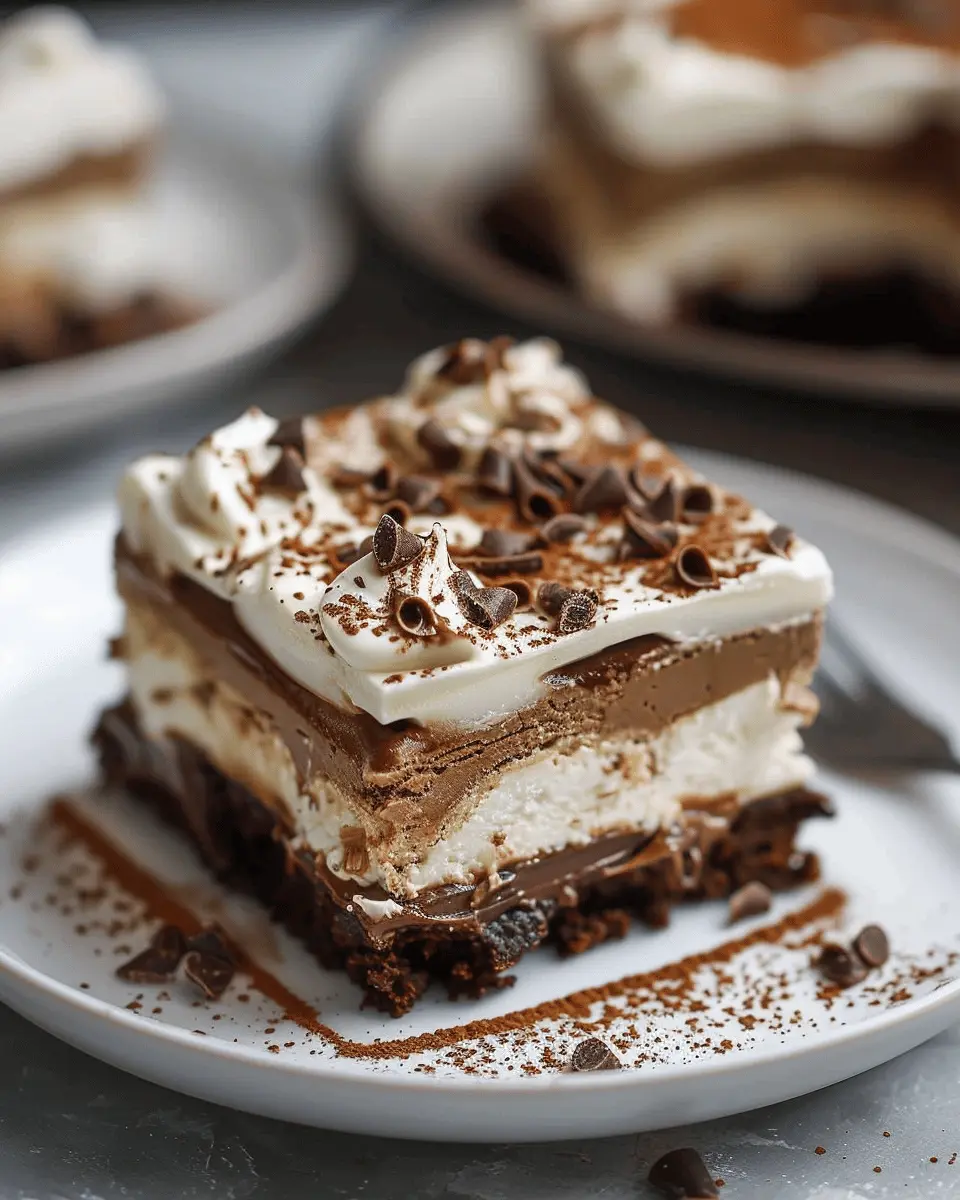
Introduction to Chocolate Layer Dessert
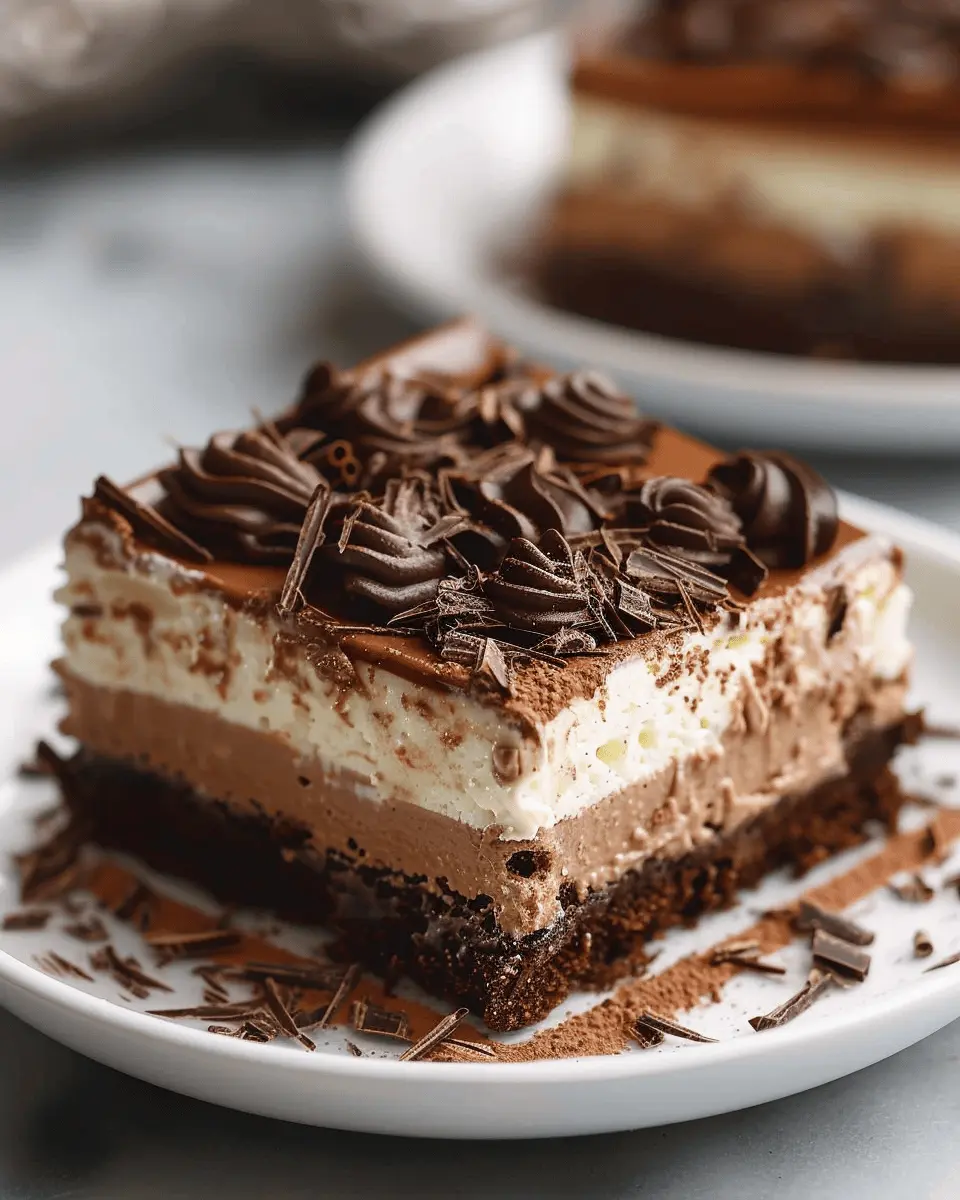
If you’ve ever found yourself craving a sweet treat that brings together rich chocolate flavors and a touch of elegance, look no further than the chocolate layer dessert. This delightful dessert combines creamy layers of chocolate pudding, whipped cream, and crumbled cookies, making it a feast for the eyes and the taste buds. Whether you’re preparing for a special occasion or simply satisfying your sweet tooth after a long week, this dessert is sure to steal the show.
Why Chocolate Layer Dessert is the Perfect Homemade Treat
One of the best things about a chocolate layer dessert is its versatility. You can easily customize it to suit your taste or dietary preferences. Feel like adding a hint of mint? Toss in some mint chocolate chips! Want a little crunch? Incorporate nuts or granola for texture. This gives the dessert a personal touch while still being simple to prepare.
What’s more, the opportunity for creativity doesn’t just end with the ingredients. The presentation of these layers is where the magic happens. Layering the ingredients in a clear glass dish not only showcases the beautiful colors of chocolate and cream but also adds a gourmet feel, making it look as amazing as it tastes.
When it comes to gatherings—whether it be a birthday party, holiday celebration, or simply an evening with friends—the chocolate layer dessert ends up being the star. Imagine the smiles as you scoop individual servings from that beautiful dish. According to a study from the American Journal of Clinical Nutrition, indulging in chocolate can release endorphins, making it a feel-good option for gatherings.
Simplifying dessert preparation is another perk. With minimal cooking involved, you can whip this up quickly, giving you more time to enjoy the company around you. You can even prepare it a day in advance, allowing the flavors to meld beautifully overnight. No more last-minute scramble!
So, ready to dive into the world of delicious layers? Check out the full recipe below, and bring some joy to your kitchen and your loved ones—all through the power of this beautiful chocolate layer dessert.
Ingredients for Chocolate Layer Dessert
Creating the perfect chocolate layer dessert involves selecting just the right ingredients that come together to form a mouthwatering treat. Here’s what you’ll need:
Crust ingredients
For that delightful crunch at the bottom, gather:
- 1 cup of crushed graham crackers
- ½ cup of unsalted butter, melted
- ¼ cup of granulated sugar
These ingredients will give your crust a delectable buttery flavor and a satisfying texture.
First layer ingredients
The first layer is where the magic begins! You’ll need:
- 1 package (8 oz) of cream cheese, softened
- 1 cup of powdered sugar
- 1 cup of whipped topping
Combining these ingredients creates a creamy, rich base that pairs perfectly with chocolate.
Second layer ingredients
Now for the chocolate goodness! Collect:
- 1 cup of chocolate pudding mix
- 3 cups of milk
- 1 teaspoon vanilla extract
This layer brings a luscious, velvety texture.
Top ingredients
To finish your chocolate layer dessert off beautifully, you will need:
- 1 cup of whipped topping
- Chocolate shavings or mini chocolate chips for garnish
Add these finishing touches for that Instagram-worthy presentation!
For detailed recipe instructions, visit The Spruce Eats or AllRecipes for inspiration!
Preparing Chocolate Layer Dessert
Making a chocolate layer dessert is a delightful culinary adventure that can enchant both friends and family. This dessert is not only visually impressive but also layered with flavors that will leave everyone coming back for seconds—or even thirds! Let’s dive into the steps that will elevate your dessert game.
Prepare the crust layer
The foundation of any great dessert is its crust. For our chocolate layer dessert, a buttery graham cracker crust is ideal. Here’s how you whip it up:
- Ingredients Needed:
- 1 ½ cups graham cracker crumbs
- ½ cup unsalted butter (melted)
- 2 tablespoons granulated sugar
- Preheat your oven to 350°F (175°C).
- In a mixing bowl, combine the graham cracker crumbs and sugar. Stir in the melted butter until the mixture resembles wet sand.
- Press the mixture firmly into the bottom of a 9×13-inch baking dish, creating an even layer.
- Bake for 10-12 minutes, or until lightly golden. Allow it to cool completely before adding the next layer.
Baking the crust doesn’t just provide a solid base but adds a slightly toasted flavor which blends beautifully with the rich chocolate. If you’re short on time, feel free to skip the baking and just use the mixture as-is—just make sure to press it firmly!
Create the cream cheese layer
The cream cheese layer is the heart of your chocolate layer dessert. It adds a creamy texture that perfectly complements the chocolate and the crust.
- Ingredients Needed:
- 8 oz cream cheese (softened)
- 1 cup powdered sugar
- 1 cup whipped topping (thawed)
- 1 teaspoon vanilla extract
- In a large mixing bowl, beat the softened cream cheese until smooth.
- Gradually add the powdered sugar, mixing well until combined.
- Fold in the whipped topping and vanilla extract until the mixture is light and airy.
The addition of whipped topping not only makes it fluffy but also light on the palate. You might find yourself sneaking tastes along the way—it’s that irresistible!
Mix the pudding layers
The pudding layers bring a rich, chocolatey flavor that defines this dessert. You have the option to go for instant chocolate pudding for speed!
- Ingredients Needed:
- 2 packages (3.9 oz each) instant chocolate pudding mix
- 3 cups milk
- 1 tablespoon chocolate syrup (for extra flavor)
- In a separate bowl, whisk together the chocolate pudding mix, milk, and chocolate syrup until smooth and thickened, which usually takes about 2 minutes.
This step is quick and easy, making use of instant pudding to save time, and the chocolate syrup elevates the overall flavor profile!
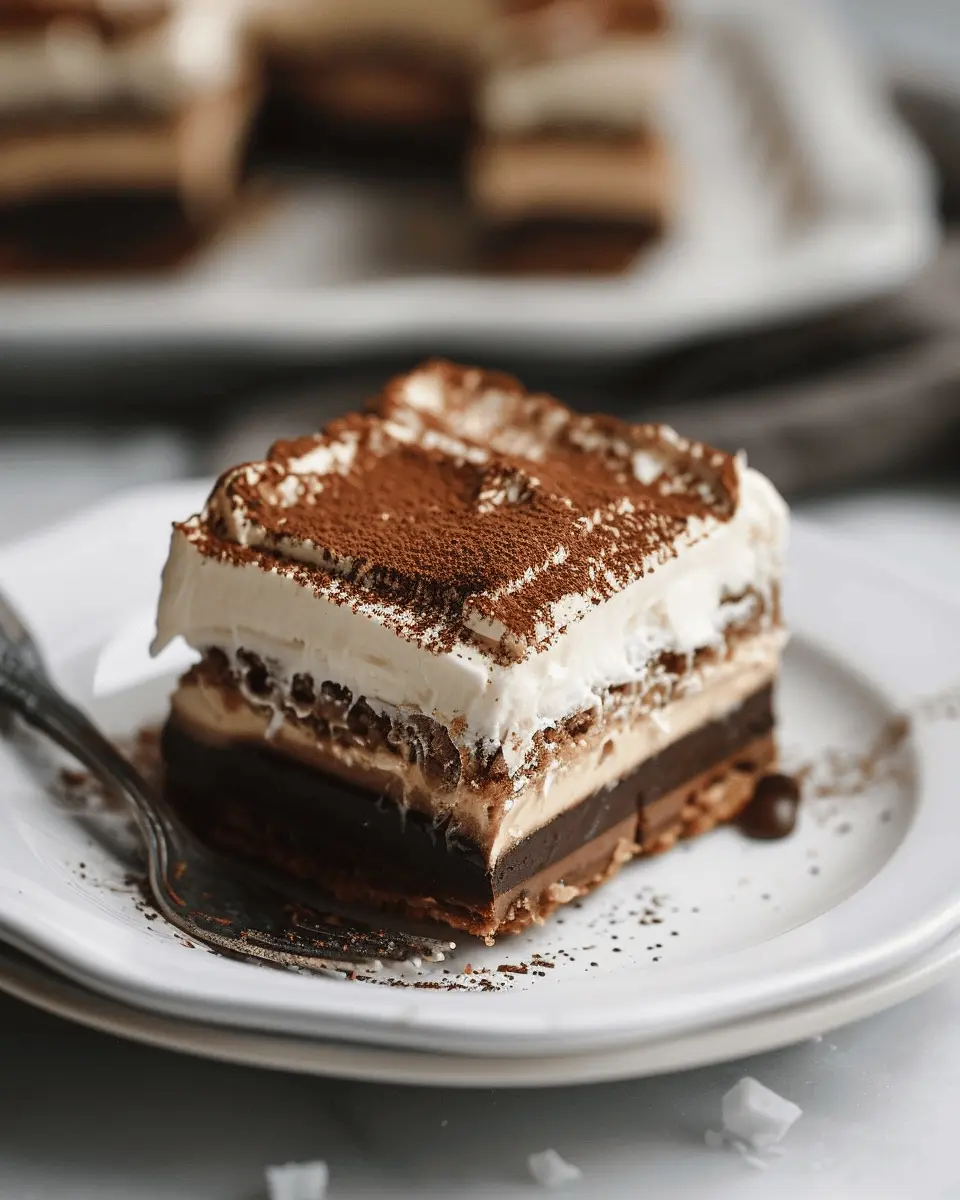
Assemble the layers
Now comes the fun part: assembling your chocolate layer dessert!
- Once your crust is completely cooled, spread the cream cheese layer over it evenly.
- Next, layer the chocolate pudding mixture on top of the cream cheese layer, smoothing it out with a spatula.
- For the final touch, spread another layer of whipped topping over the pudding. You can add shaved chocolate or chocolate sprinkles on top for that bakery-fresh look.
Creating layers is all about patience. Remember, each layer has its own unique taste and texture, so try to keep them distinct!
Chill and set
Finally, you’ll want to let your dessert chill before serving. This allows the layers to meld together perfectly.
- Cover the assembled dessert with plastic wrap and place it in the refrigerator for at least 4 hours—overnight is better if you can wait!
This cooling time helps set the pudding and makes serving a breeze. When you’re ready to serve, slice it into squares, and get ready for compliments!
By using these steps, your chocolate layer dessert will not only impress with its taste but also showcase beautifully, making it the highlight of any gathering. For more delicious dessert ideas, consider checking out AllRecipes or Food Network for inspiration!
Variations on Chocolate Layer Dessert
When it comes to dessert, the classic chocolate layer dessert can easily be tailored to fit your taste buds or dietary needs. Let’s explore some exciting variations that will make your treat truly unique!
Alternative Flavor Layers
Why stick to traditional chocolate when you can mix things up? Try incorporating different flavors in your layers:
- Vanilla Cream: Swap out the traditional chocolate mousse for a luscious vanilla cream filling. It provides a vanilla-infused contrast that complements the chocolate beautifully.
- Peanut Butter Bliss: Add a layer of creamy peanut butter mixed with whipped cream for a delightful nutty twist. This combination creates a sweet and salty flavor explosion.
- Caramel Swirl: Drizzle rich caramel sauce between the layers for an indulgent touch. This addition not only enhances the taste but also adds a beautiful presentation.
These variations can elevate your chocolate layer dessert to new heights!
Healthier Ingredients Swaps
If you’re looking to create a more health-conscious dessert without sacrificing flavor, consider these swaps:
- Greek Yogurt: Use Greek yogurt instead of heavy cream for a lighter, protein-packed layer that still tastes decadent.
- Natural Sweeteners: Substitute refined sugar with honey or maple syrup. These options can add a depth of flavor while being lower in glycemic index.
- Whole Grain Crust: Replace standard graham crackers with whole grain alternatives for a healthier crust that adds fiber and nutrients.
For further inspiration in healthier cooking, don’t miss out on resources from The American Heart Association which offer a wealth of nutritious recipes.
By experimenting with these flavors and ingredients, you’ll find that your chocolate layer dessert can be as versatile as your imagination allows! Why not invite some friends over for a tasting party and let everyone choose their favorite layers?
Cooking Tips and Notes for Chocolate Layer Dessert
Creating a delightful chocolate layer dessert can be a gratifying experience, so here are some tips to ensure every layer is a success!
Best Practices for Mixing
To achieve that velvety texture, start by mixing your ingredients at a low speed before increasing to medium. This keeps air bubbles from forming too early, leading to a denser dessert—nobody wants that! If using whipped cream, fold it in gently to maintain its lightness. For a richer chocolate flavor, consider adding a dash of espresso powder to your chocolate layer; it enhances the cocoa beautifully!
Chilling Tips for Each Layer
Chilling is crucial in maintaining the integrity of your chocolate layer dessert. After spreading each layer, pop it in the fridge for at least 30 minutes before adding the next. This ensures each section sets properly without mixing into one another. If you’re in a hurry, a quick 15-minute chill in the freezer works wonders too!
For more inspiration, check out this guide on layered desserts that can elevate your skills even further! Happy baking!
Serving Suggestions for Chocolate Layer Dessert
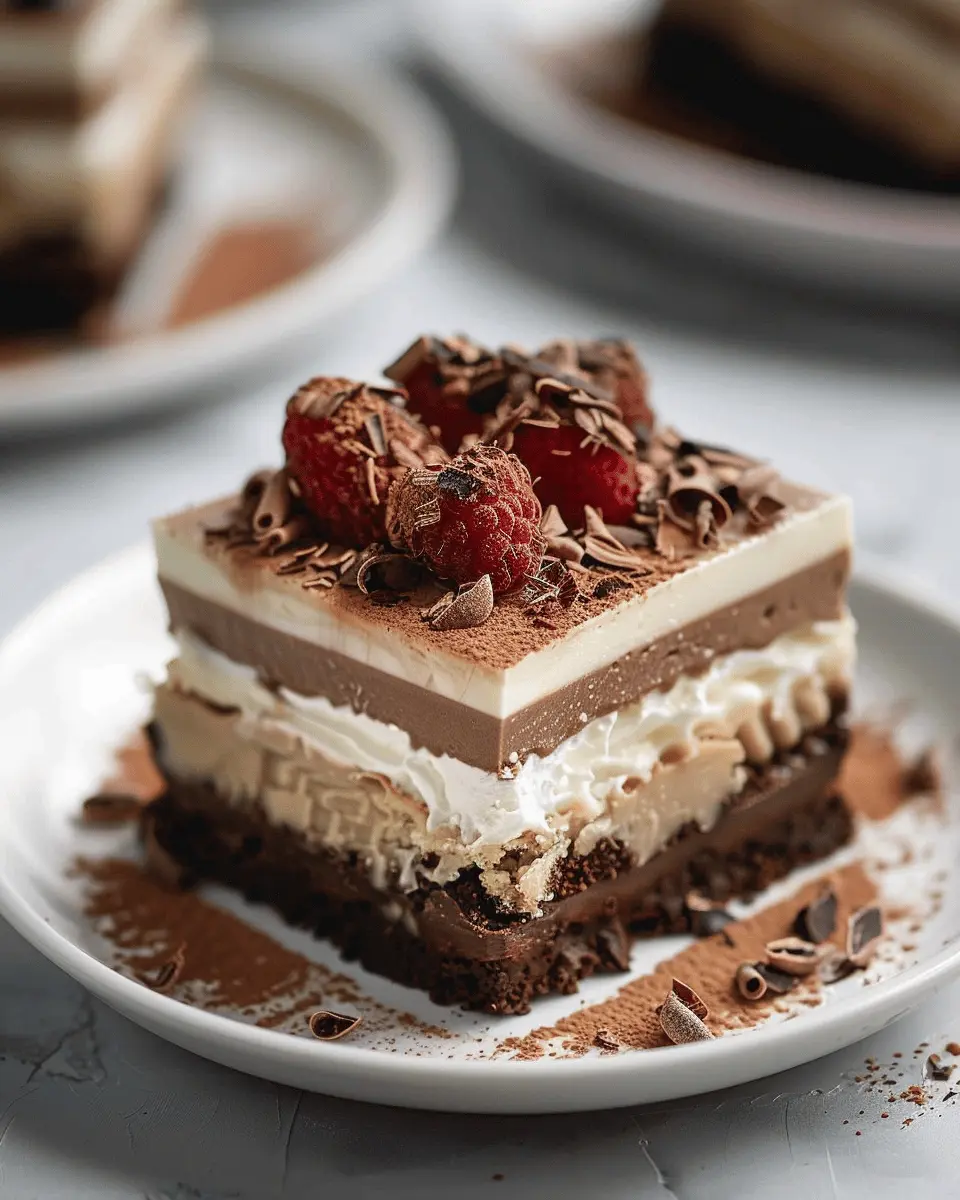
Pairing with Fresh Fruits
Elevate your chocolate layer dessert by pairing it with fresh fruits, which can add a delightful contrast of flavors and textures. Consider serving it alongside:
- Raspberries or Strawberries: Their tartness beautifully offsets the richness of chocolate.
- Banana Slices: Creamy and sweet, they’ll add a comforting touch.
- Pineapple Chunks: For a tropical twist, this juiciness will brighten every bite.
You might even want to create a fruit compote to drizzle over your dessert for added sophistication. Not only do fruits provide health benefits, but they also bring vibrant colors to your plate!
Presentation Ideas
A well-presented chocolate layer dessert can impress guests and elevate any occasion. Here are a few creative ideas:
- Clear Glass Bowls: Showcase the beautiful layers by serving it in clear glass bowls, letting the chocolate and cream peek through.
- Garnish with Whipped Cream: A dollop of freshly whipped cream can add elegance and a touch of fluffiness.
- Chocolate Shavings or Sprinkles: Add some flair with chocolate shavings or colorful sprinkles on top.
Consider browsing resources like Food Network for more presentation ideas. A visually appealing dessert not only looks good but enhances the overall experience!
Time Breakdown for Chocolate Layer Dessert
When it comes to creating a delectable chocolate layer dessert, it’s essential to know how much time you’ll need to devote. Planning ahead helps ensure your dessert turns out perfectly!
Preparation time
First off, you’ll need about 30 minutes for preparation. This includes gathering your ingredients, mixing, and layering the components. Make sure you’re organized to streamline the process!
Cooking time
Next, the cooking time is roughly 25 minutes. You’ll spend this time baking any layers that require it.
Total time
In total, you’re looking at about 55 minutes to bring your chocolate layer dessert to life, not including chilling time. Think ahead: this dessert can also be prepared a day in advance to elevate your entertaining game.
For tips on similar desserts, check out AllRecipes for inspiring ideas. Happy cooking!
Nutritional Facts for Chocolate Layer Dessert
When indulging in a delightful chocolate layer dessert, it’s important to understand how it fits into your overall diet. Below, I’ve broken down some key nutritional facts that will help you enjoy this treat more mindfully.
Calories
A typical serving of a chocolate layer dessert contains around 400-500 calories. This calorie count can fluctuate depending on the specific ingredients used, like cream or chocolate types. If you’re looking to reduce calories, consider swapping in low-fat alternatives.
Protein
One serving of your chocolate layer dessert can provide about 5-8 grams of protein, primarily from ingredients like eggs and dairy. Boosting the protein content can be as simple as using Greek yogurt in the layers, adding a nutritious punch while keeping it delicious.
Sugar Content
Sugar is where things can get tricky. A single serving usually has approximately 30-40 grams of sugar. To cut down on sugar, you might want to use natural sweeteners such as maple syrup or honey as alternatives. Keep in mind that reducing sugar can still lead to that rich, satisfying taste we all crave!
As you whip up your delicious dessert, consider exploring more nutritional insights from sources like the American Heart Association or USDA FoodData Central. These resources contain valuable information that can help you make informed dietary choices. Enjoy every bite of your dessert, while keeping its nutritional value in mind!
FAQs about Chocolate Layer Dessert
Can I make this dessert ahead of time?
Absolutely! One of the best things about a chocolate layer dessert is that it actually tastes better after it has had some time to chill in the refrigerator. Preparing it a day in advance allows the flavors to meld beautifully. Just be sure to cover it well with plastic wrap or aluminum foil to keep it fresh and to prevent it from absorbing any odors from your fridge.
How can I store leftovers?
If you’re lucky enough to have any leftovers (this dessert disappears quickly!), you can store them in an airtight container in the refrigerator for up to three days. Just remember to keep it sealed tightly to maintain its creamy texture. If you try freezing it, be aware that the texture might change once thawed. For more storage tips, you might want to check out this helpful guide on dessert storage.
What substitutions can I make for dietary restrictions?
There are plenty of ways to customize your chocolate layer dessert to fit various dietary needs. For a gluten-free option, swap out regular cookies for gluten-free ones or even use crushed nuts for the crust. If you’re looking to reduce the sugar, consider using a sugar substitute like stevia or erythritol. Vegan friends can replace cream cheese and whipped cream with plant-based alternatives—so many options! If you’re unsure about specific substitutions, resources like the Academy of Nutrition and Dietetics can provide excellent insights.
Enjoy your chocolate layer dessert making experience, and don’t hesitate to reach out if you have more questions!
Conclusion on Chocolate Layer Dessert
Final thoughts on mastering this indulgent treat
Creating a delightful chocolate layer dessert is not just about following a recipe; it’s about embracing the joy of baking. Whether you’re celebrating a special occasion or simply satisfying a sweet tooth, this treat is sure to impress. Remember, the key is in layering; each component adds texture and flavor, making every bite a new experience.
Experimenting with your favorite ingredients can also lead to delicious variations. For instance, try swapping traditional toppings with fresh berries or nuts for a touch of crunch. Plus, if you’re looking for more desserts, consider checking out resources like The Spruce Eats or Serious Eats for additional inspiration.
So roll up those sleeves and make your kitchen the heart of indulgence!
Chocolate Layer Dessert: The Indulgent Treat You’ll Love

Indulge in this rich and creamy Chocolate Layer Dessert, a delightful treat that is perfect for any occasion.
- Prep Time: 20 minutes
- Cook Time: 0 minutes
- Total Time: 4 hours 20 minutes
- Yield: 12 servings 1x
- Category: Dessert
- Method: No-Bake
- Cuisine: American
- Diet: Vegetarian
Ingredients
- 1 cup chocolate graham cracker crumbs
- 1/2 cup unsalted butter, melted
- 1 cup powdered sugar
- 8 oz cream cheese, softened
- 1 cup whipped topping
- 2 cups chocolate pudding
- 1 1/2 cups milk
- 1 cup additional whipped topping for garnish
Instructions
- Preheat the oven to 350°F (175°C).
- Combine the chocolate graham cracker crumbs and melted butter in a bowl and mix well.
- Press the mixture into the bottom of a 9×13 inch baking dish.
- In a separate bowl, beat the cream cheese and powdered sugar until smooth.
- Fold in the whipped topping and spread the mixture over the crust.
- Prepare the chocolate pudding as per the package instructions using the milk.
- Spread the chocolate pudding over the cream cheese layer.
- Top with the additional whipped topping and refrigerate for at least 4 hours.
Notes
- This dessert can be made a day in advance for better flavor.
- Feel free to add chocolate shavings on top for extra decoration.
Nutrition
- Serving Size: 1 slice
- Calories: 300
- Sugar: 25g
- Sodium: 150mg
- Fat: 18g
- Saturated Fat: 10g
- Unsaturated Fat: 6g
- Trans Fat: 0g
- Carbohydrates: 30g
- Fiber: 1g
- Protein: 3g
- Cholesterol: 30mg
Keywords: Chocolate Layer Dessert, dessert, chocolate, creamy, indulgent