Introduction to Golden Oreo Dessert
If you’ve got a sweet tooth, prepare to fall in love with this delightful Golden Oreo Dessert. Combining the iconic flavor of Golden Oreos with creamy, dreamy layers of goodness, this dessert is perfect for gatherings, potlucks, or simply a night in when you want to treat yourself. Whether you’re a fan of no-bake creations or layered delights, this dessert hits all the right notes.
Why You’ll Love This Golden Oreo Dessert
There’s something inherently satisfying about a dessert that requires minimal effort yet delivers maximum taste. This golden oreo dessert does exactly that. Here’s why it’s bound to become your new go-to:
-
Quick and Easy: If you have limited time but want a show-stopping dessert, this recipe is perfect. Most of the ingredients can be effortlessly mixed, and you won’t need to bake anything!
-
Decadent Flavors: With the rich, sweet taste of Golden Oreos complemented by a luscious cream filling, every bite is a mouthwatering experience. It’s like enjoying a rich cheesecake without any of the baking fuss.
-
Versatile Base Ingredients: Using Golden Oreos means you can easily adapt the recipe. You could swap in your favorite cream or explore different flavor combinations. Want to add peanut butter? Go for it!
-
Impressive Presentation: It looks as good as it tastes. Layers of creamy goodness topped with crumbled Oreos make for a dessert that’s as beautiful as it is delicious, perfect for impressing guests at any gathering.
-
Crowd-Pleaser: This dessert appeals to both kids and adults. It’s sweet, engaging, and fun to eat, making it an easy choice for birthday parties, family gatherings, or casual get-togethers.
With its simplicity and irresistible flavor profile, the golden oreo dessert is definitely worthy of a spot in your recipe repertoire. If you want to know how to whip up this delectable treat, . stay tuned for the full recipe! Imagine the smiles on your friends’ faces when you surprise them with it!
Ingredients for Golden Oreo Dessert
Creating a delicious golden Oreo dessert is simpler than you might think! Below, I’ll outline the essential ingredients you’ll need to whip up this delightful treat. Don’t worry; it involves mostly simple pantry staples.
Essential Ingredients
- Golden Oreos: The star of the show! About 1 package will do, and you can either crush them for a crumb base or use them whole.
- Cream Cheese: An 8-ounce package, softened to room temperature. This adds richness and a creamy texture to your dessert.
- Whipped Topping: Approximately 2 cups of whipped topping. This gives the dessert a light and airy feel.
- Sugar: Just ½ cup of granulated sugar will balance the flavors perfectly.
- Milk: 1 cup of milk to help blend the cream cheese and sugar smoothly.
- Vanilla Extract: 1 teaspoon for that extra burst of flavor.
You can find the full recipe and directions for making this golden Oreo dessert that friends and family will rave about! If you’re curious about variations, consider looking at some creative adaptations for your favorite cookies on Food Network or Serious Eats.
With these delicious ingredients, your journey to making a mouth-watering golden Oreo dessert begins!
Step-by-Step Preparation for Golden Oreo Dessert
Creating a delightful Golden Oreo Dessert is an experience filled with rich flavors and creamy textures that will surely impress your friends or brighten your family gatherings. Follow this step-by-step guide to whip up this delightful treat with ease.
Preparing the Pudding
Let’s kick things off by getting the pudding ready. You have a couple of options here: use a store-bought vanilla pudding mix or make it from scratch. For those who want an extra creaminess, consider using a high-quality brand. Here’s how to prep it:
-
Ingredients Needed:
-
2 cups of milk
-
One 3.4 oz package of vanilla pudding mix
-
Instructions:
- In a mixing bowl, whisk together the pudding mix and milk until it’s well combined.
- Allow it to sit for about 5 minutes until it thickens, but don’t let it set too long— you’ll want a smooth texture for your dessert.
This layer is essential because it provides a rich and creamy foundation for your Golden Oreo Dessert. If you’re exploring more about pudding consistency, check out this guide for tips from cooking experts.
Creating the Cookie Crust
Now, we turn our attention to the cookie crust, a crucial element that adds crunch and sweetness to your dessert. Using Golden Oreos makes this a breeze!
-
Ingredients Needed:
-
24 Golden Oreos
-
1/2 cup of unsalted butter, melted
-
Instructions:
- Crush the Golden Oreos in a food processor or place them in a ziplock bag and use a rolling pin. Aim for a fine crumb.
- Combine the crushed cookies with melted butter in a bowl, mixing until it resembles wet sand.
- Press this mixture firmly into the bottom of a 9×9 inch baking dish to form an even layer.
The crust is where all the magic begins. It provides the perfect balance to the velvety layers above.
Making the Cream Cheese Mixture
The next layer is a luscious cream cheese mixture that complements the pudding perfectly. It’s the surprise factor that elevates this Golden Oreo Dessert to new heights!
-
Ingredients Needed:
-
8 oz of cream cheese, softened
-
1 cup of powdered sugar
-
1 container of whipped topping (about 8 oz)
-
Instructions:
- In a mixing bowl, beat the softened cream cheese until smooth.
- Gradually add in the powdered sugar, mixing until fully incorporated.
- Gently fold in the whipped topping to keep it light and airy.
This layer is where the flavors really harmonize. The cream cheese adds a delightful tanginess that cuts through the sweetness, making it all the more enjoyable.
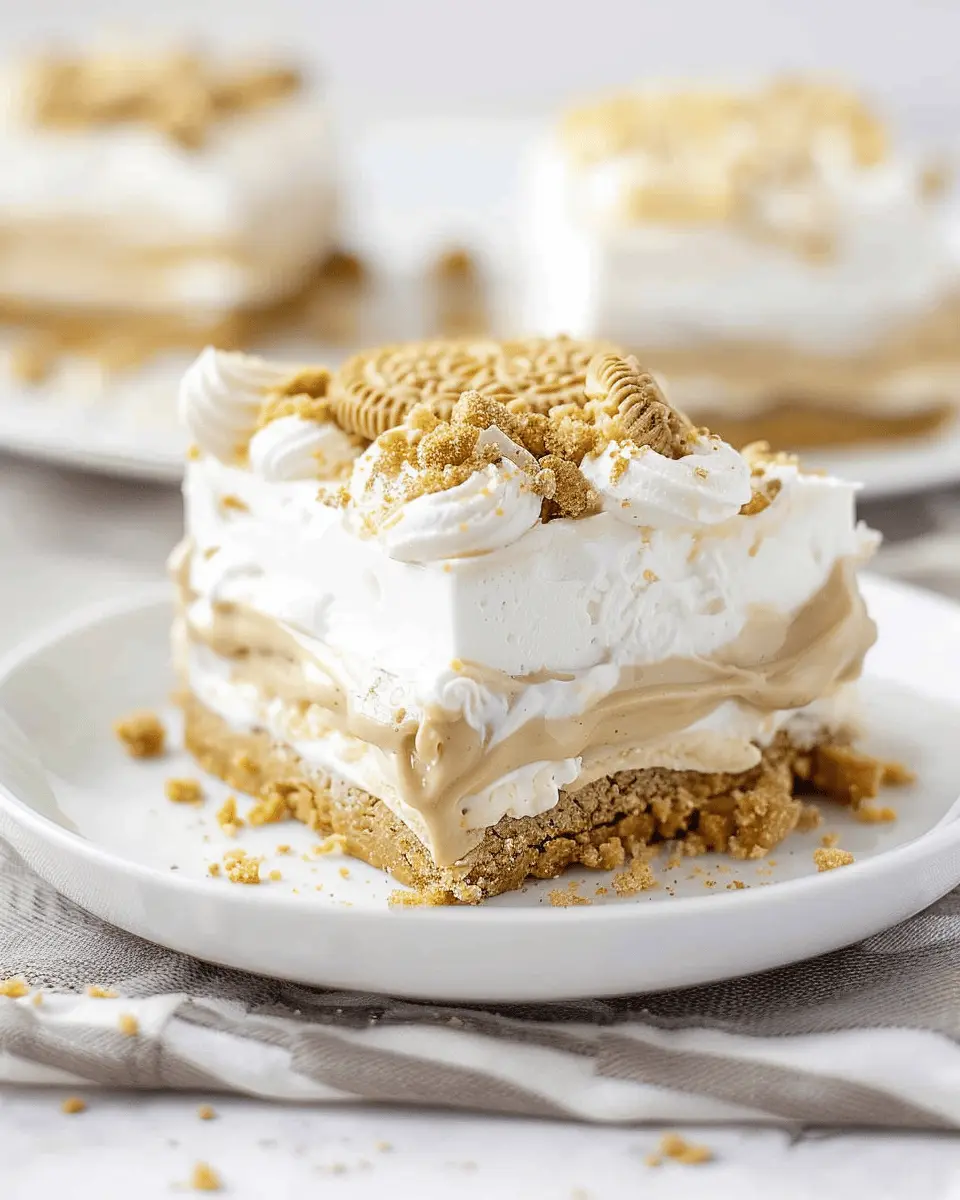
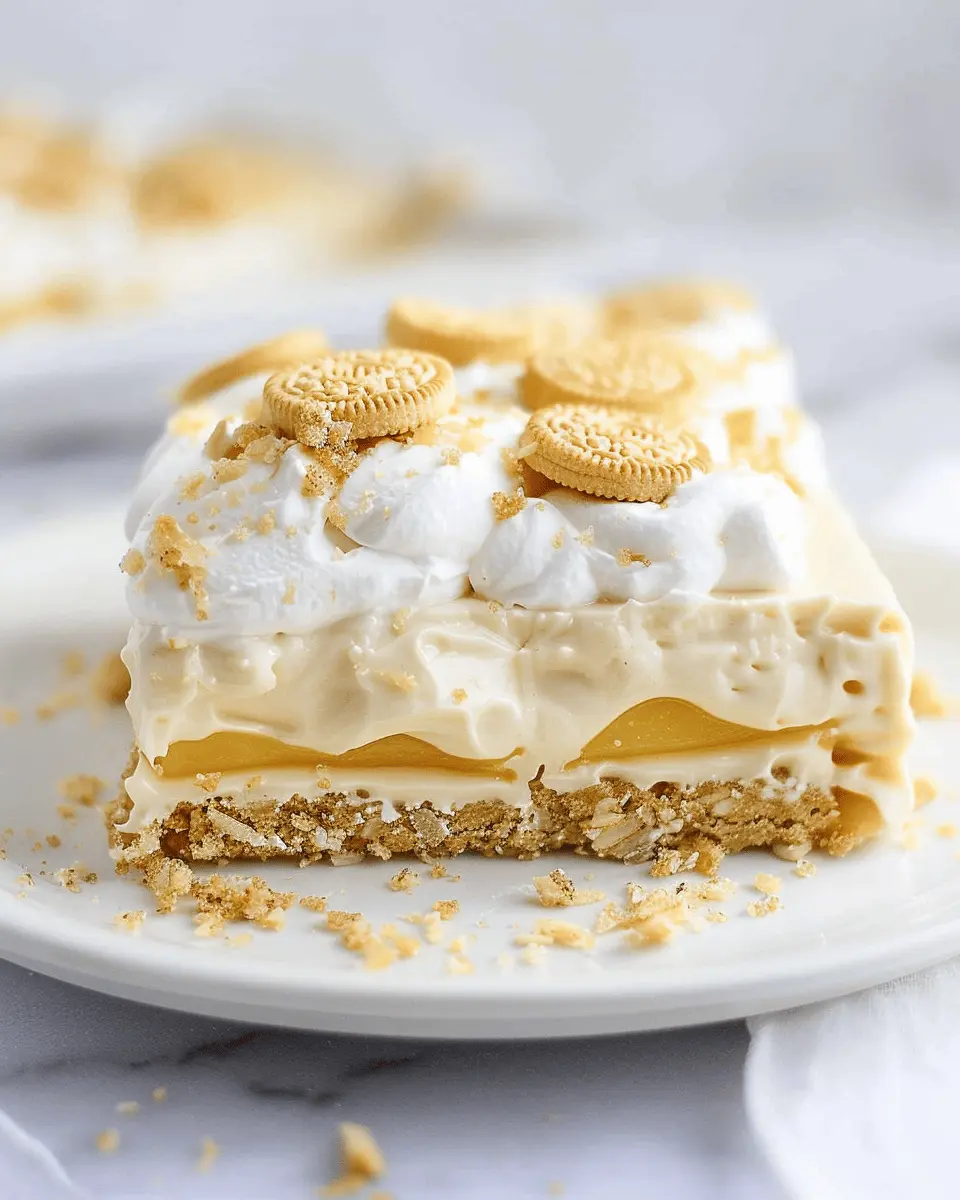
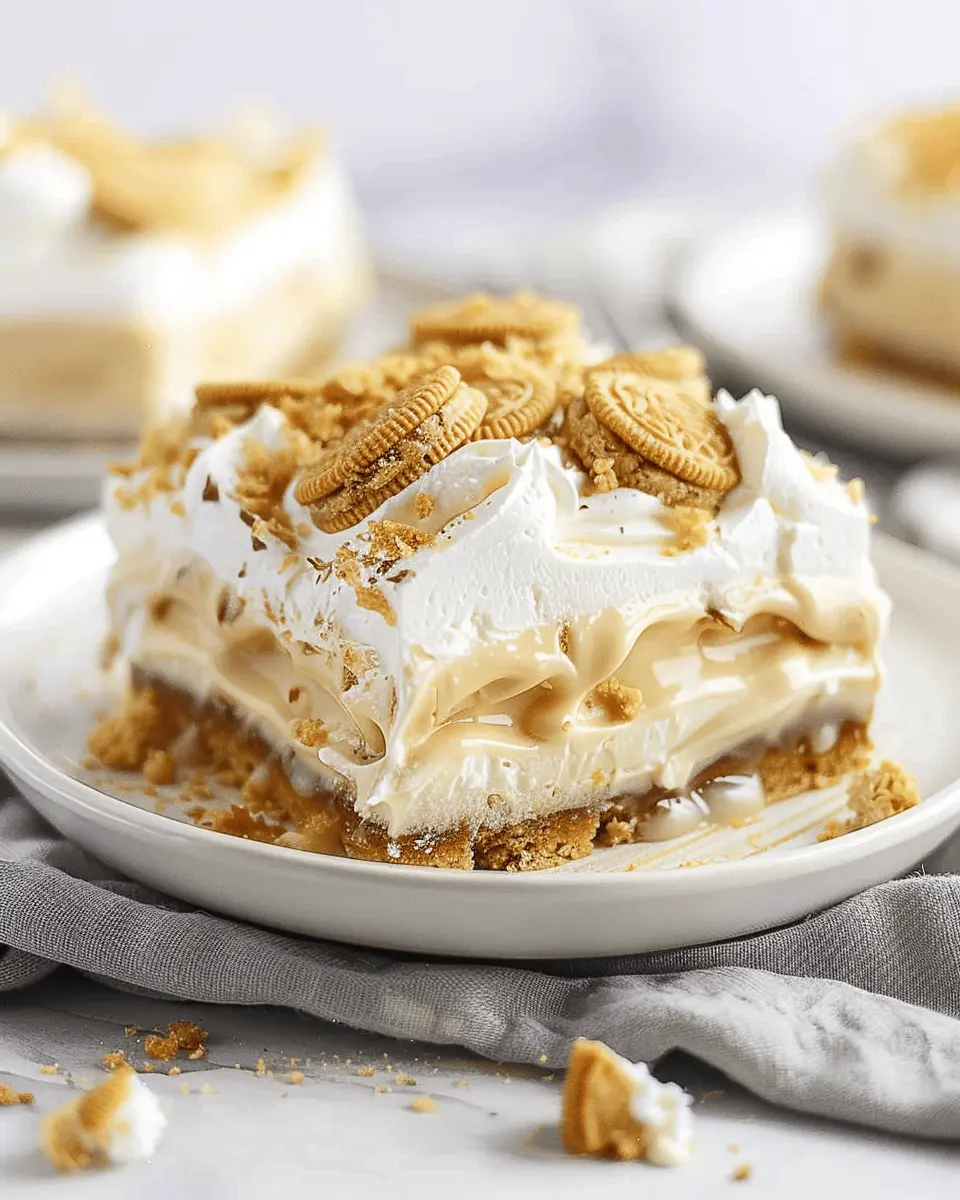
Assembling the Layers
With all mixtures prepped, it’s time to assemble your Golden Oreo Dessert.
- Instructions:
- Spread half of the pudding layer evenly over the cookie crust.
- Next, add the cream cheese mixture and smooth it out.
- Pour the remaining pudding over the cream cheese layer for a decadent finish.
- If you like, garnish with a few crushed Golden Oreos on top to make it Instagram-worthy!
The visual appeal adds an exciting touch, making it irresistible.
Chill and Serve
The last step is crucial: chilling your dessert. It allows the flavors to meld beautifully.
- Instructions:
- Cover the baking dish with plastic wrap and refrigerate for at least 4 hours or overnight.
- When ready to serve, cut into squares and enjoy!
Chilling not only enhances flavors but also makes slicing easier.
This Golden Oreo Dessert is a crowd-pleaser that showcases your creativity and skill in the kitchen. Making it not only fills your home with mouthwatering aromas but also gives you a reason to gather friends and family for a good time. Whether it’s for a birthday, a holiday celebration, or simply a night in, this dessert is sure to impress!
Variations on Golden Oreo Dessert
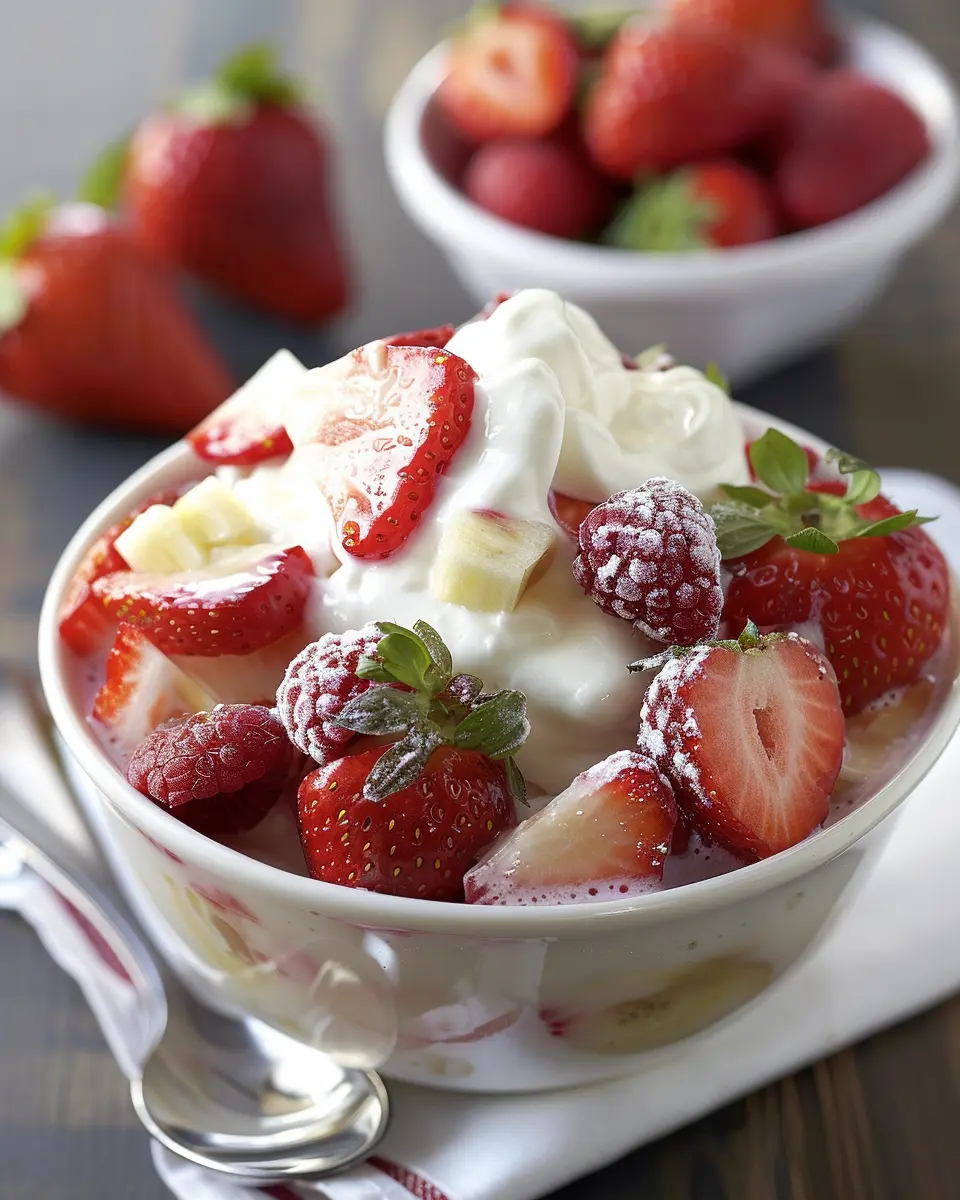
Golden Oreo Dessert with Fruity Layers
Looking to give your Golden Oreo dessert a refreshing twist? Adding fruity layers can elevate your dish to a whole new level. Consider incorporating flavors like fresh strawberries, blueberries, or even peaches. Simply layer crushed Golden Oreos with a mixture of whipped cream and your favorite fruit puree. The sweetness of the fruit complements the rich, creamy texture of the dessert beautifully. A fun tip? You can use fruit gel as a final topping for that colorful, inviting look!
If you’re feeling adventurous, try mixing in a little lemon or lime zest into your whipped cream for an extra zing that balances the sweetness. And don’t forget to check out sources like Delish for more fruity ideas!
Golden Oreo Dessert with a Nutty Twist
For those who crave a bit of crunch, a nutty twist can enhance your Golden Oreo dessert remarkably. Consider adding chopped nuts such as almonds, pecans, or walnuts into your layers. You can even use almond butter or peanut butter mixed into the whipped cream for an added layer of flavor. Simply fold in your choice of nut into the whipped topping and alternate layers of nuts and Golden Oreos.
Want a little extra sweet-savory balance? Drizzle some chocolate or caramel sauce over the top before serving. This simple addition not only adds flavor but also creates an eye-catching presentation. Don’t hesitate to find more nut-inspired recipe variations on sites like Food Network!
Whether you choose to go fruity or nutty, these adaptations give your Golden Oreo dessert a fun and tailored flair that’s sure to impress your guests. Get creative and have fun experimenting with different flavors!
Cooking Tips and Notes for Golden Oreo Dessert
Creating the perfect golden Oreo dessert is all about balance and flavor. Here are some tips to elevate your culinary game:
Ingredients Matter
- Use fresh ingredients. Quality cream cheese and whipped topping can really enhance the final flavor.
- If you can find it, try using golden Oreo cookie crumbs instead of standard crumbs for a richer taste.
Layering Technique
- When you’re layering the dessert, make sure to pack the Oreo base tightly. This keeps your dessert from crumbling when you cut into it.
Chill Time
- Allow plenty of time for chilling! The ideal serving temperature allows the flavors to meld beautifully. Aim for at least four hours in the refrigerator—overnight is even better.
These little touches can make a huge difference in your final product. Not only will your golden Oreo dessert look stunning, but it will taste great too! For more inspiration, check out this article on dessert layering or tips for making desserts healthier. Happy baking!
Serving Suggestions for Golden Oreo Dessert
When it comes to sharing the delightful Golden Oreo dessert, presentation can elevate your dish from delicious to unforgettable. Here are some serving suggestions to enhance your dessert experience.
Pair with Fresh Fruits
Add a burst of color and freshness by serving your Golden Oreo dessert alongside seasonal fruits. Slices of strawberries, blueberries, or even ripe banana can provide a lovely contrast to the creamy layers. If you’re feeling adventurous, check out this fruit pairing guide for more ideas.
Serve in Individual Portions
Think about serving the dessert in cute mason jars or glass cups. Not only does this create a visually appealing display but it also allows guests to enjoy their own Golden Oreo dessert in a more personal way. Plus, it’s easier to manage for parties!
Complement with Beverages
Don’t forget about the drinks! A cold glass of milk or a refreshing iced tea can balance the sweetness wonderfully. You might also consider serving up a coconut water or a fruity smoothie on the side for a tropical twist.
These thoughtful touches will not only enhance the flavor but also make your dessert the highlight of any gathering. Enjoy!
Time Breakdown for Golden Oreo Dessert
Preparation Time
Making your golden Oreo dessert is a delightful experience that takes about 15 minutes of hands-on time. You’ll be measuring out ingredients, crushing those delicious cookies, and mixing everything together. It’s quick enough to whip up after a long day at work!
Chilling Time
Once your dessert is assembled, it needs to chill for a bit. Pop it in the fridge for 2 to 4 hours. This step is crucial as it helps the flavors meld together, enhancing that creamy goodness. Plus, who doesn’t love a cold dessert on a hot day?
Total Time
In total, you’re looking at roughly 2 hours and 15 minutes to 2 hours and 45 minutes for your golden Oreo dessert. With minimal active time, it’s perfect for those evenings when you want to impress friends without burning the midnight oil. So, grab your ingredients and let’s make some sweet magic happen!
Nutritional Facts for Golden Oreo Dessert
When indulging in a Golden Oreo dessert, it’s essential to understand its nutritional profile. This delightful treat offers not just flavor but also a unique mix of ingredients that contribute to its overall makeup.
Calories
A typical serving of this golden Oreo dessert contains approximately 200 calories. This makes it a satisfying choice for a sweet treat while still being mindful of your daily caloric intake.
Fat Content
The fat content per serving is about 9 grams, primarily from the creamy filling and golden cookie layers. While enjoying the rich flavors, remember that moderation is key.
Sugar Levels
With around 18 grams of sugar per serving, this dessert adds a little sweetness to your day. For those watching their sugar intake, consider using alternative sweeteners or reducing the amount of added sugar in your preparation.
For further nutrient details, you can check out the USDA Nutrient Database as a reliable source. Remember, enjoying your golden Oreo dessert is all about balance—savor every bite!
FAQs about Golden Oreo Dessert
Can I make this dessert ahead of time?
Absolutely! One of the beauties of the Golden Oreo dessert is that it can be made a day or two in advance. In fact, letting it sit in the fridge for a while allows the flavors to meld together beautifully. Just make sure to cover it tightly with plastic wrap to keep it fresh and delicious.
How do I store leftovers?
Storing leftovers is simple! Keep your Golden Oreo dessert in the refrigerator in an airtight container. It should last for about 3-4 days. However, if you notice any separation or a change in texture, it’s best to enjoy it sooner rather than later. If you really want to extend its shelf life, consider freezing individual slices. Just wrap them well in plastic wrap and aluminum foil before putting them in a freezer-safe container.
What if I can’t find Golden Oreos?
No worries! If you can’t find Golden Oreos, there are plenty of alternatives. You can substitute them with regular Oreos, or for a fun twist, try using another favorite cookie like vanilla wafers or even ginger snaps. Just remember that different cookies will bring their own unique flavor to the dessert, so go wild and experiment a little!
For more entertaining tips on cookies, check out this article on cookie baking essentials that covers everything you need to know!
Feel free to reach out in the comments section if you have any other questions or tips about making this fantastic dessert!
Conclusion on Golden Oreo Dessert
In conclusion, the golden oreo dessert is a delightful and easy-to-make treat that brings a burst of flavor to any gathering. Not only does it feature the rich, creamy goodness of Golden Oreos, but it also offers a fun, nostalgic twist that will transport you back to childhood.
Whether you’re hosting a dinner party or just craving something sweet, this dessert is sure to impress your friends and family. Consider customizing the recipe with your favorite toppings or mix-ins for a personal touch. If you enjoyed this guide, be sure to check out more dessert ideas at Serious Eats for inspired classics and unique recipes. Happy baking!
Golden Oreo Dessert: The Easy Indulgence You’ll Adore

Indulge in the delectable Golden Oreo Dessert, a sweet treat that’s simple to make and sure to please!
- Prep Time: 20 minutes
- Total Time: 2 hours 20 minutes
- Yield: 8 servings 1x
- Category: Dessert
- Method: No-Bake
- Cuisine: American
- Diet: Vegetarian
Ingredients
- 1 package Golden Oreo cookies
- 8 oz cream cheese, softened
- 1 cup whipped topping
- 1/2 cup powdered sugar
- 1/4 cup milk
Instructions
- Crush half of the Golden Oreos and set aside.
- In a mixing bowl, combine cream cheese, whipped topping, and powdered sugar until smooth.
- Fold in crushed Oreos gently.
- Layer the mixture in a dish, alternating with uncrushed Oreos.
- Chill for at least 2 hours before serving.
Notes
- For a richer flavor, you can add a layer of chocolate syrup.
- Feel free to top with extra whipped cream and Oreos before serving.
Nutrition
- Serving Size: 1 slice
- Calories: 250
- Sugar: 15g
- Sodium: 150mg
- Fat: 10g
- Saturated Fat: 5g
- Unsaturated Fat: 3g
- Trans Fat: 0g
- Carbohydrates: 30g
- Fiber: 1g
- Protein: 3g
- Cholesterol: 30mg
Keywords: Golden Oreo Dessert, dessert, easy dessert