Introduction to Banana Pudding Dessert Cups
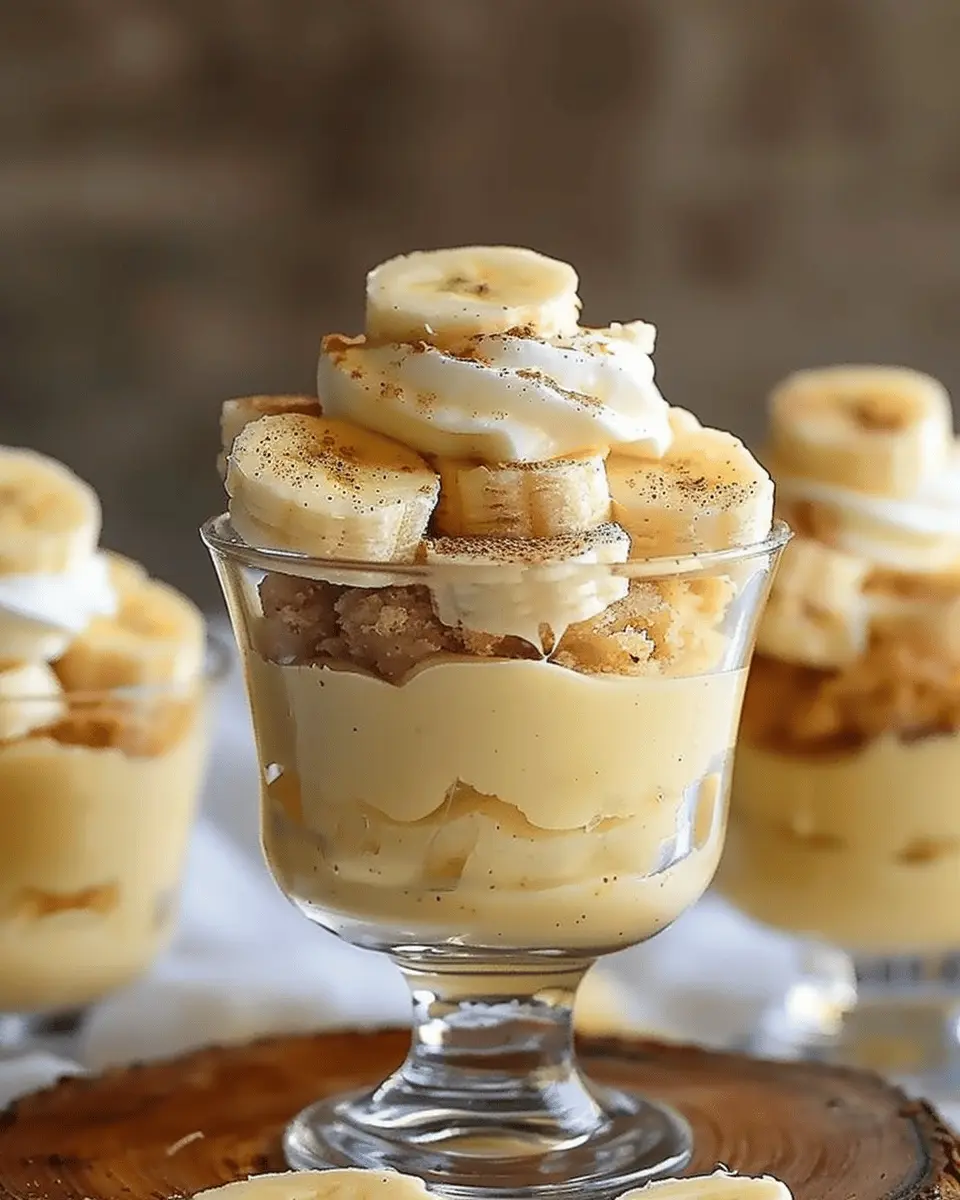
When you’re looking for a delightful and easy-to-make dessert, banana pudding dessert cups should definitely find their way onto your list of favorites. These charming little treats combine the classic flavors of traditional banana pudding while adding a modern twist that makes them perfect for any occasion. Whether it’s a cozy night in or a gathering with friends, these cups are sure to impress!
Why Banana Pudding Dessert Cups Should Be Your New Favorite Treat
Have you ever found yourself searching for that perfect balance of creamy and crunchy, sweet and refreshing? With banana pudding dessert cups, you get exactly that! Here are a few reasons why these delightful desserts will steal your heart:
-
Individual Servings: The cup format makes portion control a breeze. Each person can have their own little treat, making them ideal for parties and gatherings. You can even get creative and let your guests build their own cups with toppings like nuts, whipped cream, or fresh fruit.
-
Quick to Prepare: Not only are these cups a crowd-pleaser, but they’re also incredibly easy to prepare. With just a handful of ingredients—think ripe bananas, vanilla pudding, and crunchy vanilla wafers—you can whip up several cups in no time.
-
Versatility: Variations on the classic recipe abound! Want to experiment? Try adding layers of Turkey Bacon or Chicken Ham for a savory twist, or opt for different fruits to customize the flavors.
-
Kid-Friendly: If you’re a parent or have little ones around, banana pudding dessert cups are a fantastic choice. Kids love the interactive aspect of assembling their cups, and with healthy ingredients like bananas, you can feel good about serving them a treat.
For those curious about perfecting your pudding skills, consider checking out this guide to basic pudding techniques, which can elevate your dessert game.
In conclusion, banana pudding dessert cups are an engaging twist on a beloved classic that offer endless possibilities for customization. Why not give them a try? Your taste buds will thank you!
Ingredients for Banana Pudding Dessert Cups
Essential ingredients for a delightful dessert
Creating banana pudding dessert cups is a breeze when you have the right ingredients on hand. Here’s what you’ll need:
- Ripe bananas: They should be perfectly sweet and slightly speckled for maximum flavor.
- Instant vanilla pudding mix: This provides that creamy texture without the need for lengthy cooking.
- Milk: Whole milk will lend richness, giving your dessert a satisfying creaminess.
- Whipped topping: For that light and airy finish, this makes your cups irresistibly fluffy.
- Vanilla wafers: A classic choice that offers a delightful crunch.
These ingredients come together beautifully, but feel free to explore different brands or products that suit your taste!
Optional toppings for a personalized twist
Want to make your banana pudding dessert cups unique? Here are some fun topping options:
- Chopped nuts: Walnuts or pecans add excellent crunch.
- Chocolate chips: A little indulgent sweetness can be a game-changer.
- Fresh whipped cream: Elevate the classic with a dollop on top.
- Caramel drizzle: For those with a sweet tooth, this brings richness to every spoonful.
With these suggestions in mind, you can easily craft a banana pudding dessert that fits your style—whether you’re hosting friends or just treating yourself! Want to learn more about pudding and its history? Check out this informative piece from the Food Network. It could inspire your next dessert adventure!
Preparing Banana Pudding Dessert Cups
Banana pudding dessert cups are not just a treat; they are a delightful way to relive memories of summer barbecues and family gatherings. When making these delicious cups, the key is in the preparation and the layering of flavors. Let’s dive into the step-by-step process of crafting these scrumptious delights.
Gather Your Ingredients
Before diving headfirst into making your banana pudding dessert cups, it’s essential to gather all your ingredients. This not only streamlines the process but also ensures you don’t miss anything crucial. Here’s what you’ll need:
- 1 package of instant vanilla pudding mix
- 2 cups of cold milk
- 1 teaspoon of vanilla extract (for extra flavor)
- 3-4 ripe bananas, sliced
- 1 package of vanilla wafers (or any preferred cookies)
- Whipped cream (store-bought or homemade)
Having everything ready not only makes the process smoother but also adds excitement as you anticipate the deliciousness that’s about to unfold.
Create the Base for Your Banana Pudding Cups
Once your ingredients are prepped, it’s time to make the banana pudding base. Start by whisking the instant vanilla pudding mix with the cold milk in a large bowl. Keep whisking until the mixture thickens, which usually takes about 2 minutes.
Pro tip: Adding in the vanilla extract enhances the flavor, giving your pudding that extra depth! According to the American Culinary Federation, the right balance of flavoring can elevate even the simplest of desserts.
Chill for Perfect Texture
After you’ve created your rich pudding base, allowing it to chill in the refrigerator for about 2 hours is crucial. This step helps achieve the optimum texture for your banana pudding dessert cups. Chilling not only firms up the pudding but also allows the flavors to meld beautifully, resulting in a smoother, creamier texture.
Why wait when you could dig in right away? Think of the chilling time as an opportunity to prepare the other elements of the dessert or simply enjoy a short break while dreaming about how delicious your banana pudding will be.
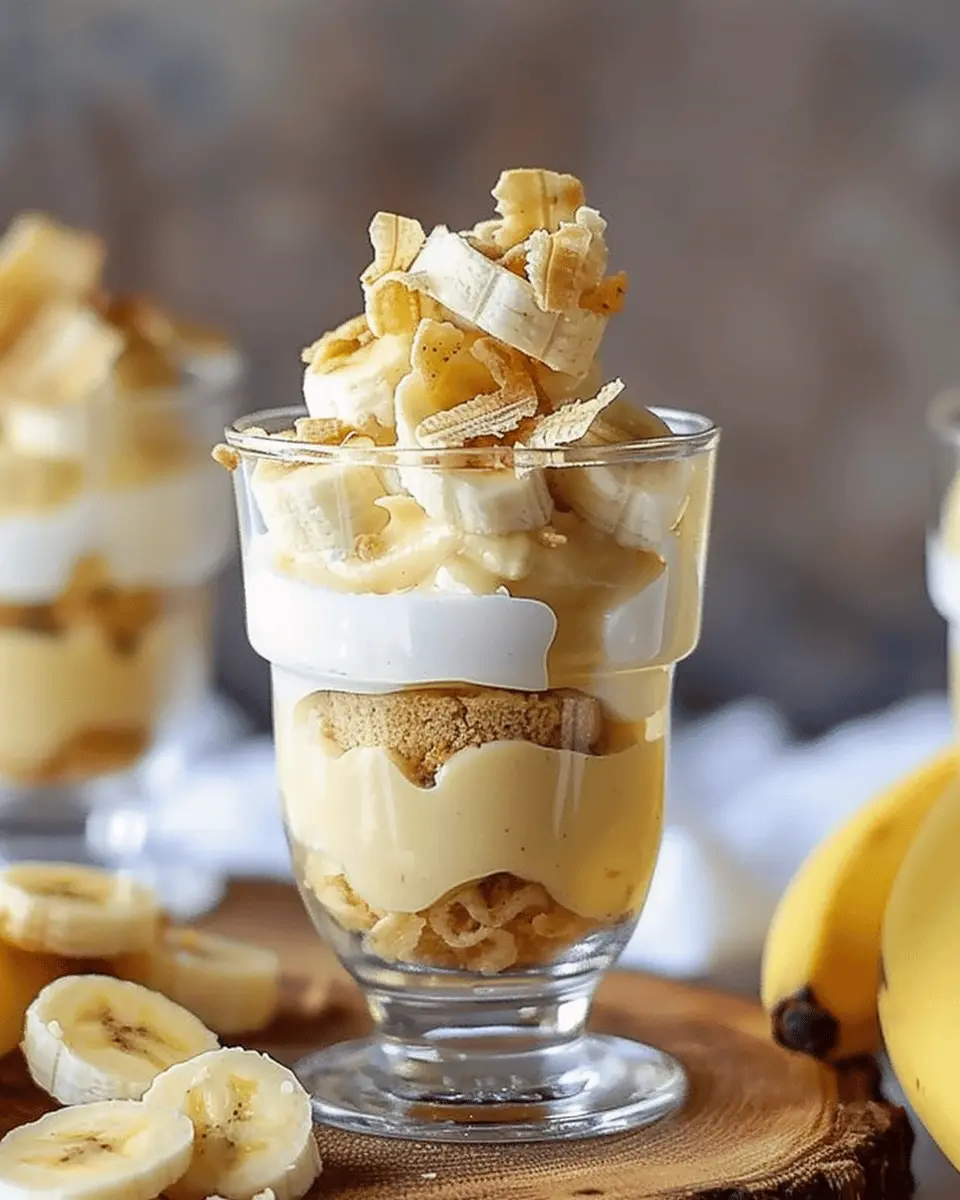
Assembling Your Dessert Cups
Now comes the fun part: assembling your dessert cups! In any serving cup or glass, start by layering the ingredients. Here’s a suggested order:
- A layer of vanilla wafers: Crumble some or leave them whole for added texture.
- A layer of banana slices: You want a generous helping for that fresh flavor.
- A layer of pudding: Spoon in your creamy pudding, filling up the cup.
- Repeat with another layer of wafers, bananas, and pudding until you reach the top.
The beauty of this step is that you can get creative. Maybe add some chocolate shavings or a drizzle of caramel in between layers for a twist!
Finish with Whipped Cream Delight
To crown your banana pudding dessert cups, add a generous dollop of whipped cream on top. Whether you opt for store-bought or homemade, this layer not only adds sweetness but also an airy texture that balances the richness of the pudding.
Feel free to get fancy with the whipped cream! Try using a piping bag to create beautiful swirls or sprinkle some crushed vanilla wafers or even a dash of cinnamon on top.
Once assembled, consider chilling them again for about 30 minutes to let all the layers set beautifully before serving.
Now, gather your friends or family, serve them up, and watch as everyone digs into the layers of yumminess! If you’re looking for more dessert inspiration, you might also enjoy exploring recipes for mini cheesecakes or mousse desserts that have that same build-it-yourself charm.
Preparing banana pudding dessert cups is not just about the recipe; it’s about sharing joy in every bite. Enjoy!

Variations on Banana Pudding Dessert Cups
If you love banana pudding dessert cups, get ready to elevate your dessert game with some delicious variations. Whether you’re in the mood for a chocolate treat or a tropical escape, these twists are perfect for any occasion!
Indulgent Chocolate Banana Pudding Dessert Cups
For chocolate lovers, this version adds a rich and indulgent element to the classic banana pudding dessert cups. To make them, simply incorporate chocolate pudding instead of the traditional vanilla base. Here’s how you can create these delightful cups:
- Ingredients: Use chocolate pudding mix, whole milk, sliced bananas, Nilla wafers, and whipped cream.
- Instructions:
- Prepare the chocolate pudding according to package instructions.
- Layer crushed Nilla wafers at the bottom of your serving cups, followed by sliced bananas and a generous scoop of chocolate pudding.
- Top it off with whipped cream and drizzle some chocolate syrup for that extra touch.
This variation is perfect for those chocolate cravings and can be a hit at gatherings. For more chocolatey inspiration, check out this chocolate pudding recipe.
Refreshing Tropical Banana Pudding Dessert Cups
Want to take your taste buds on vacation? Try these tropical banana pudding dessert cups! This fun spin adds a refreshing twist that is sure to impress.
- Ingredients: Start with vanilla pudding, coconut flakes, fresh pineapple chunks, sliced bananas, and, of course, Nilla wafers.
- Instructions:
- Prepare the vanilla pudding as per the directions.
- In your dessert cups, layer the crushed Nilla wafers, followed by banana slices and pineapple.
- Pour the vanilla pudding over the layers, then top with whipped cream and toasted coconut for that tropical flair.
These cups not only taste great but also look fantastic. For tips on tropical fruits, check out this guide on fresh fruit pairings.
Experiment with these variations, and you might just find a new favorite among your banana pudding dessert cups collection!
Cooking Tips and Notes for Banana Pudding Dessert Cups
Tips for Perfect Pudding Consistency
Achieving the right consistency for your banana pudding dessert cups is crucial for that velvety texture we all love. Here are some key tips:
- Temperature Matters: Ensure your milk and cream are at room temperature before cooking. This helps prevent clumping in the pudding.
- Slow and Steady: When whisking the pudding mixture, do so slowly and continuously. This not only reduces lumps but also promotes even cooking.
- Cool Completely: After cooking, allow the pudding to cool down completely in the fridge before layering it with bananas and wafers. This will help it set perfectly.
Notes on Making Ahead and Storage
Planning a gathering? These banana pudding dessert cups can be prepared in advance:
- Make Ahead: You can make the pudding a day earlier. Just store it in an airtight container and refrigerate.
- Assemble Just Before Serving: Layer the cups a few hours before serving for optimal freshness.
- Storage Tips: If you have leftovers, keep them in the fridge for up to three days, but note that the freshly layered bananas may brown. A sprinkle of lemon juice on them can help mitigate this.
For more in-depth insights on prepping desserts ahead of time, check out this helpful guide on meal prepping. Whether for a casual get-together or a cozy night in, mastering your banana pudding dessert cups will surely impress!
Serving Suggestions for Banana Pudding Dessert Cups
Creative ways to present your dessert
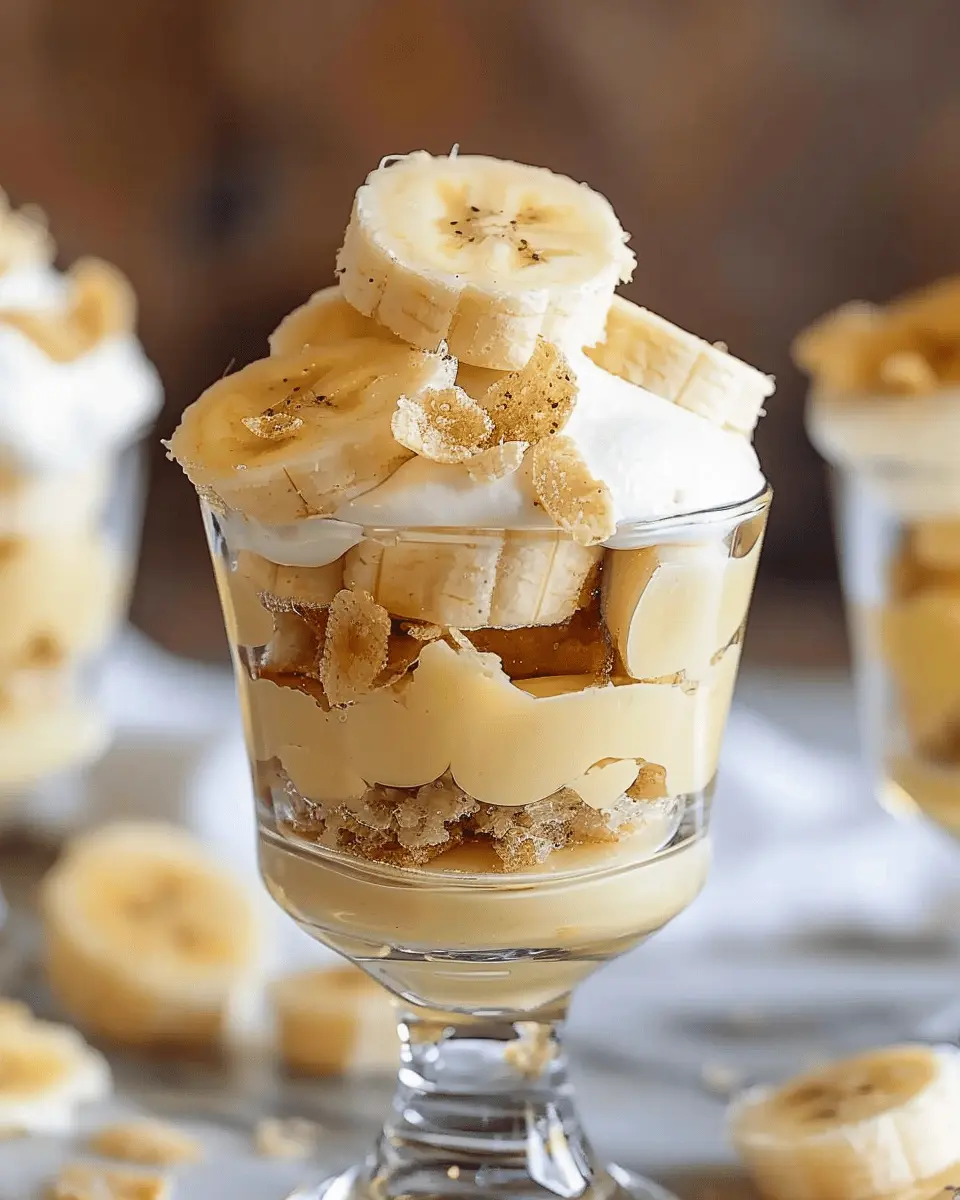
Elevate your banana pudding dessert cups by choosing charming serving vessels. Consider using small mason jars or decorative coffee cups to create an inviting look. Layer the pudding, bananas, and whipped cream neatly for a colorful display. Top each cup with a sprinkle of crushed graham crackers or a slice of fresh banana for that extra flair. For a whimsical touch, add a mini paper umbrella or a fun straw!
If you’re feeling adventurous, make a banana pudding parfait by layering the elements in a taller vessel, allowing the beautiful colors to shine. This presentation not only looks appealing but also makes it easy for guests to serve themselves.
Pairing suggestions for a full meal experience
To complement your banana pudding dessert cups, consider serving them alongside a light meal. A refreshing spinach salad with sliced strawberries and a citrus vinaigrette can balance the sweetness of the dessert. Alternatively, grilled chicken ham sandwiches on whole-grain bread make for a satisfying and wholesome meal. For beverages, offer a chilled herbal iced tea or sparkling water with lemon to cleanse the palate. This combination will ensure your guests enjoy a harmonious dining experience!
Consider checking out more meal pairing ideas on sites like AllRecipes or Food Network to inspire your menu planning.
Time Breakdown for Banana Pudding Dessert Cups
Preparation Time
Making banana pudding dessert cups is a breeze, taking about 20 minutes. You’ll quickly whip up the creamy pudding base, layer the bananas, and add those delightful vanilla wafers. Don’t rush through this part—it’s where all the flavors come together just right!
Chilling Time
Once your cups are prepped, it’s time for a little patience! Refrigerate your dessert cups for 2 hours to ensure they set properly. Chilling not only improves the texture but also melds the flavors beautifully.
Total Time
In total, you’re looking at approximately 2 hours and 20 minutes. But don’t worry, most of that time is just waiting for your delicious banana pudding dessert cups to chill. Perfect for any gathering, they’ll be worth every minute spent! For more ideas, check out some tips on making the perfect pudding from the experts at Serious Eats.
Nutritional Facts for Banana Pudding Dessert Cups
When diving into the delightful world of banana pudding dessert cups, knowing their nutritional profile can enhance your enjoyment. Here’s a quick breakdown to keep you informed!
Calories
Each serving of these creamy dessert cups packs around 250 calories. It’s a satisfying treat that fits nicely into an occasional indulgence.
Protein
While these dessert cups are primarily a sweet treat, they also provide about 4 grams of protein. This helps keep your energy levels up without overwhelming your diet.
Sugar Content
A typical serving contains about 18 grams of sugar, mostly from the natural sweetness of bananas and any added sweeteners. If you’re looking to cut back on sugar, consider using ripe bananas that offer robust flavor without needing much extra sweetness.
For more insights and healthy recipe ideas, check out sources like Healthline. Remember, moderation is key when enjoying your banana pudding dessert cups!
FAQs about Banana Pudding Dessert Cups
Can I use ripe bananas for this recipe?
Absolutely! In fact, using ripe bananas is highly recommended for your banana pudding dessert cups. The sweetness and creaminess of ripe bananas add a fantastic flavor and texture to your dessert. Plus, they’re easier to mash, giving you that smooth consistency that’s perfect for layering in your cups. Just be sure to check for any brown spots—those are typically a sign that your bananas are at their sweetest!
What can I substitute for the shortbread cookies?
If you’re not a fan of shortbread or need a different option, there are several delicious alternatives. Try using:
- Nilla Wafers: A classic choice that brings sweet flavor and crunch.
- Graham crackers: Crushed, they create a slightly different but equally delightful texture.
- Chocolate cookies: For a richer taste, chocolate cookies can give your banana pudding a decadent twist.
These substitutions can cater to your preferences while still maintaining that essential crunch!
How can I make this recipe vegan-friendly?
Creating vegan banana pudding dessert cups is entirely feasible! Here’s how you can modify the recipe:
- Dairy-Free Milk: Replace regular milk with almond milk, coconut milk, or any plant-based milk of your choice.
- Vegan Pudding Mix: Ensure your pudding mix is dairy-free or use a homemade vegan pudding substitute, often made with avocados or silken tofu blended with maple syrup.
- Plant-Based Whipped Topping: Opt for coconut whipped cream or a store-bought vegan whipped topping for that creamy finish.
These simple swaps allow you to enjoy a delicious vegan-friendly version of this classic treat without compromising on flavor! For more ideas on vegan desserts, check out VegNews.
Ready to dive into your banana pudding dessert cups? Whether you stick to the traditional route or tailor it to your taste, you’re bound to impress!
Conclusion on Banana Pudding Dessert Cups
Homemade banana pudding dessert cups bring a delightful twist to a classic treat, merging creamy textures, sweet bananas, and crunchy wafers. Remembering that golden layer of vanilla pudding, coupled with fresh banana slices, can take you back to your childhood in an instant. This recipe is not just a simple dessert; it’s a playful creation that invites you to experiment in the kitchen.
Give it a whirl—try crafting your own personalized banana pudding cups! Whether you’re hosting a gathering or just satisfying your sweet tooth after dinner, these dessert cups promise to be a hit. You’ll be amazed at how quickly they disappear! For more inspiration, check out sources like Epicurious and Food Network for variations to keep things exciting.
Banana Pudding Dessert Cups: The Easy Indulgence You Need

Indulge in these delightful Banana Pudding Dessert Cups, a simple yet delicious treat perfect for any occasion.
- Prep Time: 20 minutes
- Cook Time: 0 minutes
- Total Time: 1 hour 20 minutes
- Yield: 4 servings 1x
- Category: Dessert
- Method: No-Bake
- Cuisine: American
- Diet: Vegetarian
Ingredients
- 2 cups vanilla pudding mix
- 3 cups milk
- 1 teaspoon vanilla extract
- 1 box vanilla wafers
- 4 ripe bananas, sliced
- 1 cup whipped cream
Instructions
- In a bowl, whisk together the vanilla pudding mix and milk until smooth.
- Add the vanilla extract and mix well.
- In serving cups, layer the vanilla wafers, sliced bananas, and pudding mixture.
- Top with whipped cream and additional banana slices if desired.
- Chill in the refrigerator for at least one hour before serving.
Notes
- For a richer flavor, consider using homemade pudding.
- Feel free to substitute with chocolate pudding for a different twist.
Nutrition
- Serving Size: 1 cup
- Calories: 300
- Sugar: 22g
- Sodium: 150mg
- Fat: 12g
- Saturated Fat: 7g
- Unsaturated Fat: 4g
- Trans Fat: 0g
- Carbohydrates: 42g
- Fiber: 1g
- Protein: 4g
- Cholesterol: 30mg
Keywords: Banana Pudding Dessert Cups, easy dessert, banana dessert, pudding cups