Introduction to Cheesy Garlic Rolls
The Irresistible Allure of Cheesy Garlic Rolls
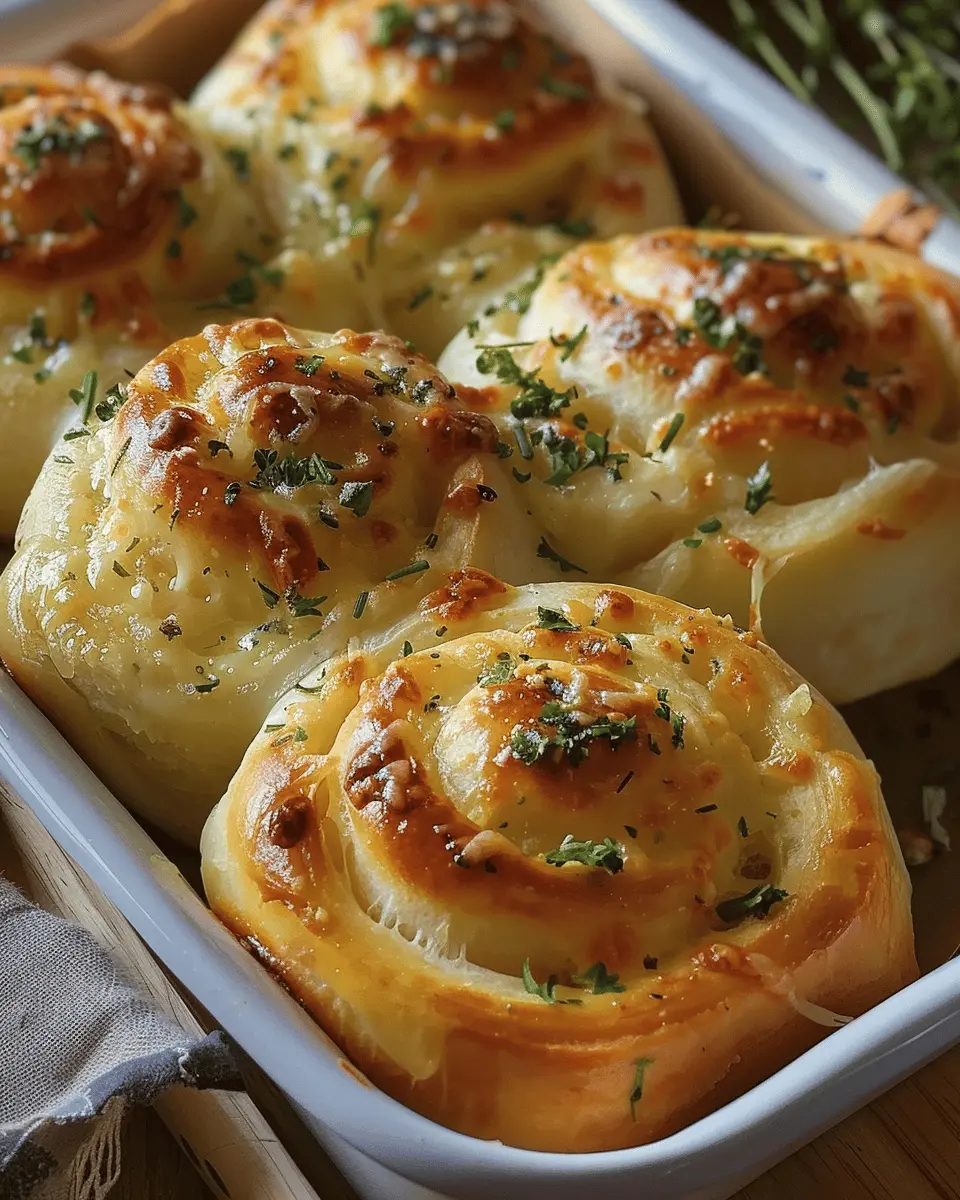
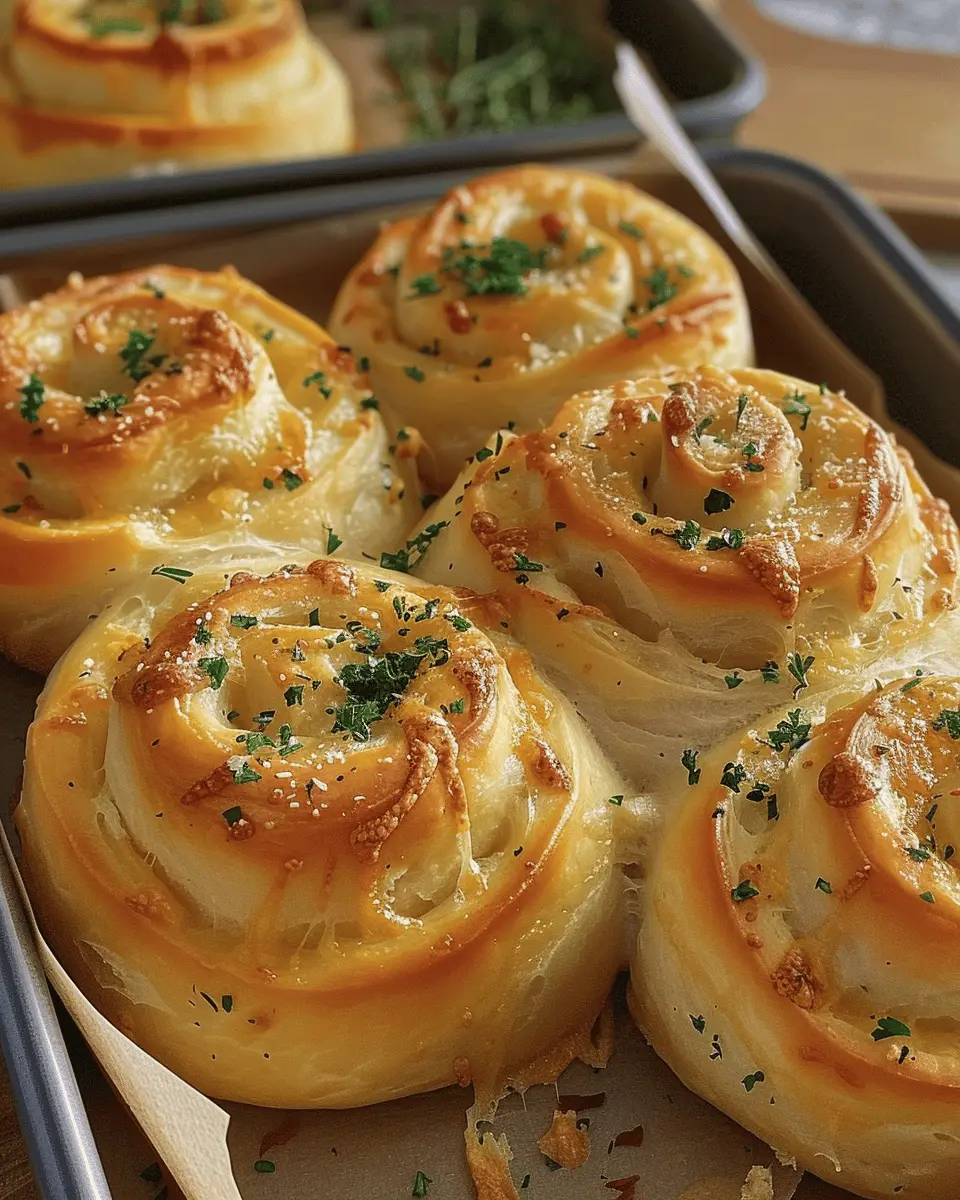
Picture this: it’s a cozy evening, the kind that calls for something warm, delectable, and downright comforting. Enter cheesy garlic rolls—the ultimate crowd-pleaser that marries the rich flavor of garlic with the gooey goodness of cheese, all wrapped up in soft, pillowy dough. These rolls are not just a side dish; they’re an experience that can elevate any meal, whether you’re serving them alongside a hearty soup or enjoying them as a snack all on their own.
One of the best things about cheesy garlic rolls is their versatility. You can customize them to your liking by adding ingredients like Turkey Bacon or Chicken Ham to give a savory twist, or you can keep them simple to let that delicious garlic shine through. This recipe embraces creativity, allowing you to experiment with different cheeses like mozzarella, cheddar, or even a zesty pepper jack for a little kick.
What’s particularly appealing is how straightforward the preparation can be. The thrill of pulling these rolls from the oven, golden and bubbling, is enough to make anyone’s mouth water. Plus, a little research shows that homemade bread, like these cheesy rolls, can be healthier and more satisfying than store-bought alternatives. According to experts from the American Association of Cereal Chemists, fresh bread retains more flavor and nutrients than its packaged counterparts. With this in mind, why not give it a shot?
Don’t be intimidated by the thought of baking; it’s simpler than you might think. You can easily whip up a batch while binge-watching your favorite show or prepping for a small gathering. Both novices and seasoned bakers can enjoy the process of mixing, kneading, and baking. And let’s be real—who doesn’t love the aroma of fresh bread wafting through the house?
In a world of endless culinary options, cheesy garlic rolls stand out as a brilliant balance of comfort and flavor that brings everyone together. Get ready to delight your taste buds and impress your friends with this fantastic recipe!
Ingredients for Cheesy Garlic Rolls
Creating cheesy garlic rolls at home is easier than you might think! Let’s dive into what you’ll need for this delicious treat.
Essential ingredients you’ll need
For the base of your cheesy garlic rolls, gather these key components:
- All-purpose flour: This will give your rolls the perfect structure.
- Active dry yeast: Essential for that classic rise.
- Warm water: Activate your yeast with warm (not hot!) water.
- Butter: Adds richness and flavor.
- Garlic: Freshly minced is best for that bold taste.
- Mozzarella cheese: The star ingredient for that gooey, cheesy pull.
- Salt: For seasoning and flavor balance.
These staples form the backbone of your rolls, creating a delightful dough that’s soft and tasty.
Optional ingredients for extra flavor
Want to elevate your cheesy garlic rolls? Consider adding these for a twist:
- Fresh herbs: Parsley or basil can add freshness.
- Turkey bacon or chicken ham: For added protein and a savory kick.
- Red pepper flakes: A touch of heat for those who enjoy a bit of spice.
Feel free to mix and match these ingredients to tailor your rolls to your taste buds. For more inspiration, check out this guide on exploring herb flavors here and delicious variations! Using these few basic ingredients can have you savoring your homemade rolls in no time. What are you waiting for? Get rolling!
Step-by-step Preparation of Cheesy Garlic Rolls
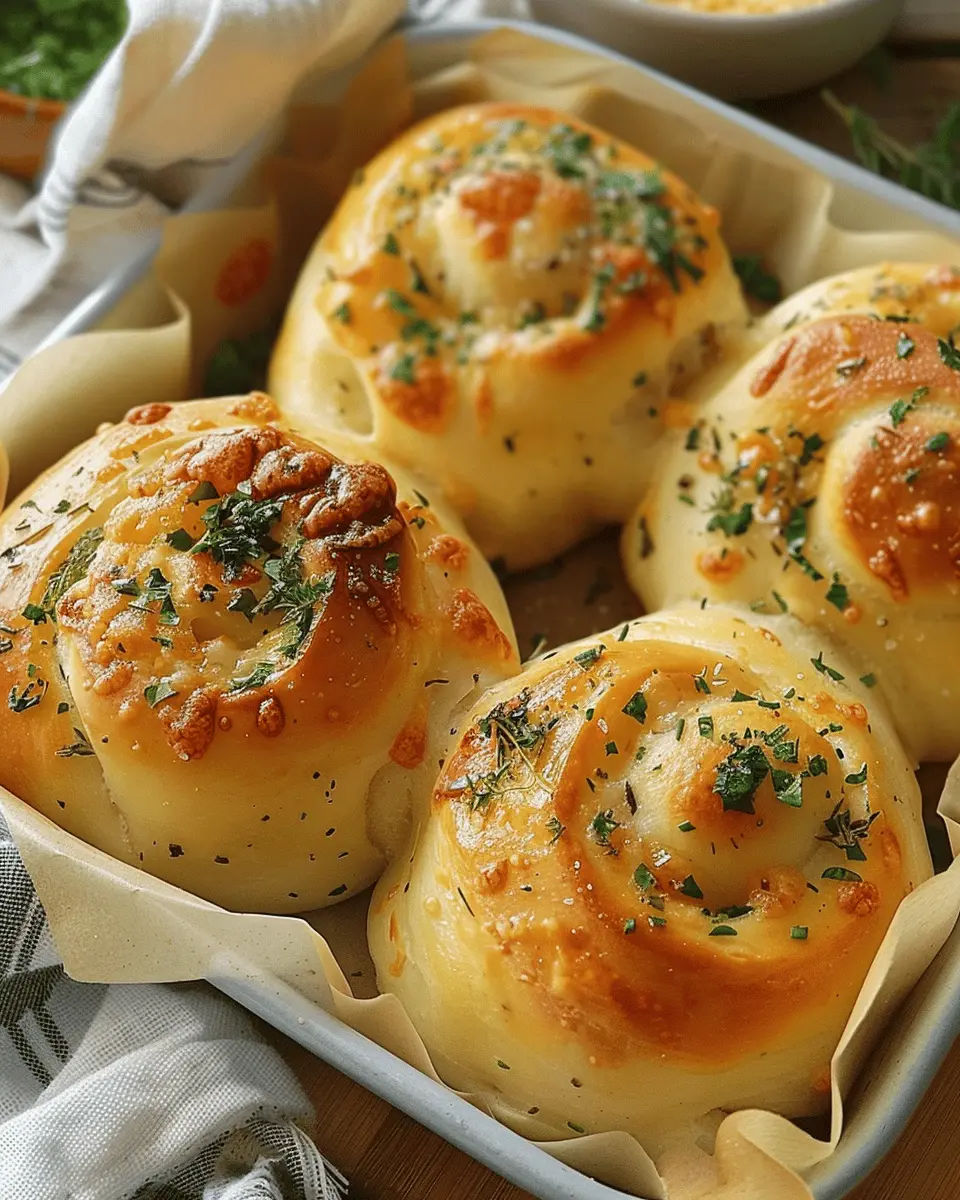
There’s something undeniably satisfying about pulling a tray of freshly baked cheesy garlic rolls from the oven. These delightful bites, loaded with gooey cheese and the aromatic essence of garlic, can ignite anyone’s appetite. So, let’s get you started with this engaging, step-by-step process!
Roast the garlic for maximum flavor
To truly elevate your cheesy garlic rolls, begin with roasting your garlic. This step is simple yet transformative. Preheat your oven to 400°F (200°C). Take a whole bulb of garlic, slice off the top to expose the cloves, drizzle with olive oil, and wrap it in foil. Roast for about 30-35 minutes until golden and caramelized. The sweet, mellow flavor of roasted garlic can turn any dish into something extraordinary.
Prepare the garlic butter mix
While the garlic is roasting, mix up your garlic butter. In a bowl, combine:
- 1/2 cup unsalted butter, softened
- 2 tablespoons parsley, finely chopped
- 1 teaspoon salt
Once the roasted garlic has cooled, squeeze it out of the skins and mash it into the butter mixture. Give it a good stir to combine the flavors. You can find some great tips on creating garlic butter in this guide.
Activate the yeast mixture
Your next step is to activate the yeast, which is essential for creating those airy rolls. In a small bowl, mix:
- 1 cup warm water (not too hot—about 110°F or 43°C)
- 1 packet (2 1/4 teaspoons) active dry yeast
- 1 tablespoon sugar
Let the mixture sit for about 5-10 minutes until it becomes frothy, indicating that the yeast is alive and kicking. This proofing process is key!
Combine dry ingredients and form the dough
In a large bowl, whisk together:
- 3 cups all-purpose flour
- 1 teaspoon salt
Make a well in the center and add the activated yeast mixture. Gradually mix until it forms a rough dough. It’s fun to see how simple ingredients come together!
Knead the dough until smooth
Dust your countertop with a little flour and turn out your dough. Knead it for about 8-10 minutes until it’s smooth and elastic. Don’t rush this step; kneading properly ensures that gluten develops, giving your rolls that wonderful texture.
Let the dough proof for the first time
Place your dough in a greased bowl, cover it with a damp cloth, and let it rise in a warm area for about 1 hour. You want the dough to double in size, which is a great time to prepare for the next steps!
Roll out the dough and spread garlic butter
Once your dough has risen, punch it down gently and turn it out onto a floured surface. Roll it into a rectangle about 1/4 inch thick. Spread your prepared garlic butter generously over the entire surface, allowing that rich flavor to soak in.
Add mozzarella and roll up
Sprinkle a generous amount of shredded mozzarella cheese over the garlic butter. Then, starting from one edge, roll the dough tightly into a log. This will create those delightful spirals!
Cut and shape the rolls
Using a sharp knife, slice the log into 1-inch thick rolls. Arrange them cut side up in a greased baking dish. You can add a little bit of extra shredded cheese on top if you like—it’s always a good idea!
Second proofing for fluffy rolls
Cover the rolls with a cloth again and let them rise for another 30 minutes. This second proofing is crucial for achieving fluffy, tender rolls.
Bake the rolls to golden perfection
Preheat your oven to 375°F (190°C). Once your rolls have completed their second rise, pop them in the oven and bake for 20-25 minutes or until they’re golden brown. The aroma will be tempting, so be prepared!
Garnish and serve your cheesy garlic rolls
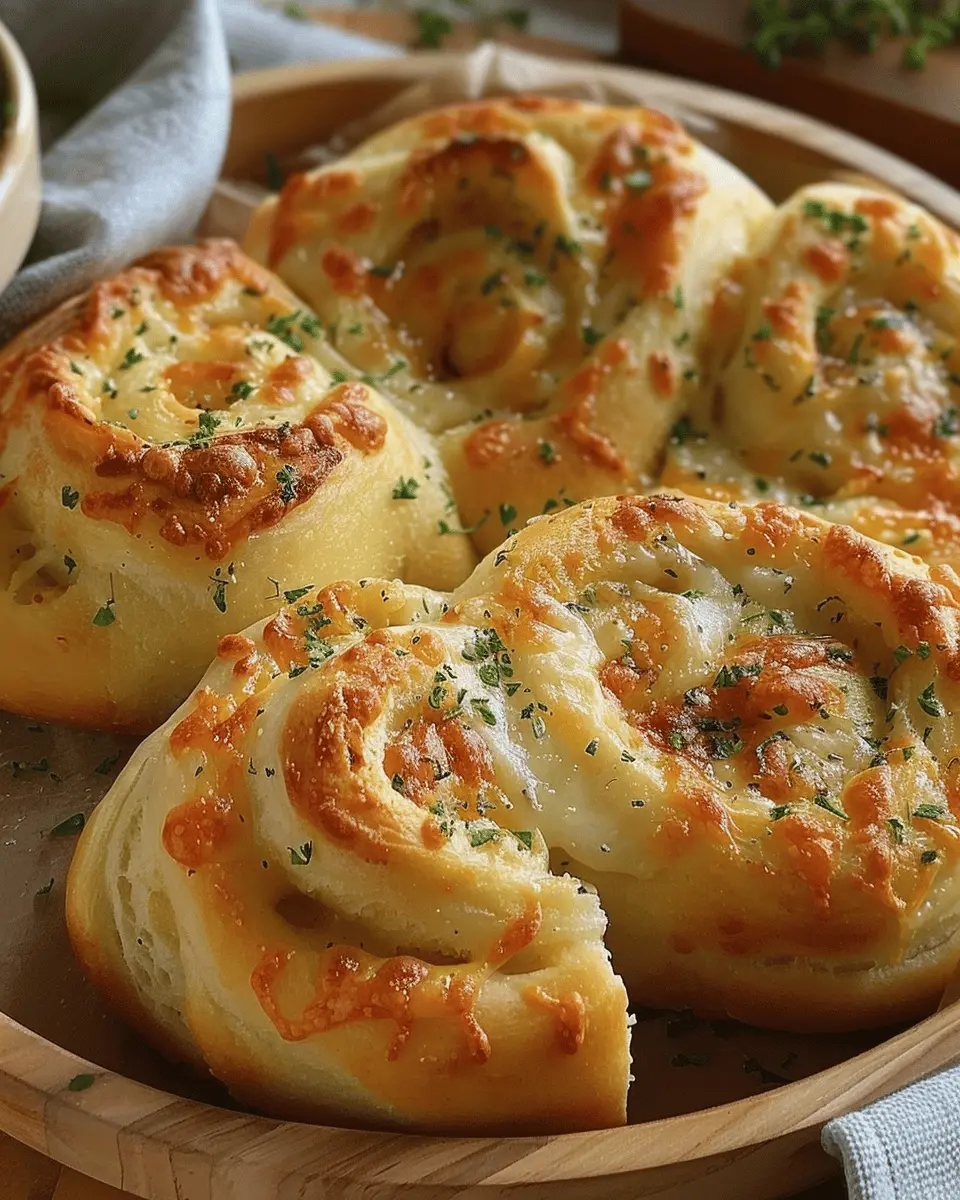
When they’re beautifully golden, take them out and brush with any leftover garlic butter. You can sprinkle a little more parsley on top for added color and freshness. Serve these cheesy garlic rolls warm and watch them disappear—they are the perfect side to any meal or fantastic as a snack on their own!
In under two hours, you’ve crafted a delightful treat that’s almost impossible to resist. Enjoy!
Variations on Cheesy Garlic Rolls
Cheesy garlic rolls are versatile little delights that can be customized to suit any palate. Let’s explore a few fun variations that can elevate your baking game.
Cheesy Rolls with Herbs
Why not bring some garden-fresh flavor into your cheesy garlic rolls? Adding herbs like fresh parsley, thyme, or rosemary can create an aromatic experience that will tantalize your senses. Simply chop a handful of your chosen herbs and mix them into your garlic and cheese filling. This not only enhances the flavor but also adds a splash of color. If you want to dive deeper into herb pairings, check out sources like The Spruce Eats.
Spicy Garlic Rolls with Jalapeños
If you like things hot, this variation is right up your alley! Incorporating chopped jalapeños into your cheesy garlic rolls will give them an exciting kick. To find the perfect balance, consider mixing in some cream cheese with your shredded cheese, helping to mellow the spice without sacrificing flavor. Imagine biting into a roll that’s both gooey from cheese and zesty from peppers!
Vegan Cheesy Garlic Rolls
Don’t worry, plant-based eaters; you can enjoy cheesy garlic rolls too! Using a combination of nutritional yeast, vegan cheese, and margarine allows you to recreate that rich, cheesy goodness without any animal products. This option is not only delicious but also caters to a wide range of dietary preferences.
Feel free to put your twist on these variations, and let us know how your cheesy garlic rolls turned out!
Cooking Tips and Notes for Cheesy Garlic Rolls
Tips for Perfecting Your Garlic Butter
The key to irresistible cheesy garlic rolls lies in your garlic butter. Start with fresh garlic—it packs a flavor punch that pre-minced options can’t match. Mix softened butter with minced garlic, parsley, and a pinch of salt. For added depth, consider stirring in a dash of Italian herbs or even a hint of red pepper flakes for some zing. Let it sit for at least an hour before using to ensure the flavors meld beautifully.
Common Mistakes to Avoid
When baking your cheesy garlic rolls, watch out for overworking the dough. This can lead to tough rolls instead of light and fluffy ones. Additionally, giving your rolls enough time to rise is crucial—don’t rush this step! Lastly, be mindful of the baking temperature; an overly hot oven can lead to burnt outsides while leaving the center doughy.
How to Store Leftover Rolls
If you’re lucky enough to have leftovers, store your cheesy garlic rolls in an airtight container at room temperature for a couple of days. For longer storage, wrap them in plastic wrap and place them in the freezer for up to three months. When you’re ready to enjoy, just reheat in the oven for that fresh-out-of-the-oven taste!
For more tips on storing baked goods, check out this helpful guide. Happy rolling!
Serving Suggestions for Cheesy Garlic Rolls
Perfect Pairings with Soups or Salads
There’s nothing quite like enjoying cheesy garlic rolls alongside a warm bowl of soup or a crispy salad. They add a delightful touch and balance to heartier dishes. Consider pairing them with:
- Creamy Tomato Soup: The rich flavors harmonize beautifully, creating a comforting meal.
- Minestrone: The savory garlic pairs well with the fresh vegetables and herbs.
- Caesar Salad: The zingy dressing and crunchy croutons are an excellent match for those gooey rolls.
If you’re craving a light salad, a simple arugula salad with lemon vinaigrette can truly elevate your meal.
Fun Ideas for Dipping Sauces
Dipping sauces can take your cheesy garlic rolls to the next level. Here are some delicious options to consider:
- Marinara Sauce: A classic choice that adds a tangy dimension.
- Garlic Herb Butter: Enhance the garlic flavor with a buttery dip.
- Spicy Ranch Dressing: For those who enjoy a bit of heat, this combo is unbeatable.
Elevate your dining experience by experimenting with different flavors. Got a favorite dip? Share your ideas! For more inspirations, check out this collection of dip recipes that’ll have you drooling.
Time Breakdown for Cheesy Garlic Rolls
Preparation Time
Getting started with your cheesy garlic rolls is quick and easy. You’ll need about 15-20 minutes to gather your ingredients, mix the dough, and shape the rolls. This could be a great time to listen to your favorite podcast or catch up on a show while you multitask in the kitchen!
Baking Time
Once your rolls are formed and ready to go, they’ll need about 20-25 minutes in the oven. The aroma of garlic and cheese will fill your kitchen, making the wait feel even longer—it’s almost irresistible!
Total Time
All in all, you’re looking at around 40-45 minutes from start to finish (longer if you decide to let them rise). Perfect for a weeknight treat or a cozy weekend gathering. If you’re interested in similar recipes, consider checking out this resource on baking times from King Arthur Baking for more insights!
Nutritional Facts for Cheesy Garlic Rolls
When you’re indulging in cheesy garlic rolls, knowing their nutritional profile can help you enjoy them mindfully. Let’s break down the essentials:
Calories Count Per Roll
Each cheesy garlic roll contains approximately 150 calories. While they’re not the lightest snack, their delightful flavor makes them worth the occasional treat.
Protein Content
In terms of protein, each roll offers around 5 grams. That might not seem like a lot, but it contributes to a satisfying bite that can help curb your appetite for longer.
Other Nutritional Highlights
These rolls are not just about deliciousness; they also bring some benefits to the table:
- Calcium: Thanks to the cheese, they provide a good amount of calcium, essential for bone health.
- Fiber: If you opt for whole wheat flour, you’ll boost the fiber content, aiding digestion.
- Flavor: Garlic is known for its health benefits, including anti-inflammatory properties.
If you’re curious about more ways to enhance your meals, consider checking out Nutrition.gov for tips on healthy eating. Remember, it’s all about balance!
FAQs about Cheesy Garlic Rolls
When it comes to cheesy garlic rolls, you might have a few questions buzzing in your mind. I’m here to help clarify things so you can enjoy this delightful recipe to the fullest!
Can I make the dough ahead of time?
Absolutely! Making the dough ahead of time can save you precious moments during meal prep. Prepare your dough, let it rise, and shape it into rolls. After that, you can either:
- Refrigerate for up to 24 hours: Just allow it to come to room temperature for about 30 minutes before baking.
- Freeze the rolls: Place them in an airtight container or freezer bag, and when you’re ready to bake, let them thaw overnight in the fridge and rise before baking.
This little trick ensures that you can enjoy fresh cheesy garlic rolls even on the busiest of days!
What’s the best way to reheat the rolls?
Reheating your rolls to retain their delicious flavor is key. Here’s how you can do it effectively:
- Oven Method: Preheat your oven to 350°F (175°C). Wrap the rolls in foil and heat for about 10-15 minutes. This keeps them soft while ensuring they warm through.
- Microwave Method: For a quicker option, pop them in the microwave for 10-15 seconds. However, they may lose some of their crispy texture.
How can I customize the cheese filling?
The beauty of cheesy garlic rolls lies in their versatility! Here are some ideas for customizing the cheese filling:
- Experiment with different cheeses like mozzarella, cheddar, or even a sharp blue cheese for a bold flavor.
- Add herbs such as fresh basil or parsley to the cheese mix for an aromatic touch.
- Consider incorporating cooked Turkey Bacon or Chicken Ham for an extra savory kick.
Feel free to mix and match to create your unique flavor profile!
Whether you’re prepping for a gathering or just indulging in a cozy night in, understanding these tips will elevate your cheesy garlic rolls game! For more ideas on bread-related recipes, check out this bread-making guide for extra inspiration!
Conclusion on Cheesy Garlic Rolls
Why cheesy garlic rolls deserve a spot in your recipe book
Cheesy garlic rolls are more than just delightful bites; they are the perfect companion to any meal, bringing warmth and flavor that everyone craves. Whether you’re hosting a casual dinner party or enjoying a quiet night in, these rolls create a mouthwatering experience that will impress your guests.
Their versatility makes them suitable for various cuisines, while the ease of preparation is ideal for busy young professionals. After indulging in cheesy garlic rolls, you’ll find them becoming a go-to recipe. Don’t miss out on incorporating this delicious crowd-pleaser into your cooking repertoire. For more culinary inspiration, check out resources like Bon Appétit and Serious Eats.
Cheesy garlic rolls: Indulgent homemade goodness for all
Indulge in these cheesy garlic rolls that are perfect for any occasion. Homemade goodness packed with flavor!
- Prep Time: 20 minutes
- Cook Time: 20 minutes
- Total Time: 1 hour 40 minutes
- Yield: 12 rolls 1x
- Category: Appetizers
- Method: Baking
- Cuisine: American
- Diet: Vegetarian
Ingredients
- 2 cups all-purpose flour
- 1 tablespoon sugar
- 1 teaspoon salt
- 1 packet instant yeast
- 1 cup warm water
- 1/4 cup unsalted butter, melted
- 1 teaspoon garlic powder
- 1 cup shredded mozzarella cheese
Instructions
- In a bowl, combine warm water and yeast. Let it sit for 5 minutes.
- Add flour, sugar, salt, and melted butter to the yeast mixture. Mix until a dough forms.
- Knead the dough on a floured surface for about 5 minutes.
- Place dough in a greased bowl, cover, and let it rise for 1 hour.
- Preheat the oven to 375°F (190°C).
- Punch down the dough, roll into balls, and place them on a baking sheet.
- Melt butter and mix with garlic powder. Brush over the dough balls.
- Top with shredded mozzarella cheese.
- Bake for 15-20 minutes or until golden brown.
Notes
- Let the rolls cool slightly before serving.
- These can be served with marinara sauce for dipping.
Nutrition
- Serving Size: 1 roll
- Calories: 150
- Sugar: 1g
- Sodium: 200mg
- Fat: 7g
- Saturated Fat: 4g
- Unsaturated Fat: 2g
- Trans Fat: 0g
- Carbohydrates: 18g
- Fiber: 1g
- Protein: 4g
- Cholesterol: 15mg
Keywords: Cheesy garlic rolls