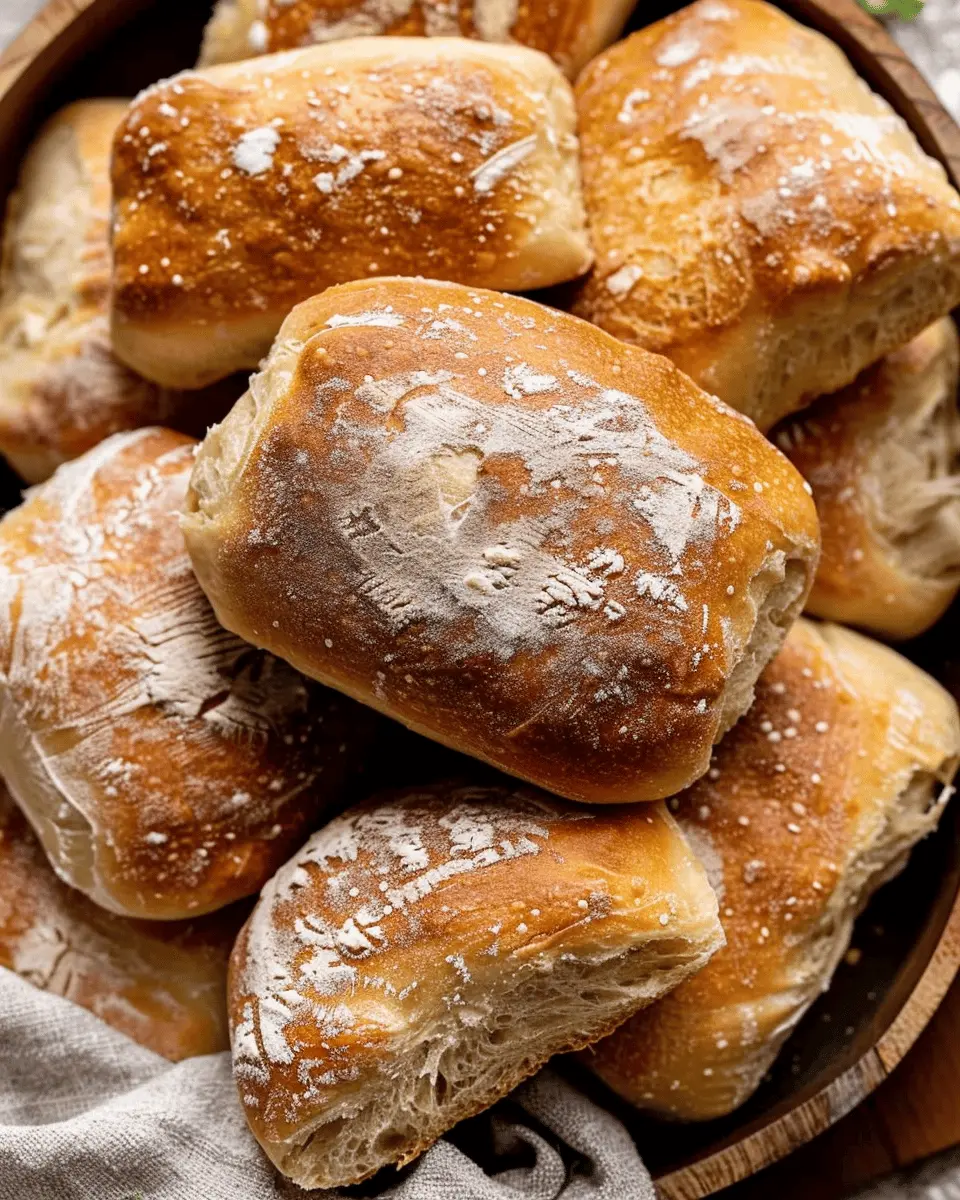
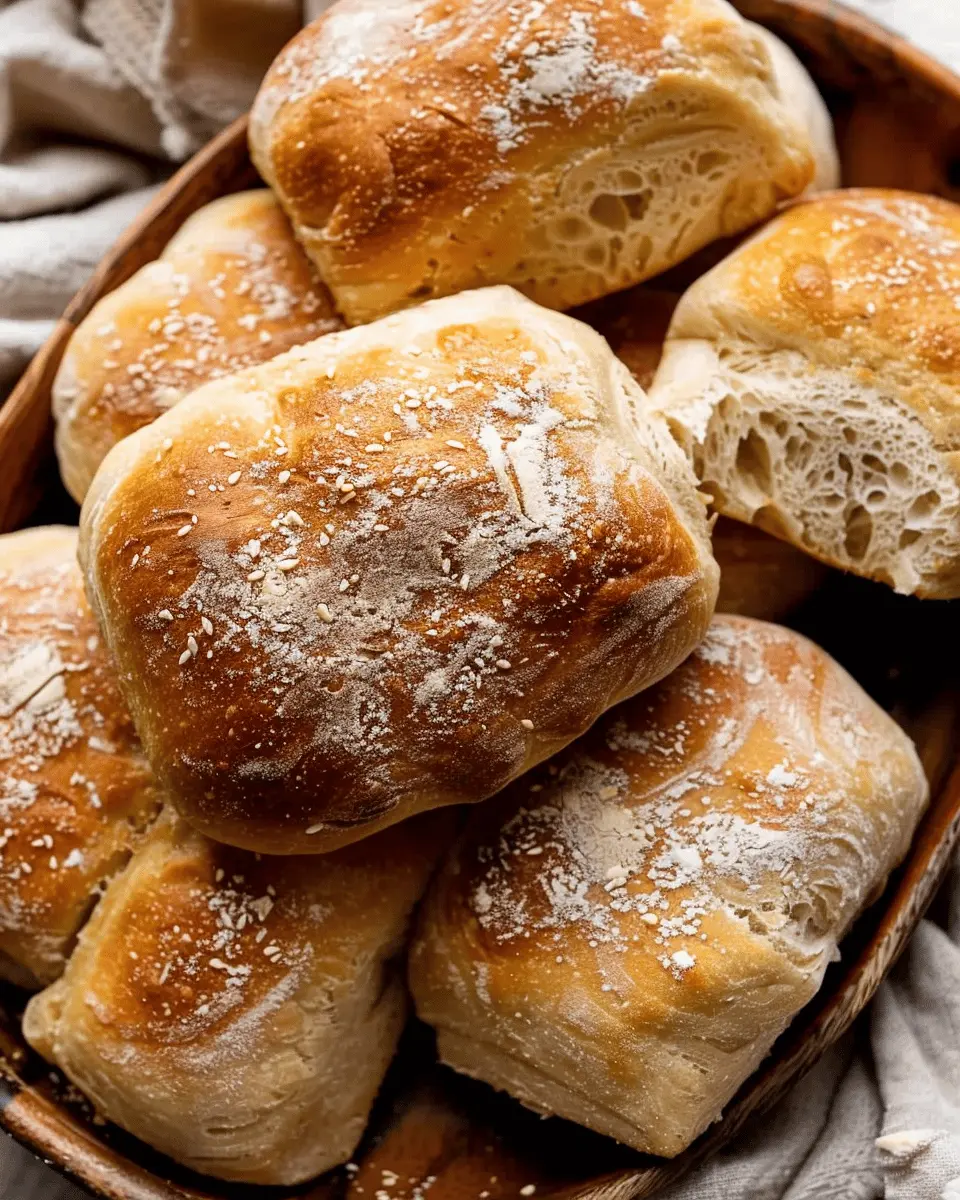
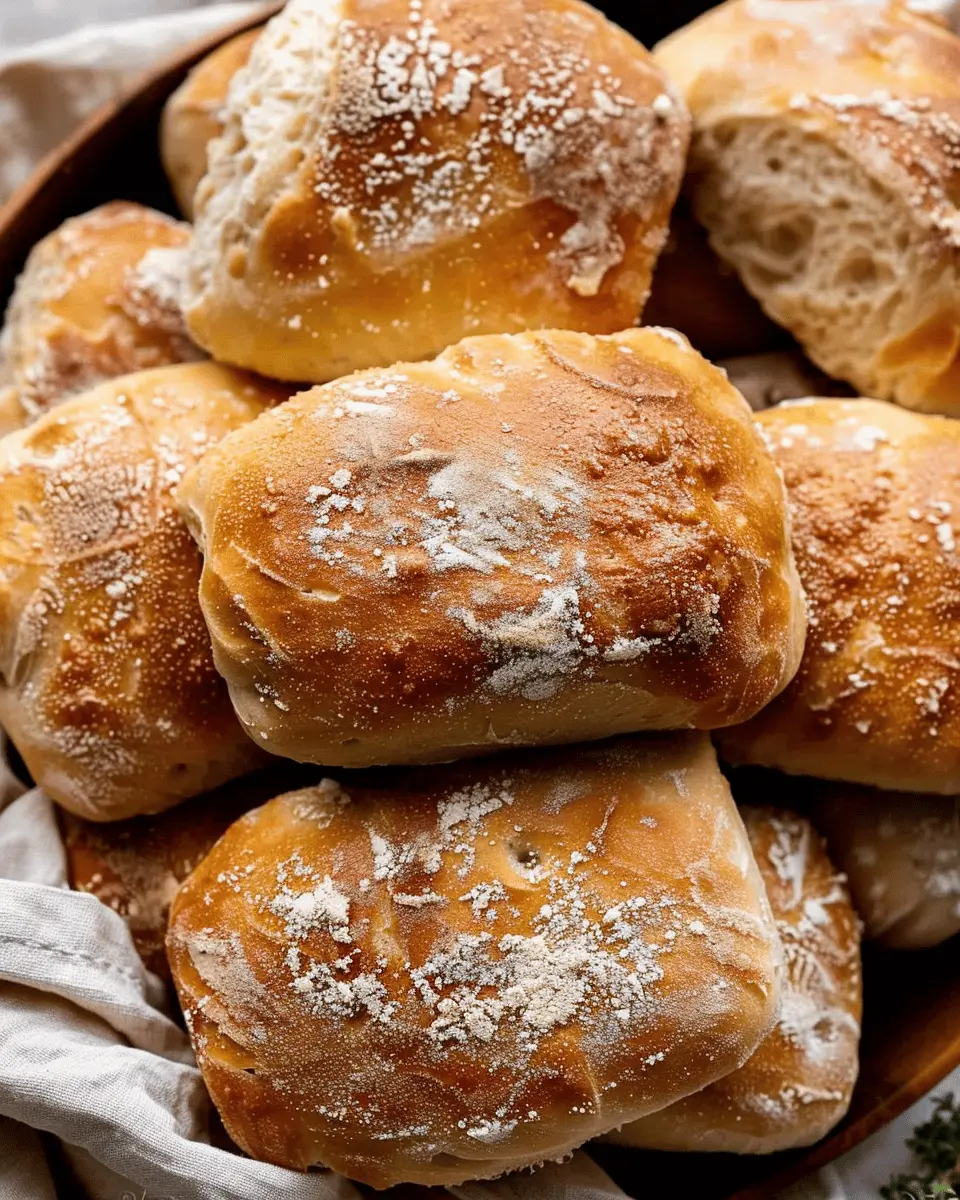
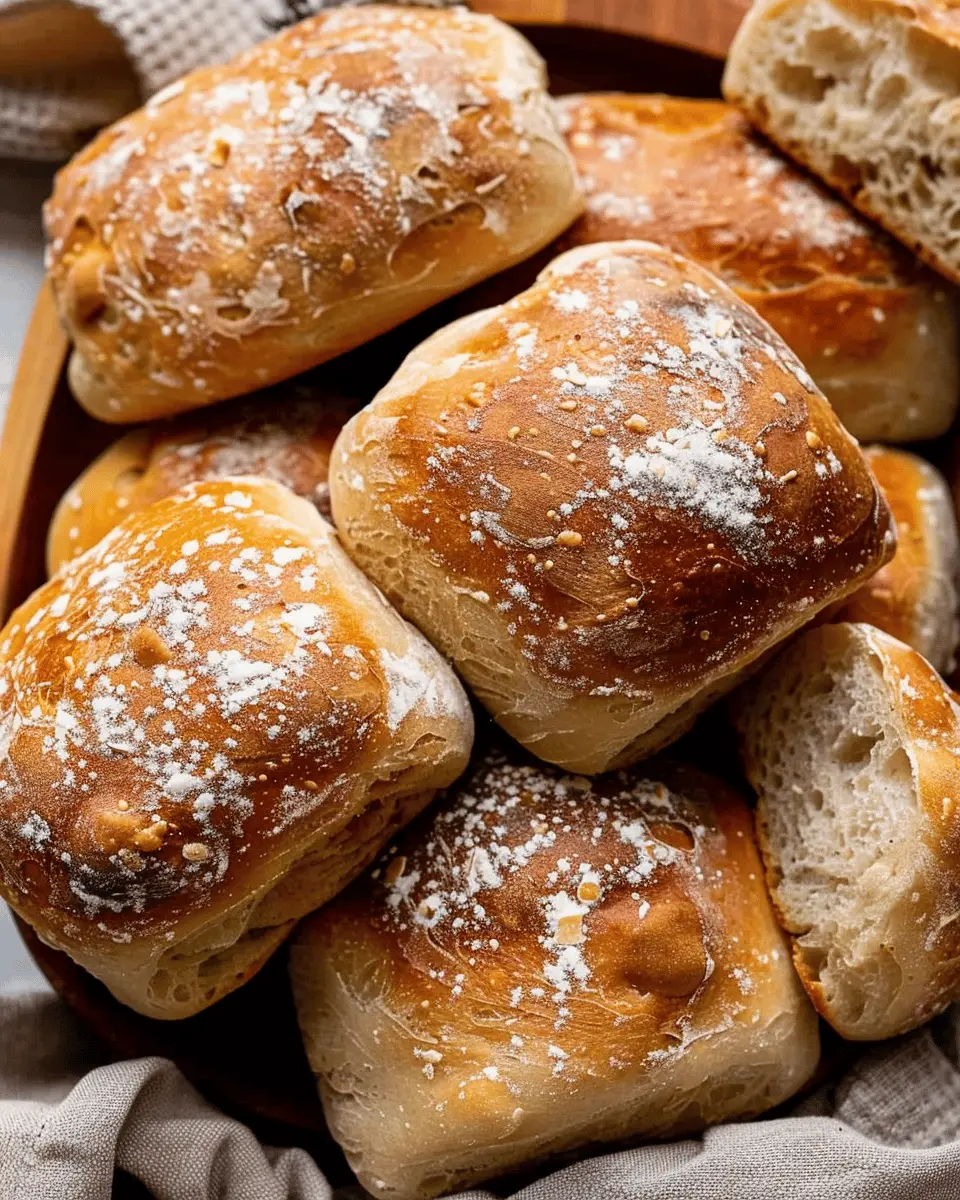
Introduction to Homemade Ciabatta Rolls
When it comes to baking, few things compare to the satisfaction of pulling a fresh batch of ciabatta rolls from the oven. If you’ve only ever bought these Italian delights from the store, you’re in for a treat! Homemade ciabatta rolls are a game-changer that redefine what bread can be—crispy on the outside, soft and airy on the inside, with a subtle nuttiness that elevates any sandwich or meal.
Why Homemade Ciabatta Rolls Are a Game-Changer
Imagine biting into a warm, freshly baked roll that’s bursting with flavor and texture—there’s nothing quite like it. Here are a few reasons why making your own ciabatta rolls at home is worth the effort:
-
Quality Ingredients: When you make your own rolls, you control everything that goes into them. Choose high-quality flour, fresh yeast, and even add your favorite herbs to customize your recipe. Check out reputable sources like the King Arthur Baking Company for ingredient tips.
-
Creative Freedom: Want to create a unique sandwich? Go ahead! With homemade ciabatta rolls, you can experiment with fillings. Whether you’re stacking them with turkey bacon, chicken ham, or fresh veggies, the possibilities are endless.
-
Health Conscious: Sure, you can find store-bought options, but they often contain preservatives and additives. Making your rolls can help you avoid unnecessary ingredients while enjoying the health benefits of whole grains (often recommended by nutrition experts at Harvard Health).
Baking bread might seem daunting, but it’s surprisingly straightforward. Once you grasp the basics—mixing the dough, proper kneading techniques, and letting it rise—you’re well on your way to mastering the art of ciabatta rolls. Plus, what’s better than that warm, intoxicating aroma wafting through your home?
So, if you’re ready to dive into this delightful culinary adventure, gather your ingredients, roll up your sleeves, and let’s get baking! Trust me; you’ll be proud of your homemade ciabatta rolls every time you serve them.
Ingredients for Ciabatta Rolls
Essential ingredients for perfect ciabatta rolls
Crafting ciabatta rolls requires a handful of essential ingredients that come together to create that iconic airy texture and delicious crust:
- Bread Flour: This is key for structure and chewiness. It has a higher protein content than all-purpose flour, helping to develop gluten.
- Water: Ideally at room temperature, as it activates the yeast and helps in achieving that beautiful open crumb texture.
- Yeast: Active dry or instant yeast works well. It’s responsible for the rise and lightness of the rolls.
- Salt: Not just for flavor; it strengthens gluten and controls yeast activity, ensuring your rolls don’t over-proof.
These basic ingredients make the magic happen. You can learn more about the science behind bread making at the King Arthur Baking site.
Optional extras to elevate your rolls
Want to take your ciabatta rolls to the next level? Consider adding:
- Olive Oil: A splash can enhance flavor and add a hint of richness.
- Herbs and Spices: Fresh rosemary or garlic can infuse your dough with aromatic charm.
- Cheese: Incorporate grated Parmesan or crumbled feta into your dough for a delightful surprise.
These simple adjustments can transform your ciabatta rolls into an unforgettable culinary experience. So go ahead, experiment, and enjoy the process!
Step-by-step Preparation of Ciabatta Rolls
Making your own ciabatta rolls can seem intimidating, but I assure you, it’s quite manageable and incredibly rewarding. Follow these steps, and you’ll be savoring fresh, airy rolls in no time!
Gather your ingredients and tools
Before you dive into the actual mixing and baking, it’s essential to have everything at hand. Here’s what you’ll need:
Ingredients:
- 4 cups all-purpose flour
- 1 ½ cups water (room temperature)
- 2 teaspoons salt
- 1 teaspoon sugar
- 2 teaspoons instant yeast
Tools:
- Large mixing bowl
- Wooden spoon or spatula
- Kitchen scale (for precision)
- Plastic wrap or a damp towel
- Baking sheet
- Parchment paper
- A sharp knife or bench scraper
Having all your materials ready will streamline the process and help you avoid interruptions. Trust me—this makes a difference when you’re in the zone!
Mix the dough – the secret to airy ciabatta
Mixing the dough for your ciabatta rolls is crucial for achieving that light and airy texture. In your mixing bowl, combine the flour, salt, sugar, and yeast without stirring. This safeguards the yeast, giving you a better rise. Once your dry ingredients are mixed, pour in the water.
- Use a wooden spoon or spatula to mix until there are no dry bits left.
- The mixture will be sticky and shaggy—that’s perfect!
Why is this step so critical? The hydration level in ciabatta dough is higher than in most bread recipes. It encourages gluten development, resulting in that sought-after airy structure. If you’re curious about more technical aspects of bread-making, you can read this insightful article on hydrating dough on The Fresh Loaf.
First rise – how long should you wait?
Now that your dough is mixed, it’s time for the first rise, also called fermentation. Cover the bowl with plastic wrap or a damp towel to trap warmth and moisture. Let it sit in a warm area for about 1 to 2 hours, until it nearly doubles in size.
This is where the magical transformation begins! The yeast consumes the sugars and produces carbon dioxide, causing the dough to puff up. A good tip here is to find a warm nook in your kitchen, like the top of your refrigerator or a sunny window.
Shape the rolls – tips for that authentic look
After the first rise, turn your dough out onto a lightly floured surface. Here’s where the fun begins! Gently stretch and fold the dough rather than punching it down. This technique helps retain the air bubbles created during the rise.
- Divide the dough into equal portions (about 180 grams each is ideal).
- Use floured hands to shape each portion into an oval or rectangle.
- For that authentic ciabatta rolls look, create a slightly tapered end as you shape.
The key is to handle the dough gently to keep all those wonderful air pockets intact.
Second rise – patience is key
Place your shaped rolls onto a parchment-lined baking sheet, leaving some space between them for expansion. Cover them with a damp towel and let them rise again for 30 to 60 minutes.
This is the patience stage; don’t rush it! If your kitchen is cool, they may take a little longer. The more they rise, the fluffier they’ll be. Trust the process—great bread needs this time.
Bake the rolls – listen for that crust
Preheat your oven to 450°F (230°C) about 30 minutes before your rolls finish their second rise. Place an empty baking tray on the lower rack; this will create steam when heated, helping to get that delightful crust.
Once ready, slide your rolls into the oven. Bake for about 20-25 minutes or until they are golden brown and sound hollow when tapped on the bottom.
Listening is key! That cracking sound signifies perfectly baked ciabatta rolls. Once done, let them cool on a wire rack, and soon, you’ll have freshly baked rolls that will impress family and friends alike.
By following these steps, you’ll master the art of making ciabatta rolls in no time. So why not try your hand at making these delightful rolls today? Your taste buds will thank you!
Variations of Ciabatta Rolls
Herbed Ciabatta Rolls for Fresh Flavor
If you’re looking to elevate your ciabatta rolls, consider infusing them with fresh herbs. Picture this: a warm, crusty roll bursting with the aroma of rosemary, thyme, or basil. Not only do these flavors enhance your rolls, they also add a gorgeous green hue. Simply incorporate chopped herbs into your dough during mixing or sprinkle them on top before baking for an aromatic finish.
These herbed ciabatta rolls are perfect for sandwiches, pairing beautifully with grilled vegetables or your favorite spreads. Plus, fresh herbs offer health benefits, including antioxidants and essential oils. Check out this article on Healthline for more information!
Cheese-Stuffed Ciabatta Rolls for a Surprise
For a delightful twist, try making cheese-stuffed ciabatta rolls. Imagine pulling apart a warm roll to reveal gooey, melted cheese inside. You can use a variety of cheeses—mozzarella for a mild flavor, or sharp cheddar for a kick. The process is simple: form the dough into a disk, place a piece of cheese in the center, and then fold the dough over and shape it back into a roll.
These rolls can transform any simple meal into a feast. Serve them alongside a hearty soup or a fresh salad and watch your friends’ eyes light up as they discover the cheesy surprise. Plus, stuffed bread is a fun way to reinvent meals! For tips on cheese choices, visit The Cheese Professor.
Experiment with these variations to make your ciabatta rolls uniquely yours. What flavors inspire you most?
Cooking Tips and Notes for Ciabatta Rolls
Common Pitfalls and How to Avoid Them
When making Ciabatta Rolls, the dough’s hydration can be daunting. A high water content is essential for that signature airy texture, but it can also lead to a sticky mess. To avoid this:
- Use a stand mixer with a dough hook if possible; this makes handling the sticky dough easier.
- Keep your hands and work surface lightly floured.
- If the dough is too wet, don’t panic—just let it rise longer!
Equipment Recommendations for Best Results
To achieve bakery-quality Ciabatta Rolls, consider these essential tools:
- Stand Mixer: A workhorse for kneading your dough to perfection.
- Baking Stone or Steel: This helps to mimic a traditional pizza oven, giving your rolls a beautiful crust.
- Bread Lame or Sharp Razor Blade: For making those characteristic slashes on top.
Don’t forget to check out The Kitchn for more tips on choosing the right baking equipment!
Remember, practice makes perfect. Each batch of Ciabatta Rolls may teach you something new!
Serving Suggestions for Ciabatta Rolls
Delicious spreads and toppings to try
When you think of ciabatta rolls, think beyond the sandwich! These crusty little beauties can be elevated with a variety of spreads and toppings. Here are some mouthwatering ideas:
- Creamy Avocado Spread: Simple avocado, a dash of lemon juice, and salt create a velvety topping that complements the bread’s texture beautifully.
- Herbed Goat Cheese: Spread a layer of tangy goat cheese mixed with fresh herbs for an elegant touch.
- Hummus Variations: From traditional to roasted red pepper, hummus adds a nutritious punch that pairs perfectly with ciabatta.
Feel free to explore different flavors at sites like AllRecipes for more inspiration!
Pairing ideas for your homemade ciabatta rolls
The versatility of these ciabatta rolls shines when paired with the right accompaniments. Here are a few ideas to get you started:
- Turkey Bacon and Spinach: Assemble a delicious sandwich that’s filled with protein and nutrients.
- Chicken Ham with Fresh Veggies: Layer on some chicken ham for a hearty yet light meal, and add crisp lettuce or tomato for freshness.
- Beef Sliders: Use mini ciabatta rolls for sliders, packing flavor into streamlined bites perfect for gatherings.
Consider pairing your rolls with a refreshing cucumber-infused water or a zesty homemade lemonade to round out the meal!
Time Breakdown for Ciabatta Rolls
When embarking on your Ciabatta Rolls journey, it’s important to manage your time wisely. Here’s a quick breakdown:
Preparation time
Getting your ingredients together and mixing everything will take about 20 minutes. This is your moment to savor the process, so enjoy the aroma of flour and yeast!
Rise time
Patience is key here: you’ll want your dough to rise for a solid 1 to 2 hours. It’s during this time that magic happens—your dough transforms, expanding and developing that irresistible texture.
Baking time
Finally, the baking part takes approximately 20-25 minutes. Keep an eye on those rolls, and you’ll be rewarded with golden, crusty delights that are perfect for sandwiches or a side with soup.
For more pro tips and tricks, check out King Arthur Baking to dive deeper into your Ciabatta Rolls experience!
Nutritional Facts for Ciabatta Rolls
Calories per roll
If you’re curious about the caloric content of ciabatta rolls, you’re in for a treat. Each roll typically contains around 150 calories, making them a light yet satisfying addition to your meal. Whether you’re enjoying them as part of a savory sandwich or dipping them in olive oil, these rolls offer just the right amount of energy without weighing you down.
Carbohydrates and protein content
When it comes to carbohydrates, a single ciabatta roll packs approximately 30 grams, giving you a solid carbohydrate boost that can be ideal before an active day. As for protein, these rolls provide about 5 grams, making them a reasonable choice when combined with protein-rich fillings, such as turkey bacon or chicken ham. Want to know more about carb management or balancing macros? Check out reliable resources like Healthline for expert insights. With these nutritional facts in mind, you can enjoy your ciabatta rolls guilt-free!
FAQs about Ciabatta Rolls
Can I make ciabatta rolls without a stand mixer?
Absolutely! If you don’t have a stand mixer, don’t worry—making ciabatta rolls by hand can be just as rewarding. Mix your ingredients in a large bowl, then use a wooden spoon or your hands to combine everything until you achieve a sticky dough. The key is to knead it gently but thoroughly for about 10 minutes, allowing the gluten to develop. This will give you that lovely chewy texture everyone craves.
How do I store leftover ciabatta rolls?
Storing your leftover ciabatta rolls is pretty simple. For short-term storage, just place them in a paper bag at room temperature for up to two days. If you want to keep them fresh for longer, wrap them tightly in plastic wrap or put them in an airtight container. This will help prevent them from going stale. Just be careful—if they get too moist, the crust may soften, which isn’t ideal!
Can I freeze ciabatta rolls for later use?
Yes, you can! Freezing is an excellent way to preserve your ciabatta rolls for future enjoyment. Just make sure they are completely cooled before wrapping them in plastic wrap and placing them in a freezer zip-top bag. They can be stored in the freezer for about three months. When you’re ready to eat them, simply pop them in the oven at 350°F for about 10-15 minutes to revive that crunchy crust.
If you’re curious to learn more about bread preservation or the science of baking, check out resources such as the King Arthur Baking Company for tips and insights. Happy baking!
Conclusion on Homemade Ciabatta Rolls
The joy of making your own ciabatta rolls
Creating your own Ciabatta Rolls is an incredibly rewarding experience. There’s something special about mixing flour, water, and yeast, watching the dough rise, and then transforming it into those beautifully crusty rolls. Not only do they taste better than store-bought options, but you’re also able to customize them to suit your taste. Imagine biting into a warm, crusty roll filled with oozy mozzarella and fresh basil.
Plus, making ciabatta from scratch can be a delightful bonding activity, whether it’s with friends or loved ones. So why not give this recipe a try and bring a touch of Italy to your kitchen! For more tips on baking and recipes, check out King Arthur Baking and Serious Eats.
Ciabatta Rolls: The Best Homemade Recipe You Must Try
Try this incredible recipe for homemade ciabatta rolls that are perfect for any meal.
- Prep Time: 15 minutes
- Cook Time: 25 minutes
- Total Time: 12 hours 40 minutes
- Yield: 12 rolls 1x
- Category: Bread
- Method: Baking
- Cuisine: Italian
- Diet: Vegetarian
Ingredients
- 4 cups all-purpose flour
- 2 cups water
- 2 teaspoons active dry yeast
- 2 teaspoons salt
Instructions
- In a large bowl, mix the flour, yeast, and salt.
- Add water gradually and mix until a wet, sticky dough forms.
- Cover the bowl with a damp cloth and let it rise for about 12 hours.
- Preheat the oven to 450°F (232°C).
- Transfer the dough onto a floured surface and shape it into rolls.
- Let the rolls proof for 30 minutes on a baking sheet.
- Bake for 20-25 minutes until golden brown.
Notes
- For a crispier crust, place a pan with water in the oven while baking.
Nutrition
- Serving Size: 1 roll
- Calories: 150
- Sugar: 0g
- Sodium: 300mg
- Fat: 1g
- Saturated Fat: 0g
- Unsaturated Fat: 0g
- Trans Fat: 0g
- Carbohydrates: 30g
- Fiber: 1g
- Protein: 5g
- Cholesterol: 0mg
Keywords: ciabatta rolls, homemade bread, baking