Introduction to Garlic Bread Rolls
Garlic bread rolls are one of those delightful treats that can elevate any meal, whether it’s a cozy weeknight dinner or a festive gathering with friends. Imagine biting into a warm, buttery roll, infused with the irresistible aroma of garlic and herbs. Not only are these rolls delicious, but they are also surprisingly easy to make at home, adding a personal touch to your culinary repertoire.
Why Garlic Bread Rolls Are a Must-Try at Home
First off, there’s simply no comparison between store-bought versions and homemade garlic bread rolls. When you make them yourself, you have complete control over the ingredients, allowing you to tailor flavors to your preferences. You can opt for vegan butter, add fresh herbs from your garden, or even incorporate a dash of cheese for a gooey surprise. This makes it a versatile recipe that caters to a variety of dietary preferences.
But let’s be real: who doesn’t love fresh bread? According to the American Institute for Cancer Research, whole grains like those found in bread can be beneficial for digestive health, among other advantages. Pairing healthy ingredients with the indulgent flavor of garlic creates the perfect harmony that will have your taste buds singing.
Are you hosting a dinner party? Serving garlic bread rolls is a fantastic way to impress your guests. It shows you care about the little details. Picture this: as your friends arrive, the warm, inviting scent of baking rolls fills the air, and everyone knows they’re in for a treat.
Furthermore, garlic has been celebrated for its numerous health benefits, which can make your rolls not just delightful but beneficial too. A range of studies suggest that garlic may help boost your immune system and support heart health. So, while indulging in these rolls, you can feel good about including a nutritious ingredient.
In summary, garlic bread rolls are not just a side dish; they are a home-cooked hug in any meal. Get ready to put on your apron and try it out—your taste buds will thank you!
If you’re curious to learn more about the benefits of garlic, check out resources like Healthline for further insights. And don’t hesitate to explore various dipping sauces that can accompany your rolls for an extra layer of flavor!
Ingredients for Garlic Bread Rolls
Essential Ingredients for the Perfect Rolls
Creating irresistible garlic bread rolls starts with selecting the right ingredients. Here’s what you need for that flavorful, buttery goodness:
- All-purpose flour: The foundation of your rolls, providing the perfect texture. Aim for high-quality flour to enhance the taste.
- Activated yeast: Essential for that airy, fluffy feel. Make sure it’s fresh! For a great guide on yeast, check out this resource.
- Warm water: This helps activate the yeast. Ensure it’s not too hot—around 110°F is ideal!
- Sugar: Just a pinch to nourish the yeast and balance flavors.
- Salt: Essential for seasoning and strengthening the dough.
- Butter: Melted and mixed into your dough, it adds richness and enhances flavor.
- Garlic: Fresh minced garlic is recommended for the best flavor, but garlic powder can be a quick alternative.
- Herbs: Fresh parsley or Italian seasoning can elevate your rolls, giving them a pleasant herbal note.
Each ingredient plays a crucial role, making these garlic bread rolls an unforgettable addition to your meal.
Step-by-Step Preparation for Garlic Bread Rolls
When the craving for warm, buttery, and aromatic garlic bread rolls strikes, you want a recipe that’s not only delicious but also achievable! Let’s dive into a simple step-by-step preparation that will guide you toward achieving that perfect garlic roll experience. Ready? Let’s get started!
Gather Your Ingredients
First things first, let’s gather everything you need. Here’s a list of ingredients that will make your garlic bread rolls irresistibly tasty:
- Active dry yeast – 1 packet (about 2 ¼ teaspoons)
- Warm water (around 110°F or 43°C) – ½ cup
- Sugar – 1 tablespoon (to activate the yeast)
- All-purpose flour – 3 to 4 cups (more if necessary)
- Salt – 1 teaspoon
- Butter – ½ cup (unsalted, for that delicious garlic butter)
- Garlic cloves – 4 to 5 (fresh is always best!)
- Parsley – 1 tablespoon, chopped (optional for garnish)
- Parmesan cheese – ¼ cup (for extra flavor, optional)
Collecting these ingredients beforehand saves the hassle of scrambling in the kitchen! And if you’re interested in more variations, check out Taste of Home for other flavor additions.
Make the Garlic Butter Mixture
Next up: the star of the show, the garlic butter!
- Melt ½ cup of butter in a small saucepan over low heat.
- Add minced garlic (about 4-5 cloves) to the melted butter and let it simmer gently for a minute or two until fragrant, but be careful not to brown the garlic.
- Once ready, take off the heat and stir in chopped parsley if you’re using it. This mixture will be used later for brushing on the rolls.
The smell of garlic slowly cooking in butter is bound to entice anyone nearby!
Combine Dry Ingredients and Prepare Dough
Now let’s get to the dough!
- In a large bowl, combine 1 packet of active dry yeast, 1 tablespoon of sugar, and ½ cup of warm water. Let it sit for about 5-10 minutes until it becomes foamy. This step indicates your yeast is active.
- In a separate bowl, mix together 3 cups of all-purpose flour and 1 teaspoon of salt. Gradually stir in the yeast mixture until combined.
At this point, you’re well on your way to making your garlic bread rolls!
Knead the Dough
Kneading may seem intimidating at first, but it’s actually quite therapeutic!
- Turn the dough out onto a floured surface and begin to knead gently for about 6-8 minutes, until the dough is smooth and elastic.
- If it feels too sticky, add a little more flour, but be cautious not to overdo it.
Kneading helps develop gluten, which gives your rolls that lovely texture.
Shape the Rolls
Here comes the fun part!
- Once your dough is kneaded, divide it into 12 equal pieces.
- Shape each piece into a smooth ball by tucking the edges under.
- Place them on a greased or parchment-lined baking sheet, leaving enough space in between for rising.
Now you can admire your handiwork while the anticipation builds!
Let Them Rise
Patience is key during this step.
- Cover the rolls with a clean kitchen towel and let them rise in a warm area for about 30-40 minutes, or until they’ve doubled in size.
This is a perfect time to preheat your oven to 375°F (190°C).
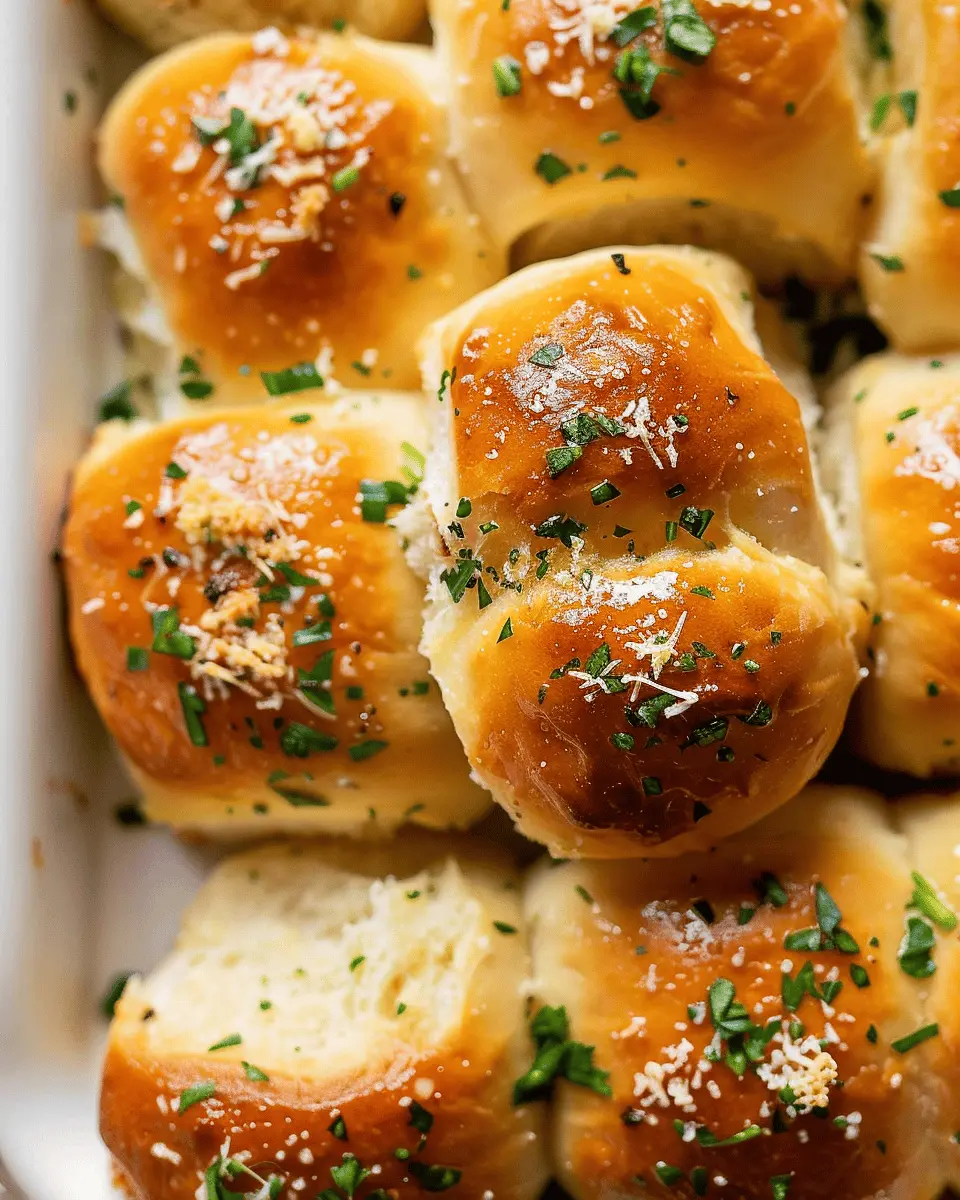
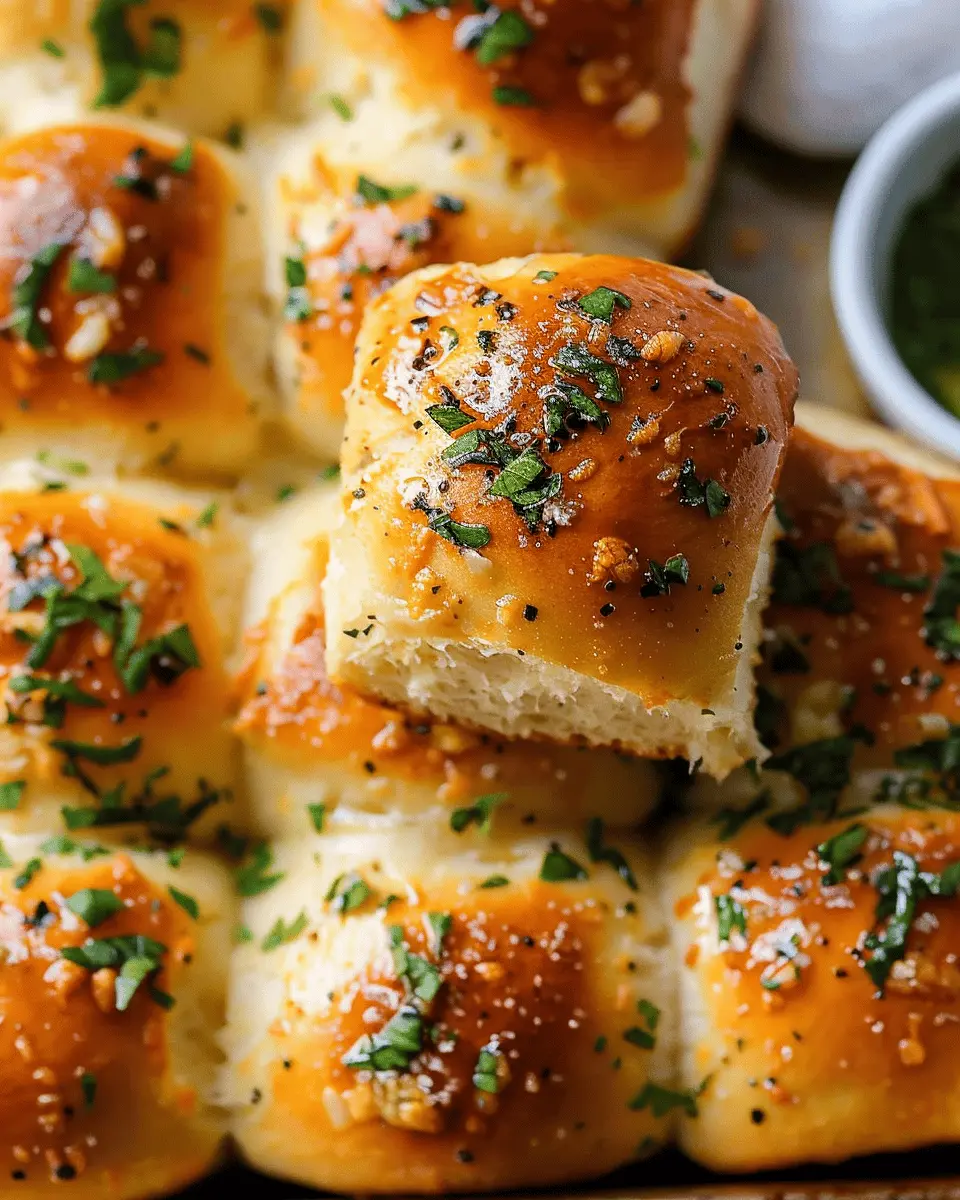
Bake the Rolls to Perfection
Finally, baking day has arrived!
- Brush the top of the risen rolls generously with the prepared garlic butter mixture.
- If you want to add a little texture, sprinkle some grated Parmesan on top.
- Bake for about 15-20 minutes or until they’re golden brown.
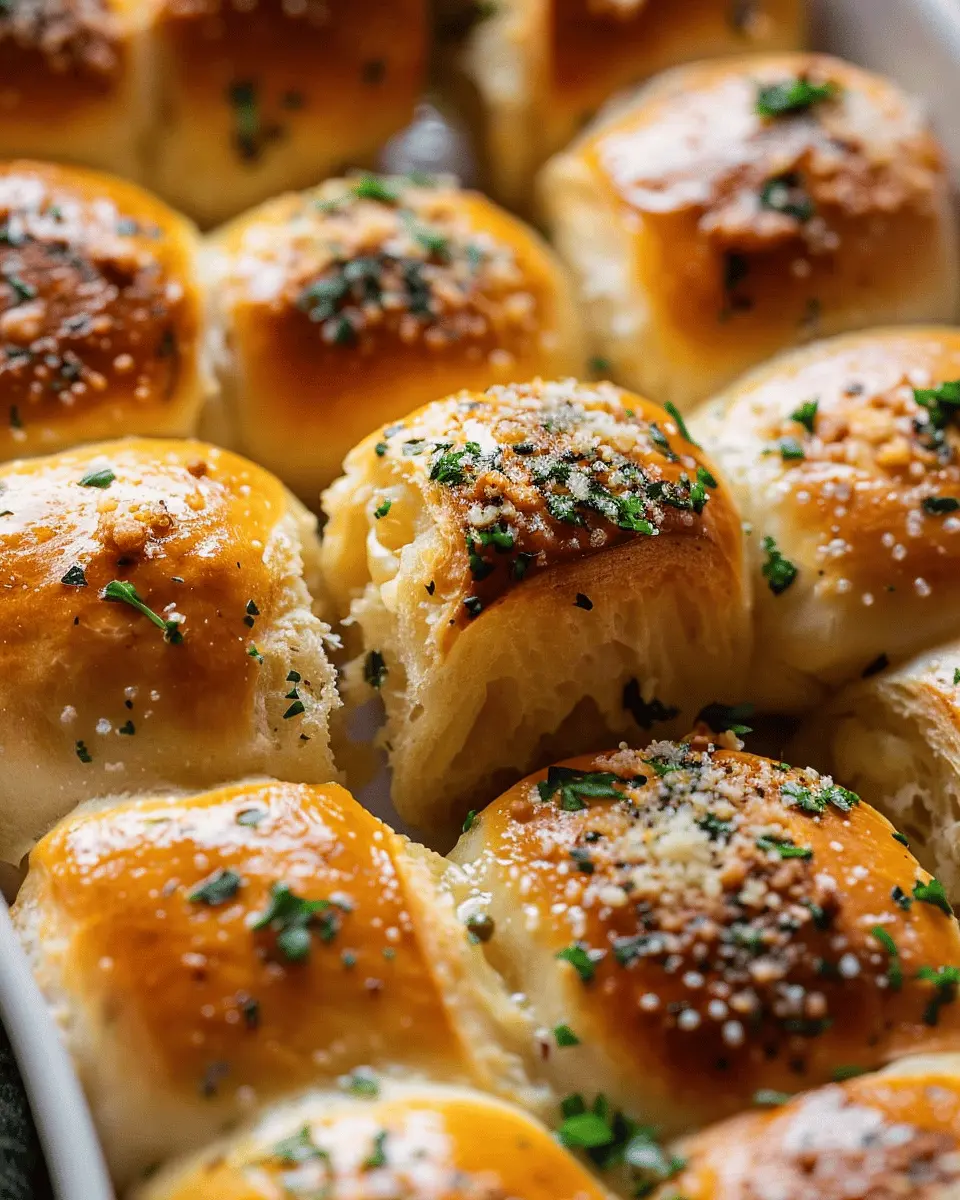
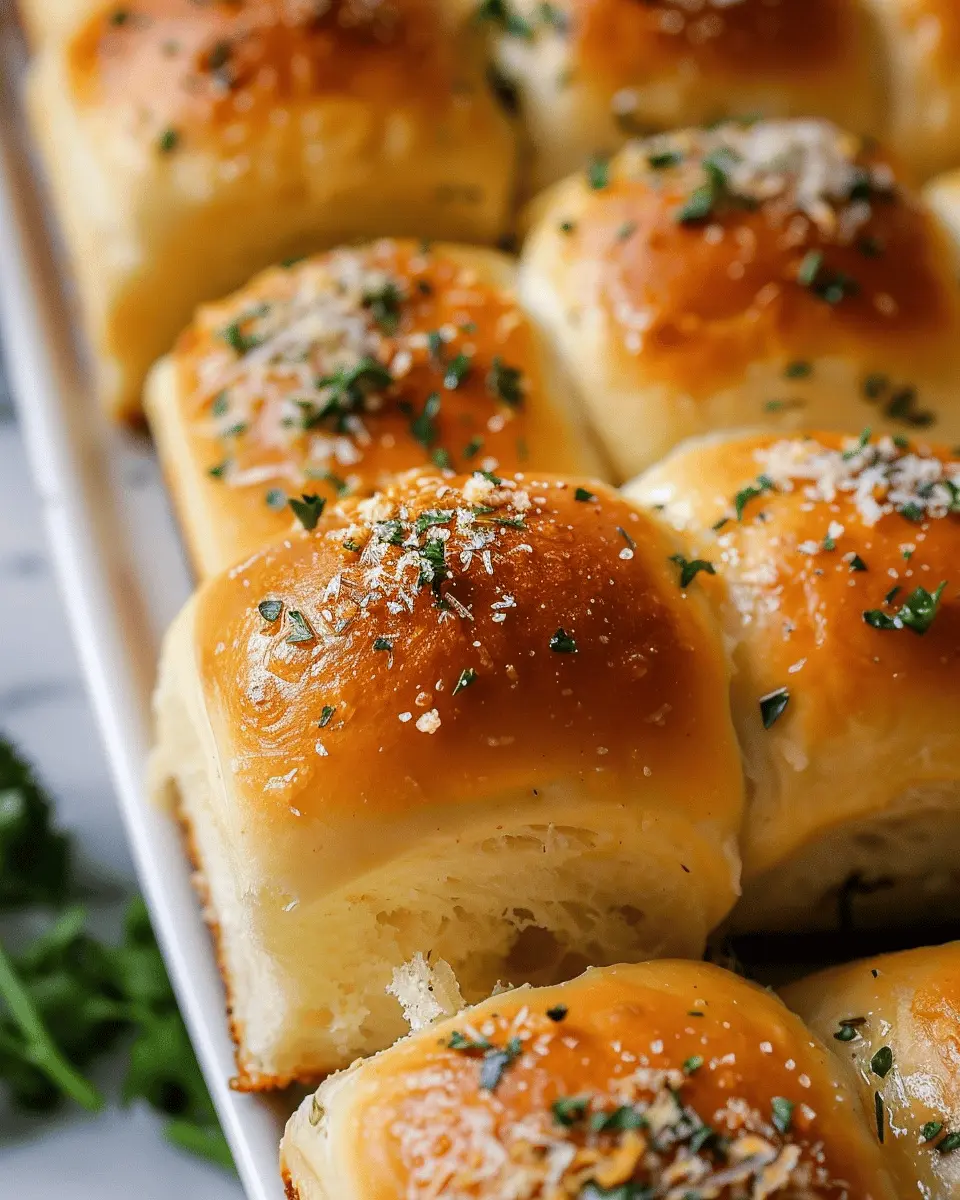
The smell of baking garlic bread rolls wafting through your home will be absolutely irresistible!
Once they come out, brush them with any leftover garlic butter, and sprinkle with a bit more parsley for that fresh touch. Serve these warm with dinner, as appetizers, or simply enjoy them as a snack on their own.
You’ve successfully created delicious garlic bread rolls that are sure to impress, enjoy!
Variations on Garlic Bread Rolls
If you’re a fan of garlic bread rolls, there’s a world of delicious variations waiting for you to explore. Elevating your rolls can be as simple as a tweak here and a twist there. Let’s dig into two crowd-pleasing options.
Herb-Infused Garlic Bread Rolls
Take your rolls to a new level by adding a medley of fresh herbs. A combination of parsley, rosemary, and thyme complements the robust flavor of garlic beautifully.
- What to do: Simply mix finely chopped herbs into your garlic butter before slathering it onto the dough. This not only enhances the flavor but also adds a pop of color to your rolls.
- Extra Tip: Incorporate a bit of grated lemon zest for a refreshing citrus note that works wonders!
If you’re looking to learn more about herb pairings, check out resources like the Herb Society of America for inspiration.
Cheesy Garlic Bread Rolls
Nothing elevates garlic bread rolls quite like cheese. Imagine warm, gooey cheese oozing from every bite.
- What to do: Add shredded cheese, like mozzarella or cheddar, into the roll mixture or place it in the center of each roll before baking. For an even cheesier experience, sprinkle some on top right before they come out of the oven.
- Fun addition: Mixing in a dash of crushed red pepper can give your cheesy rolls an exciting kick!
Experimenting with these variations can transform your traditional garlic bread rolls into a memorable feast. Why not try both and see which one becomes the new favorite in your household?
Happy baking!
Cooking Tips and Notes for Garlic Bread Rolls
Mastering the Dough Consistency
Getting the dough right is crucial for perfect garlic bread rolls. Aim for a soft but slightly tacky consistency—it shouldn’t stick excessively to your hands or the bowl. An excellent trick is to check the windowpane effect: stretch a small piece of dough; if it holds together without breaking, you’re golden!
For a flavor boost, consider adding freshly chopped herbs like parsley or basil to the dough. They complement the garlic wonderfully and add a touch of freshness.
How to Prevent Over-Browning
To avoid that dreaded over-browning, keep a close eye on your rolls as they bake. Every oven is different, so start checking them a few minutes before the recommended time. If the tops are browning too quickly, cover them loosely with aluminum foil. This nifty trick helps maintain a gorgeous golden color while ensuring they’re cooked perfectly inside.
Did you know that garlic can be quite versatile? Pair your rolls with a simple dipping sauce like olive oil and balsamic vinegar. It’s an easy addition that elevates your bread experience.
For more expert tips on bread-making, you can check out resources like the Bread Baker’s Guild. Happy baking!
Serving Suggestions for Garlic Bread Rolls
Perfect Pairings with Soups and Salads
Looking to elevate your dining experience? Garlic bread rolls are a fantastic accompaniment to a cozy bowl of tomato basil soup or a zesty mixed greens salad. The buttery garlic flavors complement the acidity of the tomatoes and the freshness of the salad beautifully. Try serving them with a comforting minestrone or a heartwarming chicken noodle soup. You can even turn these rolls into a delightful crouton substitute—just tear them into pieces and toss them into your salad for an added crunch.
Creative Ways to Serve with Dips
Dips offer another exciting way to serve your garlic bread rolls. Think about pairing them with creamy spinach and artichoke dip or a tangy sun-dried tomato hummus. If you’re feeling adventurous, whip up a quick homemade pesto for a burst of flavor that’s sure to impress. Don’t forget, you can also use them as a delightful base for bruschetta—just top the sliced rolls with your favorite tomato and herb mix. How’s that for a savory treat? For more dip ideas, check out Epicurious for inspiration and recipes.
Time Breakdown for Garlic Bread Rolls
Preparation Time
Getting your garlic bread rolls started is quick and simple, taking approximately 20 minutes. You’ll mix your ingredients, knead the dough, and get everything ready to rise. Remember, a great dough makes for amazing rolls.
Rising Time
Patience is a virtue, especially when it comes to yeast dough. The rising time for your garlic bread rolls is about 1 hour. This is when the dough develops that airy texture we all love.
Baking Time
Once the dough has risen beautifully, baking will take around 15-20 minutes. Keep an eye on them; you want a lovely golden-brown finish that’s absolutely irresistible.
Total Time
In total, you’re looking at approximately 1 hour and 40 minutes from start to finish. The best part? You can chat with friends or prepare a delicious salad while you wait! If you want to explore more culinary adventures, check out some great tips on kneading at King Arthur Baking. Happy baking!
Nutritional Facts for Garlic Bread Rolls
Calories per Roll
When you’re savoring a warm, buttery garlic bread roll, understanding its caloric value can help you enjoy it guilt-free. Each roll typically contains around 150-200 calories, making it a satisfying yet reasonable addition to your meal.
Carbohydrates and Protein Content
These delightful rolls primarily offer carbohydrates, providing about 30-35 grams per roll. They do pack a small protein punch as well, containing about 4-5 grams. They’re perfect for a quick energy boost during your busy day!
Key Vitamins and Minerals
Garlic bread rolls are more than just delicious; they also contain some health benefits! These rolls are rich in essential vitamins and minerals, such as:
- B Vitamins: Support energy metabolism.
- Minerals: Including calcium and iron, which are vital for bone health and oxygen transportation.
For more on the nutritional benefits of garlic, check out the National Center for Biotechnology Information. Enjoy your garlic bread rolls knowing they’re more than just a tasty treat!
FAQs About Garlic Bread Rolls
Can I Make These Rolls in Advance?
Absolutely! You can prep your garlic bread rolls ahead of time to save on stress. If you want to enjoy fresh rolls without the fuss, prepare the dough, shape it, and then place it in the freezer before the second rise. Just thaw them in the refrigerator overnight or let them rise at room temperature for a couple of hours before baking. This way, you can have warm, garlicky goodness any day of the week!
What Should I Do if My Dough Doesn’t Rise?
It can be a bit disheartening if your garlic bread rolls dough doesn’t rise like it should. First, check your yeast’s freshness; expired yeast is a major culprit. Always ensure your water is warm (not hot!) when activating the yeast—around 110°F works best. If it still doesn’t rise after about an hour, don’t panic! You can try moving your dough to a warmer spot, like near a warm oven or heater.
Can I Use Whole Wheat Flour Instead?
Yes, you can! Substituting whole wheat flour for all-purpose flour in your garlic bread rolls recipe adds a hearty touch and boosts the nutritional value. Just keep in mind that whole wheat flour can absorb more liquid, so you may need to adjust the wet ingredients slightly. A good rule of thumb is to use about 25% less whole wheat flour than all-purpose for the same texture and rise.
For more detailed tips on yeast bread, consider exploring resources from the King Arthur Baking Company or The Bread Kitchen. Happy baking!
Conclusion on Garlic Bread Rolls
Why These Rolls Are a Game Changer for Your Homemade Meals
Garlic bread rolls are truly a culinary masterpiece. Imagine pulling these fluffy creations from the oven, their rich aroma filling your kitchen. They’re perfect for cozy dinners, casual gatherings, or even a spontaneous movie night with friends.
These rolls not only elevate your meal experience but are incredibly versatile. You can enjoy them with pasta, as a side to soups, or even as a simple snack with delectable dips. Plus, they’re easy to make, allowing you to impress your guests without a culinary degree. If you’re looking for a delicious addition that will leave everyone asking for the recipe, these garlic bread rolls are a must-try!
For more inspiration on pairing with other dishes, check out resources from EatingWell for healthy meal ideas or Serious Eats for advanced cooking techniques.
Garlic Bread Rolls: The Best Homemade Treat for Any Meal

Discover the perfect garlic bread rolls that elevate any meal, with a crispy outside and soft inside.
- Prep Time: 15 minutes
- Cook Time: 20 minutes
- Total Time: 1 hour 35 minutes
- Yield: 12 rolls 1x
- Category: Bread
- Method: Baking
- Cuisine: Italian
- Diet: Vegetarian
Ingredients
- 4 cups all-purpose flour
- 2 teaspoons instant yeast
- 1 teaspoon salt
- 1 tablespoon sugar
- 1 1/2 cups warm water
- 1/2 cup unsalted butter, melted
- 4 cloves garlic, minced
- 1/4 cup fresh parsley, chopped
- 1/2 teaspoon dried oregano
Instructions
- In a large bowl, combine flour, yeast, salt, and sugar.
- Add warm water and mix until a dough forms.
- Knead the dough on a floured surface for about 10 minutes.
- Place the dough in a greased bowl, cover it, and let it rise for 1 hour.
- Punch down the dough, then divide it into small balls.
- Mix melted butter, garlic, parsley, and oregano in a bowl.
- Dip each dough ball in the garlic butter mixture and place on a baking sheet.
- Let the rolls rise again for 30 minutes before baking.
- Bake at 375°F (190°C) for 15-20 minutes until golden brown.
Notes
- For extra flavor, sprinkle cheese on top before baking.
- Serve warm for the best taste.
Nutrition
- Serving Size: 1 roll
- Calories: 150
- Sugar: 1g
- Sodium: 200mg
- Fat: 7g
- Saturated Fat: 4g
- Unsaturated Fat: 2g
- Trans Fat: 0g
- Carbohydrates: 18g
- Fiber: 1g
- Protein: 3g
- Cholesterol: 15mg
Keywords: Garlic Bread Rolls, Homemade Bread, Easy Garlic Rolls