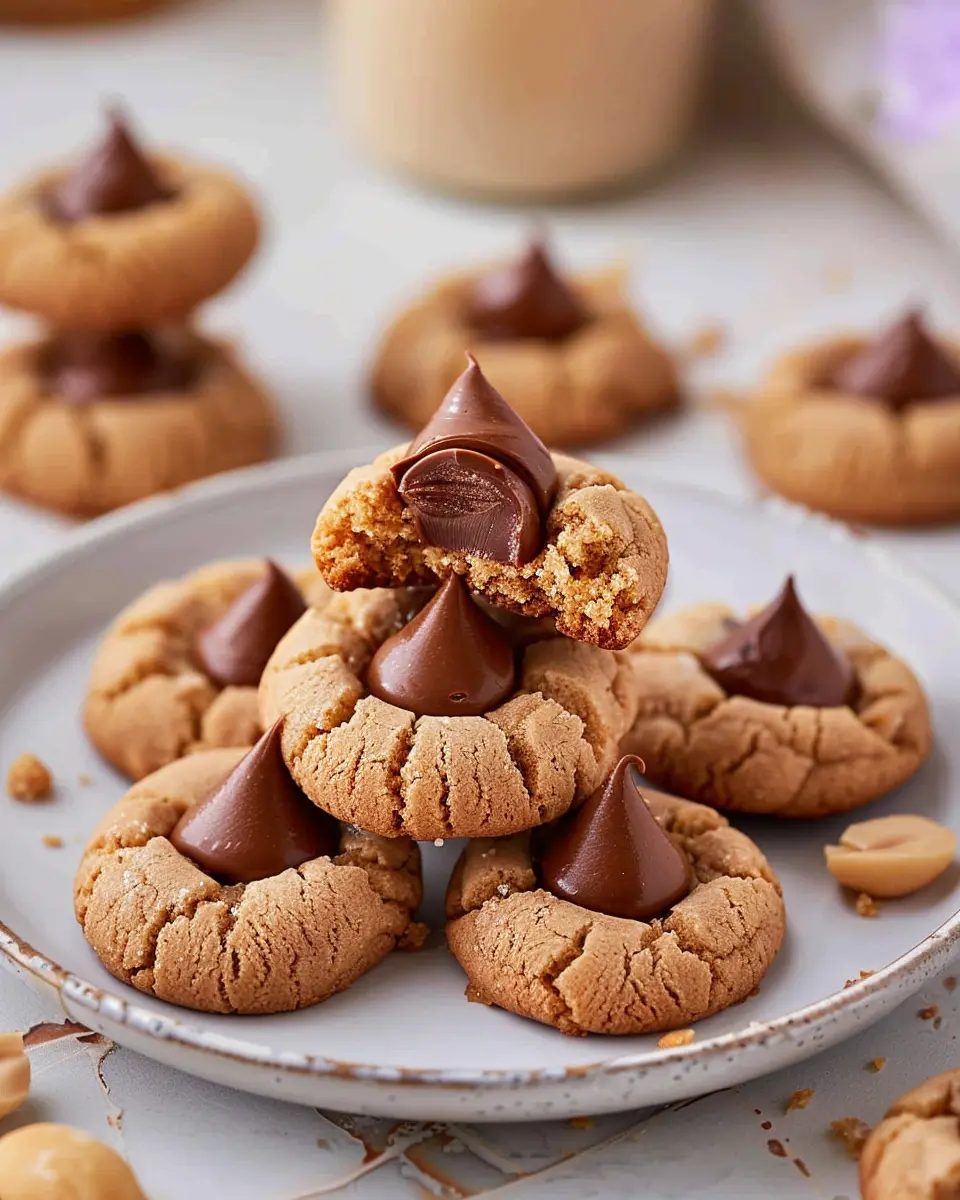
Introduction to Peanut Butter Blossom Cookies
There’s something truly magical about Peanut Butter Blossom Cookies that brings a wave of nostalgia. Perhaps it’s the perfect blend of sweet and salty that makes every bite a delightful experience. For many, these cookies represent cherished memories of family gatherings, holiday celebrations, or simple baking days at home. Did your grandmother have a special recipe tucked away in her kitchen? Mine did, and I can still picture her rolling the dough and adding those iconic chocolate kisses.
Why Peanut Butter Blossom Cookies are a Nostalgic Favorite
Peanut Butter Blossom Cookies are more than just treats; they evoke powerful memories and connections to our past. They remind us of the joy and warmth that comes from baking. As kids, we eagerly anticipated that moment when our parents would pull a fresh tray out of the oven, and the sweet aroma would fill the air.
These cookies not only taste amazing but also carry a rich history. Believed to have gained popularity in the 1950s, Peanut Butter Blossom Cookies were an inventive twist on traditional peanut butter cookies, topped with a chocolate kiss, which added an element of fun and surprise. If you’re curious about the history of baking and its tie to childhood moments, check out resources from the National Culinary Museum.
Baking isn’t just about the end product; it’s about the connections we create along the way. Whether you’re baking for yourself or sharing with friends, these cookies have a way of bringing people together. So maybe you’re planning a gathering or simply looking for a weekend project—these delightful cookies are sure to impress.
And let’s not forget the ultimate combination: a rich, roasted peanut flavor complemented by the smooth chocolate that adds just the right amount of sweetness. Together, they create a texture and taste that makes your taste buds dance.
Now that you’re feeling the nostalgia, why not give them a try? Follow along as we dive into the easy steps to make your very own Peanut Butter Blossom Cookies. They might just become your new favorite recipe to pass down for generations to come!
Ingredients for Peanut Butter Blossom Cookies
When whipping up a batch of Peanut Butter Blossom Cookies, you want the best ingredients to achieve that perfect chewy texture and delightful flavor. Here’s what you’ll need:
- 1 cup creamy peanut butter: The star of the show! Opt for a natural brand without added sugar for a healthier twist.
- 1 cup granulated sugar: This sweetener balances the richness of the peanut butter.
- 1 cup packed brown sugar: Adding this will enhance the flavor profile and bring moisture to your cookies.
- 2 large eggs: Vital for binding the ingredients together and adding fluffiness.
- 1 teaspoon vanilla extract: A splash of this aromatic essence rounds out the flavors beautifully.
- 2 cups all-purpose flour: Essential for structure, make sure to spoon it lightly into the measuring cup for accuracy.
- 1 teaspoon baking soda: Provides leavening, helping your cookies rise.
- 1/2 teaspoon salt: A pinch adds depth to the sweet flavors.
- Chocolate kisses: To top it all off, these are a must for that signature chocolate-peanut butter combo.
If you’re looking for tips on how to customize these cookies, check out this guide on baking basics for some helpful insights!
Preparing Peanut Butter Blossom Cookies
Peanut Butter Blossom Cookies are a timeless favorite that not only satisfy cravings but also bring a wave of nostalgia. Whether you’re a baking novice or a seasoned pro, this step-by-step guide will help you create these delicious treats effortlessly. Let’s get started!
Gather Your Ingredients
Before diving into baking, ensure you have all your ingredients ready. Here’s what you’ll need:
- 1 cup creamy peanut butter
- ½ cup unsalted butter, softened
- 1 cup granulated sugar
- ½ cup brown sugar, packed
- 1 large egg
- 2 ½ cups all-purpose flour
- 1 teaspoon baking soda
- A pinch of salt
- Granulated sugar for decoration
- 36 chocolate kisses (use your favorite!)
Having everything on hand makes the process smoother and more enjoyable. Plus, fewer trips to the pantry mean more time to enjoy those warm cookies!
Cream the Peanut Butter and Butter
Start by creaming together the peanut butter and softened butter in a large mixing bowl. You can use an electric mixer for convenience, or a wooden spoon if you prefer a good workout. The goal is to get a smooth, homogenous mixture. This step is crucial because it helps to evenly distribute the fats, leading to a richer flavor and desirable texture.
Beat in the Sugars and Egg
Next, it’s time to sweeten things up! Gradually add the granulated sugar and brown sugar to your creamed mixture, beating until it’s fluffy and well-combined. Then, crack in that large egg. Did you know that eggs act as a binding agent in cookies? They help integrate all your ingredients while adding moisture. Keep mixing until everything is evenly combined. If you prefer a bit of depth in flavor, consider using a high-quality peanut butter, as it can significantly enhance the taste profile of your Peanut Butter Blossom Cookies.
Add Flour and Baking Soda
Now, let’s get down to business. In a separate bowl, whisk together the all-purpose flour, baking soda, and a pinch of salt. Gradually add this dry mixture to your wet ingredients, stirring gently until the dough comes together. Avoid over-mixing at this point; you want those cookies to remain soft and chewy!
For a fun twist on textures, think about adding in some chopped peanuts or chocolate chips for extra crunch and sweetness.
Shape the Cookies and Coat in Sugar
Once your dough is ready, it’s time to shape the cookies. Scoop out around 1-inch balls of dough and roll them in granulated sugar. This not only adds a delightful sparkle but also helps create a wonderful crust once baked. If you’d like your cookies to have a more rustic look, you can leave them a bit uneven and freeform.
Bake and Press in the Chocolate Kisses
Finally, it’s time for the moment of truth: baking! Preheat your oven to 350°F (175°C). Arrange the cookie balls on a baking sheet lined with parchment paper, giving them some space to spread out during baking. Pop them in the oven and bake for about 10-12 minutes, or until the edges are lightly golden.
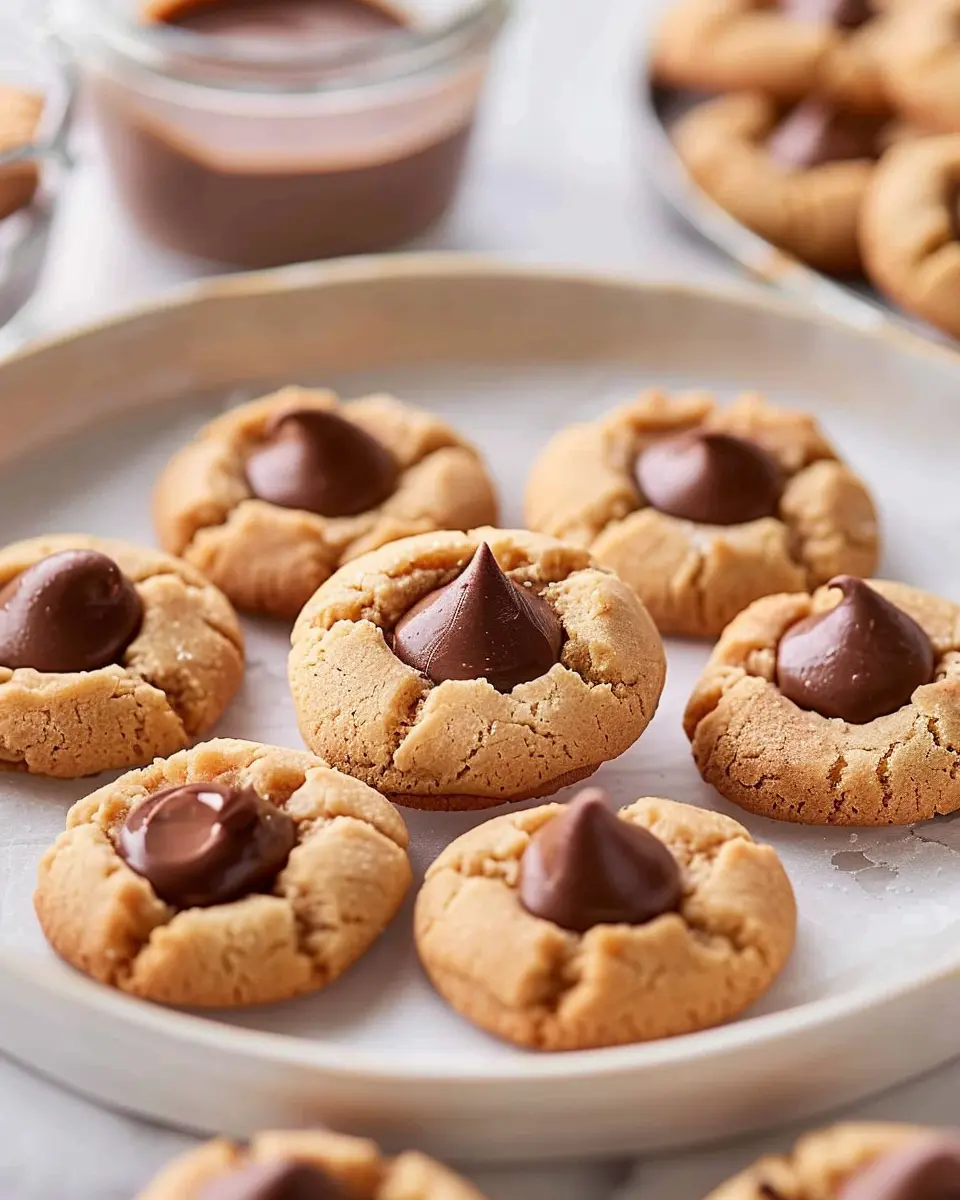
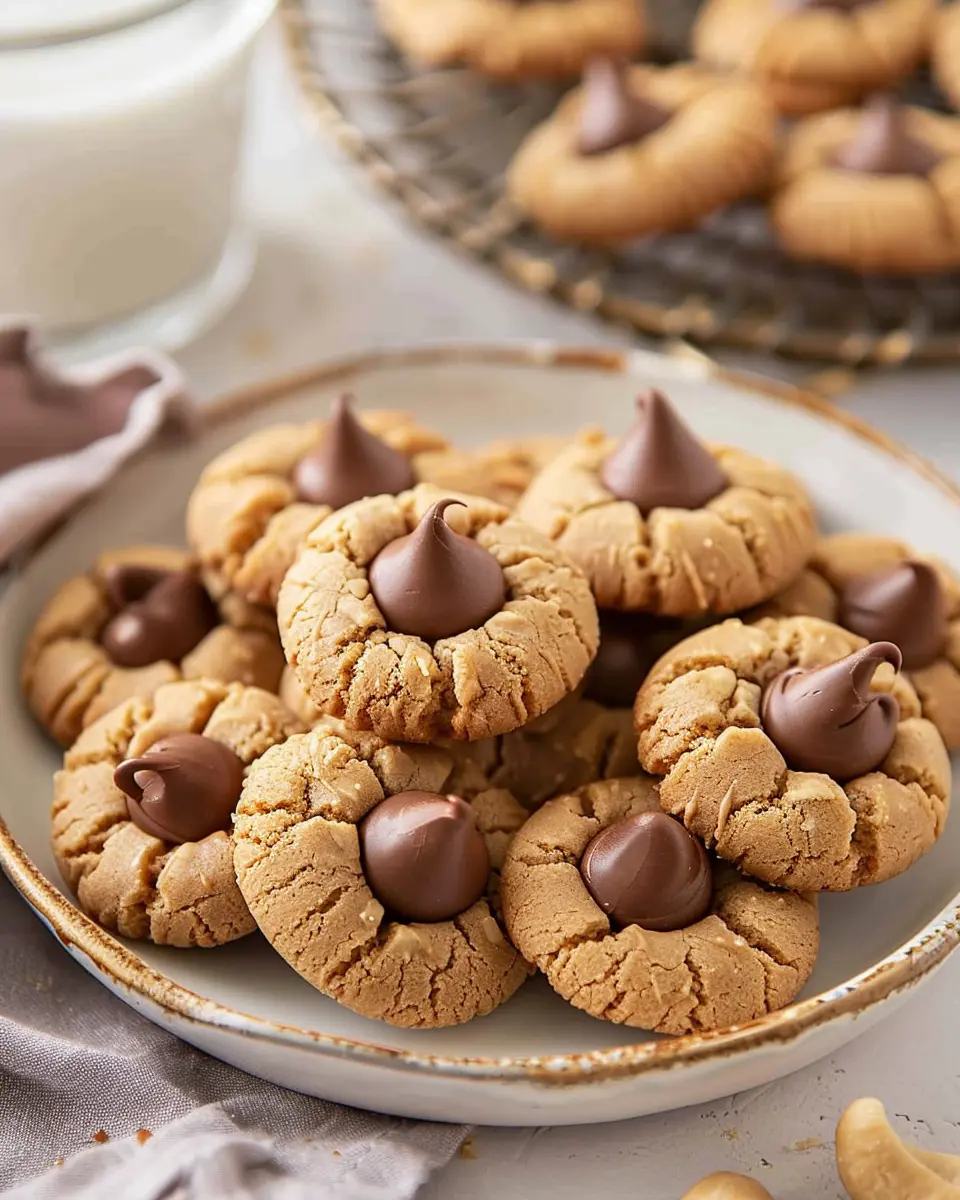
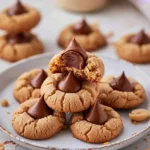
Now for the fun part! As soon as you pull them out of the oven, press a chocolate kiss gently into the center of each cookie. The cookies will crack a bit, which is perfectly normal. Allow them to cool a bit on the baking sheet before transferring them to a wire rack to cool completely.
And there you have it—your own batch of Peanut Butter Blossom Cookies! They are perfect for sharing with friends, family, or just enjoying all by yourself with a glass of cold milk. What’s your favorite way to enjoy these cookies? Do you keep them classic or add in your unique spin?

Variations on Peanut Butter Blossom Cookies
Classic Peanut Butter Blossoms with a Twist
Peanut Butter Blossom Cookies are a timeless favorite, but why not shake things up a bit? One delightful variation is to experiment with the type of chocolate you use. Instead of traditional Hershey’s kisses, try using dark chocolate or sea salt caramel chocolates for a rich, indulgent flair. You can also add a sprinkle of sea salt on top for that sweet-and-salty combination that is impossible to resist.
Another fun twist is adding a hint of flavor! Incorporating ingredients like vanilla extract or a dash of espresso powder can elevate the classic taste. For an even richer experience, consider using chunky peanut butter for added texture. Curious about other flavor enhancements? Check out this article on flavor pairings to inspire your creativity.
Gluten-Free Peanut Butter Blossom Options
For those with dietary restrictions, you can still enjoy delicious Peanut Butter Blossom Cookies! Simply swap the all-purpose flour with a gluten-free flour blend. Many brands are formulated to provide a similar taste and texture. Choose an option that includes xanthan gum for that perfect chewy bite.
Additionally, consider experimenting with nut flours like almond flour, which adds a unique flavor profile while keeping your cookies gluten-free. According to recent studies, alternatives like almond and coconut flour can help lower the carb count, making your treats a bit healthier too. If you’re unsure about gluten-free baking, resources like Gluten-Free Living offer great tips and recipes to help you along the way.
By exploring these variations, you can create countless delicious memories around the classic Peanut Butter Blossom Cookies. Happy baking!
Baking Notes for Peanut Butter Blossom Cookies
Tips for Achieving the Perfect Texture
When it comes to creating Peanut Butter Blossom Cookies, texture is key to elevating this classic treat. Here are some essential tips to ensure your cookies come out perfectly soft and chewy:
-
Choose the Right Peanut Butter: Opt for creamy natural peanut butter without added sugar or oil. This will give your cookies a smooth texture while allowing the nutty flavor to shine. Check out Why Natural Peanut Butter Is Best for more insights.
-
Chill the Dough: Allowing your cookie dough to chill for at least 30 minutes before baking will help prevent spreading and result in thicker, chewier cookies.
-
Oven Temperature: Always preheat your oven to the correct temperature. An oven thermometer can help ensure accuracy; even a few degrees can vastly impact cookie texture!
-
Don’t Overbake: Remove your cookies from the oven just as the edges begin to turn golden. They will continue to cook on the baking sheet after being taken out.
Baking Peanut Butter Blossom Cookies is not just about following a recipe; it’s an adventure in creating nostalgia with a delicious twist! Happy baking!
Serving suggestions for Peanut Butter Blossom Cookies
Creative ways to enjoy your cookies
Peanut Butter Blossom Cookies are not only delightful on their own but can also serve as a tasty base for creative concoctions. Here are some fun ways to elevate your cookie experience:
-
Ice Cream Sandwiches: Sandwich your favorite ice cream between two Peanut Butter Blossom Cookies for a dreamy treat. Consider flavor pairings like vanilla, chocolate, or even a bold coffee ice cream!
-
Cookie Crumbles: Crumble the cookies over pancakes or waffles for a sweet breakfast twist. Drizzle with maple syrup for an irresistible morning delight.
-
Dip & Decorate: Melt some chocolate and dip half of each cookie for a decadent touch. Sprinkle with crushed nuts or colorful sprinkles to make them extra festive for gatherings.
-
Gifting: Package a dozen of your Peanut Butter Blossom Cookies in a decorative box and add a handwritten note. This personal touch makes for a heartfelt gift that’s perfect for any occasion.
By exploring these serving suggestions, you’ll not only satisfy your sweet tooth but also impress friends and family with your creativity! For more ideas on cookie pairings, check out resources from the National Peanut Board.
Tips for Making Perfect Peanut Butter Blossom Cookies
Use Room Temperature Ingredients
When baking Peanut Butter Blossom Cookies, starting with room temperature ingredients is key. This ensures a smooth mixing process and a consistently fluffy texture. Butter, eggs, and even the peanut butter should be left out for about 30 minutes before you begin. This little trick can significantly enhance the overall taste and mouthfeel of your cookies.
Measuring Flour Correctly
How you measure flour can make or break your cookies. Instead of scooping directly from the bag, use the spoon-and-level method. This involves spooning flour into your measuring cup and leveling it off with a knife. Proper measurement can prevent your dough from being too dense, resulting in those perfect chewy centers of your Peanut Butter Blossom Cookies. For a deeper dive into the science of baking, check out this informative guide on flour measurement techniques from the King Arthur Baking Company.
Involving Family in the Baking Process
Baking is always more fun when you share the experience. Get your family involved—whether it’s mixing the dough, rolling the balls, or unwrapping the chocolate kisses. This not only creates lasting memories but can also help people learn about baking fundamentals. Plus, it’s a fantastic way to bond over delicious treats!
By following these tips, you’re on your way to creating perfect Peanut Butter Blossom Cookies that everyone will love. Happy baking!
Time details for Peanut Butter Blossom Cookies
When you’re ready to whip up a batch of Peanut Butter Blossom Cookies, knowing your time commitment is essential to a smooth baking experience. Here’s what to expect:
Preparation time
The preparation time for these delightful cookies is approximately 15 minutes. This includes gathering your ingredients and forming the cookie dough, so make sure to have everything ready to go!
Baking time
Once your dough is ready, the baking time is about 10–12 minutes. Keep an eye on them to ensure that they’re perfectly golden but not overcooked.
Total time
In total, you’ll need around 30 minutes from start to finish. Whether for a treat or a cozy gathering, these cookies are a quick and satisfying option! If you’re curious about tips and tricks for perfecting cookie recipes, consider checking sources like Serious Eats or Bon Appétit for more insights. Happy baking!
Nutritional information for Peanut Butter Blossom Cookies
When it comes to enjoying Peanut Butter Blossom Cookies, knowing their nutritional profile can help you indulge wisely. Here’s what you need to know:
Calories
Each cookie packs about 90-100 calories, making it a delightful treat without compromising your daily intake.
Carbohydrates
These cookies contain roughly 12-15 grams of carbohydrates per serving. They strike a balance by providing just enough sweetness alongside the rich peanut butter flavor.
Protein
With approximately 3 grams of protein per cookie, Peanut Butter Blossom Cookies offer a small protein boost. This can be particularly satisfying after a long day at work or during some downtime.
For more detailed insights on cookie nutrition and how it fits into a balanced diet, consider visiting resources like Healthline and MyFitnessPal. Knowing how to enjoy treats like these can help elevate your baking game, while still keeping health in check!
FAQs about Peanut Butter Blossom Cookies
Can I use natural peanut butter?
Absolutely! Using natural peanut butter can give your Peanut Butter Blossom Cookies a wholesome touch. Just keep in mind that the consistency may differ. Natural peanut butter is often looser than processed varieties, so you might need to adjust the flour slightly to compensate. If the dough feels too sticky, add a tablespoon of flour at a time until it reaches the right consistency.
How do I store leftover cookies?
To keep your Peanut Butter Blossom Cookies fresh, store them in an airtight container at room temperature. They can last for about a week—if they last that long! For added moisture retention, you can place a piece of bread in the container, which will help keep your cookies soft. For best practices on food storage, check out this resource from the USDA.
Can I freeze peanut butter blossom cookies?
Yes, you can definitely freeze your Peanut Butter Blossom Cookies! To do this, let them cool completely, and then place them in a single layer on a baking sheet. Once frozen, transfer them to a freezer-safe bag, ensuring to remove as much air as possible. They can be stored this way for up to three months. When you’re ready to enjoy them, simply thaw at room temperature or pop them in a preheated oven to warm up.
Need more cookie inspiration? Check out our favorite cookie recipes here for ideas that satisfy every sweet tooth!
Conclusion on Peanut Butter Blossom Cookies
In summary, Peanut Butter Blossom Cookies are more than just treats; they evoke nostalgic memories of baking with loved ones. The blend of rich peanut butter and the delightful surprise of a chocolate kiss creates a harmonious flavor that is hard to resist. Whether you’re perfecting your baking skills or simply indulging in a sweet craving, these cookies are a fabulous choice. Plus, they’re perfect for gatherings, holiday celebrations, or a cozy night in. So roll up your sleeves and share this delicious recipe with friends. For more baking tips and fun recipes, check out King Arthur Baking for inspiration. Happy baking!
Peanut Butter Blossom Cookies: Easy Treats That Delight Everyone
A delightful recipe for Peanut Butter Blossom Cookies that are easy to make and loved by everyone.
- Prep Time: 15 minutes
- Cook Time: 12 minutes
- Total Time: 27 minutes
- Yield: 48 cookies 1x
- Category: Dessert
- Method: Baking
- Cuisine: American
- Diet: Vegetarian
Ingredients
- 1 cup creamy peanut butter
- 1 cup granulated sugar
- 1 cup brown sugar, packed
- 2 large eggs
- 1 teaspoon vanilla extract
- 2 cups all-purpose flour
- 1 teaspoon baking soda
- 1/2 teaspoon salt
- 48 chocolate kisses
Instructions
- Preheat the oven to 350°F (175°C).
- In a mixing bowl, combine peanut butter, granulated sugar, brown sugar, eggs, and vanilla extract. Mix until smooth.
- Add flour, baking soda, and salt. Mix until combined.
- Shape dough into 1-inch balls and place on a baking sheet.
- Bake for 10 minutes, remove from oven, and immediately press a chocolate kiss into the center of each cookie.
- Return to the oven for an additional 2 minutes.
- Let cool on a wire rack.
Notes
- For a twist, try using different flavored chocolate or candies.
- Ensure cookies are placed at least 2 inches apart on the baking sheet.
Nutrition
- Serving Size: 1 cookie
- Calories: 100
- Sugar: 10g
- Sodium: 50mg
- Fat: 5g
- Saturated Fat: 1.5g
- Unsaturated Fat: 3g
- Trans Fat: 0g
- Carbohydrates: 14g
- Fiber: 1g
- Protein: 2g
- Cholesterol: 10mg
Keywords: Peanut Butter Blossom Cookies, Easy Cookies, Dessert, Cookies