Introduction to Red Velvet Cake
What is Red Velvet Cake and its Origins?
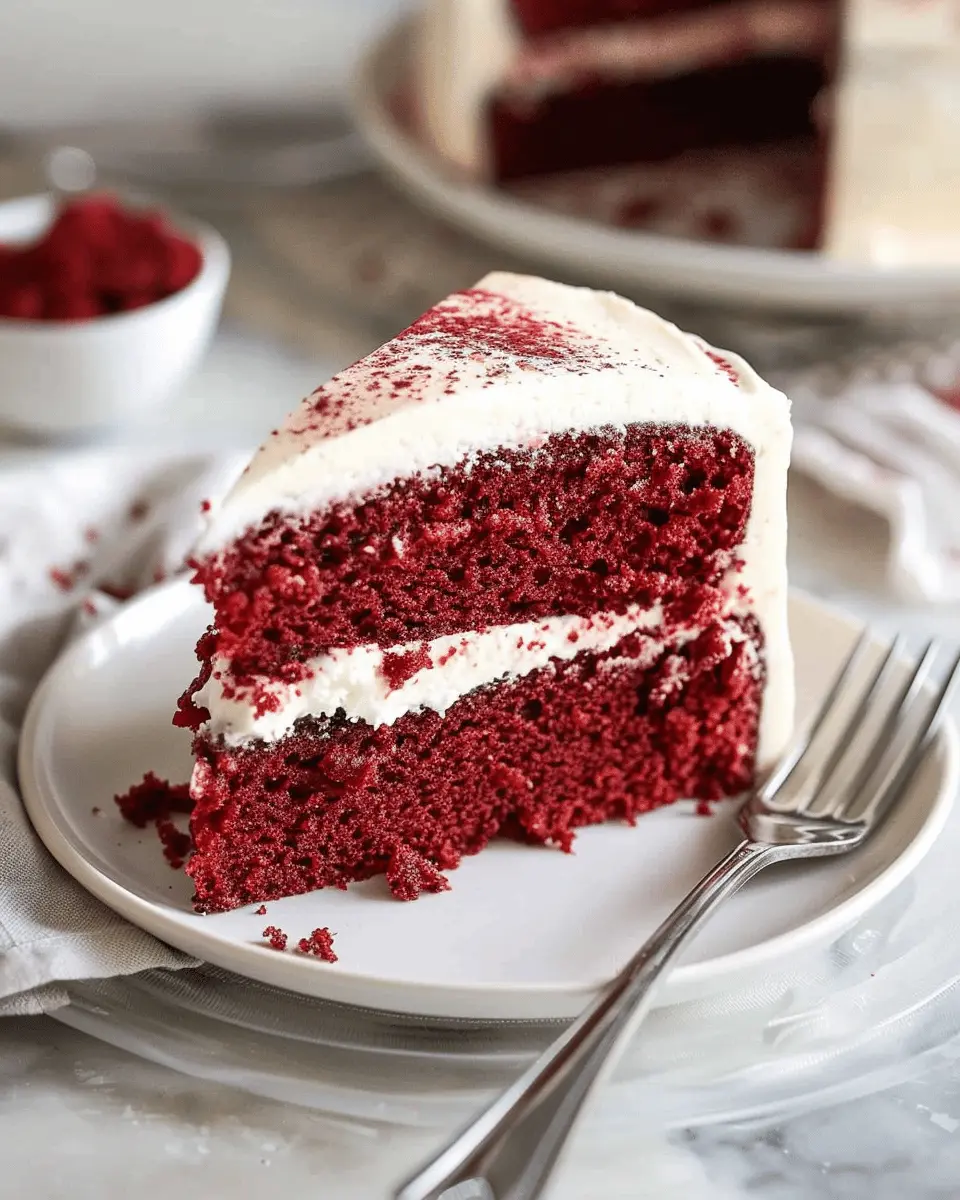
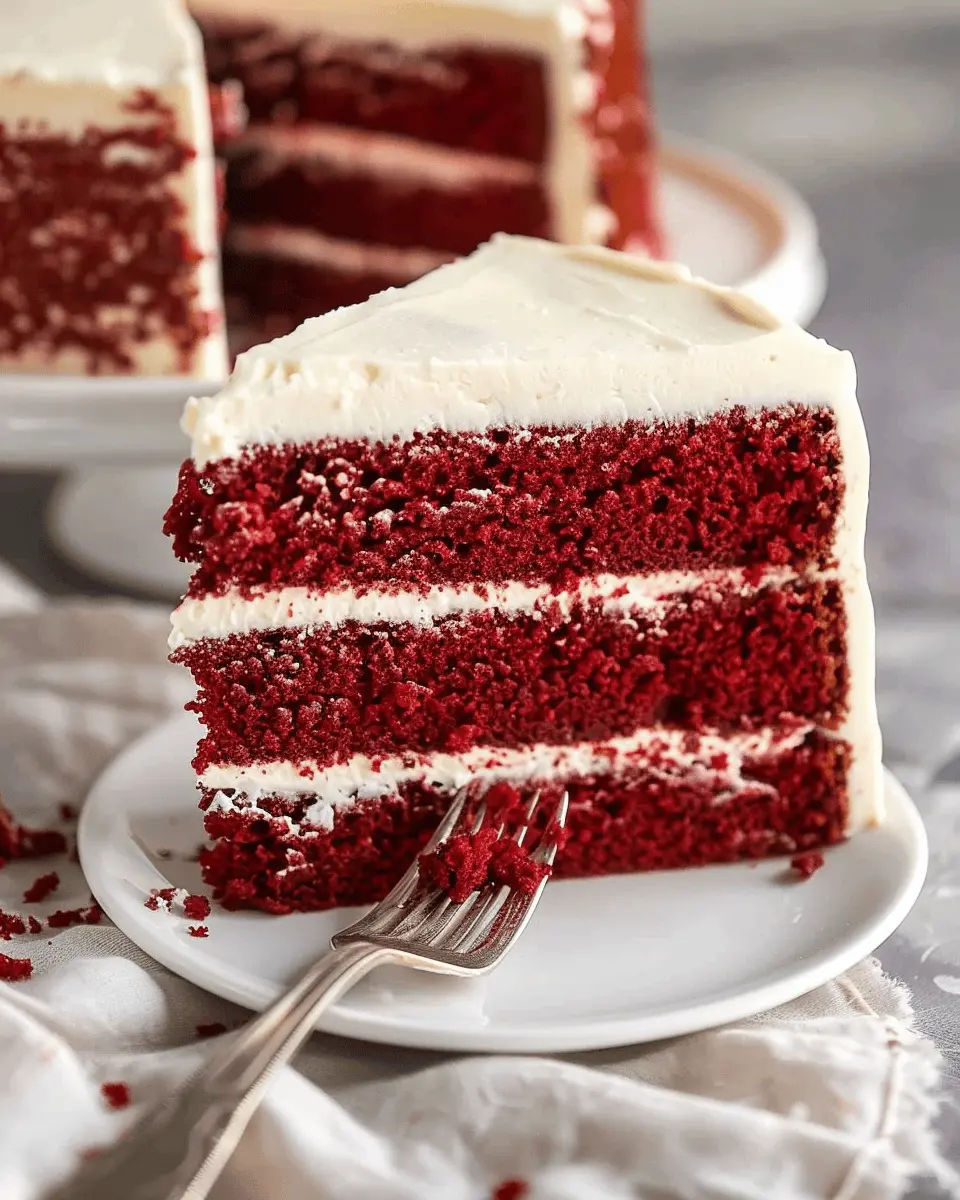
Red velvet cake is not just a feast for the eyes; it’s a delightful treat that has intrigued cake lovers for decades. Traditionally, this enchanting dessert features layers of moist cake, hinted with a subtle cocoa flavor and often accompanied by a rich cream cheese frosting. But where did this eye-catching dessert come from?
The origins of red velvet cake can be traced back to the early 20th century, with roots in both North America and Canada. One of the earliest mentions of red velvet cake appeared in a cookbook published in 1920. However, it wasn’t until the 1980s, when it was popularized by the famous “Red Velvet Cake” served at the famed Manhattan restaurant, the Magnolia Bakery, that it truly captured the hearts of many. The cake’s vibrant red color is partly due to the cocoa powder interacting with acidic ingredients like vinegar and buttermilk, resulting in its signature hue.
Some food historians suggest the red color was initially achieved through beet juice, contributing to the cake’s moistness and unique texture. The red velvet trend received a significant boost during the 2000s, thanks in part to its representation in films and television, making it a sought-after dessert for special occasions. If you’re interested in diving deeper into the intriguing history of cakes, check out this comprehensive article on cake origins.
Why Everyone Loves Red Velvet Cake
So, why the obsession with red velvet cake? It’s not just about looks. This cake is a delightful balance of flavors, combining sweetness with a touch of cocoa and the tanginess of cream cheese frosting. Its stunning appearance makes it a perfect centerpiece for celebrations and a favorite at weddings and birthdays.
If you’re still unsure whether to dive into making your very own red velvet cake, just think about the joy of seeing friends and family delight in each slice. Trust me, once you experience a moist, flavorful piece paired with that creamy frosting, you’ll understand the allure that keeps people coming back for more. Ready to learn how to whip up this beloved cake? Let’s get baking!
Ingredients for Red Velvet Cake
Creating the perfect red velvet cake is all about using the right ingredients. Here’s a guide to what you’ll need for a deliciously moist and vibrant cake, topped with cream cheese frosting.
Dry Ingredients
First up, the dry ingredients! These are the building blocks of your cake:
- 2 ½ cups all-purpose flour
- 1 ½ cups granulated sugar
- 1 teaspoon baking soda
- 1 teaspoon salt
- 1 tablespoon unsweetened cocoa powder
These elements ensure your cake rises beautifully while maintaining that signature tender texture. Using high-quality flour makes all the difference, so consider this tip from Serious Eats.
Wet Ingredients
Now, let’s bring in the flavor! For the red velvet cake, you’ll need:
- 1 cup vegetable oil
- 1 cup buttermilk, at room temperature
- 2 large eggs
- 2 tablespoons red food coloring
- 1 teaspoon vanilla extract
- 1 teaspoon white vinegar
The richness of the oil and buttermilk is what gives red velvet cake its desirable moistness.
Frosting Ingredients
Don’t forget the frosting! You’ll want it to be creamy and decadent, so gather these ingredients:
- 1 cup unsalted butter, softened
- 8 oz cream cheese, softened
- 4 cups powdered sugar
- 1 teaspoon vanilla extract
This frosting is what takes your red velvet cake from good to absolutely indulgent. Who can resist that creamy goodness?
With these ingredients on hand, you’re well on your way to baking a show-stopping red velvet cake for your next gathering. Happy baking!
Preparing Red Velvet Cake
When it comes to making a stunning red velvet cake, the journey starts long before you take that first delicious bite. This cake not only looks fabulous with its vibrant hue but also captivates the palate with a rich, velvety texture and a hint of cocoa. Let’s walk through the essential steps to prepare this delectable dessert that’s perfect for any occasion.
Preheating and Preparing the Baking Pans
To kick things off, you’ll want to preheat your oven to 350°F (175°C). This step ensures that your cake bakes evenly and rises beautifully. While the oven is warming up, prepare your baking pans:
- Grease and flour two 9-inch round baking pans to prevent any sticking. Alternatively, you can use parchment paper at the bottom for easy removal.
- Make sure the pans are evenly coated and tap out any excess flour to avoid a clumpy cake.
Taking these initial steps can make all the difference, ensuring a smooth baking process. Check out this guide on preparing baking pans for more tips!
Mixing the Dry Ingredients
Next, it’s time to focus on the dry ingredients, which will create the foundation of your red velvet cake. In a large bowl, whisk together:
- 2 ½ cups all-purpose flour
- 1 ½ cups granulated sugar
- 1 teaspoon baking soda
- 1 teaspoon salt
- 1 tablespoon unsweetened cocoa powder
The cocoa powder is key here, adding depth to the flavor without overshadowing the signature taste of red velvet. Make sure that everything is well combined; this ensures that the leavening agents distribute evenly throughout the batter.
Creaming Butter and Sugar
Now, let’s move on to the creaming, which is undoubtedly one of the most rewarding parts of cake making. In a separate bowl, beat together:
- 1 cup (2 sticks) unsalted butter, softened
- 1 ½ cups granulated sugar
Using a hand mixer on medium speed, whip these ingredients together until the mixture turns light and fluffy. This process incorporates air into the batter, making your cake rise beautifully. It’s magical watching the transformation. Pro tip: if you can, use a stand mixer for a hands-free option!
Adding Wet Ingredients to the Batter
With your butter and sugar fluffy, it’s time to add the wet ingredients that will give your red velvet cake its signature moistness. You’ll need to mix in:
- 1 cup buttermilk (or a buttermilk substitute)
- 2 large eggs, at room temperature
- 2 tablespoons red food coloring
- 1 teaspoon vanilla extract
- 1 teaspoon white vinegar
Mix these wet ingredients until they’re well incorporated; they’ll blend perfectly with the fluffy butter-sugar combination. The buttermilk is especially important as it reacts with the baking soda to create that tender crumb. For a deeper dive into the science behind baking, this informational resource can be intriguing!
Combining Everything and Baking
Now, let’s finally bring everything together! Gradually add the dry ingredients into the wet mixture, ensuring that you combine them until just mixed. It’s important not to overmix, as this will result in a denser cake.
Once everything is well combined, evenly divide the batter between your prepared baking pans. Bake in the preheated oven for about 25 to 30 minutes, or until a toothpick inserted in the center comes out clean. Keep an eye on them to avoid overbaking because nobody wants a dry red velvet cake!
When the cakes are done, let them cool in the pans for about 10 minutes before transferring them to wire racks to cool completely. This step is crucial as it allows the cakes to set, making assembly easier later.
Now you’re well on your way to enjoying an absolutely gorgeous red velvet cake that will impress anyone who gets a slice!
Variations on Red Velvet Cake
When it comes to red velvet cake, variations are as delightful as the original. If you or someone you know has dietary restrictions, fear not! There are scrumptious alternatives that capture the spirit of this iconic dessert.
Gluten-Free Red Velvet Cake
For those avoiding gluten, you can still indulge in this luscious treat! Swap out traditional all-purpose flour for a gluten-free blend or almond flour. Here’s a simple guideline:
- Use 1:1 gluten-free flour mix to replace regular flour.
- Keep an eye on moisture levels; gluten-free options can be drier.
- Add a tablespoon of apple cider vinegar to enhance the cake’s tenderness.
This way, your gluten-free red velvet cake will be just as moist and vibrant as the classic version. Don’t forget to check resources like King Arthur Baking for more tips on baking gluten-free.
Vegan Red Velvet Cake
Craving a vegan twist? Making a vegan red velvet cake is not only easy, but it can also be incredibly delicious. Here’s how to adjust your recipe:
- Replace eggs with flaxseed meal (1 tablespoon of flaxseed mixed with 2.5 tablespoons of water = 1 egg).
- Substitute dairy milk with almond milk or coconut milk to keep it rich and creamy.
- Use vegan butter or coconut oil instead of regular butter.
When baked, a vegan red velvet cake is surprisingly soft and delectable, proving that plant-based can be just as indulgent.
Adapting recipes means you can share this treat with everyone, regardless of dietary needs. So why not embrace these variations and impress your friends at your next gathering? Baking should be fun—and delicious!
Baking Notes for Red Velvet Cake
Tips for Ensuring the Cake Turns Out Perfectly
Baking a mouthwatering red velvet cake doesn’t have to be a challenge if you keep a few tips in mind. First, always measure your ingredients accurately. A kitchen scale can be a game-changer! For an even texture, room temperature ingredients provide the best results. Also, make sure to mix your batter gently—overmixing can lead to a dense cake. Finally, using quality cocoa powder can elevate the flavor; consider brands like Valrhona or Ghirardelli for a rich taste.
Common Mistakes to Avoid
When baking a red velvet cake, there are a few pitfalls to steer clear of. One common mistake is underestimating the importance of the red dye. Use a high-quality gel food coloring for vibrant results. Don’t skip the buttermilk either; it adds that signature tang. Also, be cautious not to open the oven door while baking—this can cause your cake to sink. Trust the timer; your cake will come out perfectly if you give it the full baking time.
For further reading on common baking mistakes, check out this helpful resource from The Kitchn. Happy baking!
Serving Suggestions for Red Velvet Cake
Pairing with Beverages
When it comes to red velvet cake, the right beverage pairing can enhance your dessert experience significantly. Opt for a rich, creamy coffee or a luscious hot chocolate—it’s like a match made in dessert heaven! If you’re feeling adventurous, try a berry-flavored iced tea or a refreshing lemonade. The tartness of these drinks complements the sweet, velvety texture of the cake perfectly. Want something a bit more elevated? A chilled glass of sparkling water with fresh citrus slices can cleanse your palate beautifully between bites.
Creative Serving Ideas
Don’t just stop at the classic slice! Here are some fun ways to serve your red velvet cake:
- Mini Cupcakes: Bake them in mini forms for a bite-sized treat, perfect for parties.
- Layered Dessert Cups: Crumble the cake and layer it with cream cheese frosting and fresh fruits in a cup for a delightful visual and taste experience.
- Cake Pops: Transform leftover cake into pops for an easy-to-eat dessert option.
Each of these presentations adds a unique twist to your red velvet cake, making it suitable for any occasion! For even more inspiration, check out this recipe round-up for diverse serving ideas.
With a few creative touches and the right beverage, your red velvet cake can become the star of any gathering!
Cooking Tips and Notes for Red Velvet Cake
Secrets to Moistness
Achieving a delightfully moist red velvet cake can be both an art and a science. The key lies in carefully balancing your dry and wet ingredients. Here are some tips to help you nail that perfect texture:
-
Use Buttermilk: This is your best friend! Not only does buttermilk add tangy flavor, but its acidity helps tenderize the cake. Don’t have any? You can create a substitute by mixing milk with a bit of vinegar or lemon juice.
-
Don’t Overmix: When combining your ingredients, mix until just combined. Overmixing can develop gluten, leading to a denser cake instead of the light, fluffy texture you want.
-
Egg Temperature Matters: Using room temperature eggs allows for a smoother blend with the batter. It helps to incorporate air, leading to a lighter finish.
How to Achieve the Perfect Frosting
Frosting is the crowning glory of your red velvet cake. Here’s how to get that velvety texture just right:
-
Cream Cheese Basics: Use full-fat cream cheese for a richer flavor. Make sure it’s softened to room temperature for easy whisking.
-
Sweetness Balance: Start with less sugar and gradually add to taste. This way, you’ll avoid the dreaded overly-sweet frosting. Plus, if you’re looking for a less sugary option, consider a whipped cream cheese frosting as a lighter alternative.
-
Chill Between Layers: If you’re stacking multiple layers, chill your cake briefly after frosting each layer. This helps to maintain structure and prevents a messy presentation.
For more vibrant techniques and inspiration, check out this guide, and elevate your baking skills even further. Happy baking!
Time Breakdown for Red Velvet Cake
Preparation Time
Making your own red velvet cake is a delightful experience, and it typically takes about 30 minutes to prepare the ingredients, mix the batter, and get those layers ready for baking. Don’t rush it; it’s the perfect time to enjoy the aroma of cocoa and vanilla filling your kitchen.
Baking Time
Once the batter is in the oven, you’ll need to allocate around 25-30 minutes for the baking process. Keep an eye on it! The smell alone will have your friends begging for a slice. A classic tip here: use a toothpick to check for doneness!
Total Time
When you combine the preparation and baking, you’re looking at a total of about 1 hour for your homemade red velvet cake. It’s well worth the wait, especially when topped with a rich cream cheese frosting. Consider pairing it with a refreshing non-alcoholic drink, such as homemade lemonade or iced tea, to elevate your dessert experience!
For more tips on perfecting your red velvet cake, check out this helpful guide for baking essentials.
Nutritional Facts for Red Velvet Cake
Calories
When you indulge in a slice of red velvet cake, you can expect it to pack around 350-400 calories, depending on the recipe and portion size. While it’s certainly a treat for special occasions, understanding the caloric content can help you make mindful choices.
Sugar Content
The sweetness of red velvet cake often comes from about 30-35 grams of sugar per slice. This can vary widely based on the frosting used and additional toppings. It’s always a good idea to check the recipe to get a more accurate picture of the total sugar content. For a healthier balance, consider using alternatives like honey or agave syrup.
Serving Size Consideration
Serving size plays a crucial role in your overall intake. A generous slice may be twice the size of an acceptable portion. To enjoy your red velvet cake without the guilt, aim for a smaller slice, and savor each bite. Remember, moderation is key! For more insights on healthy baking choices, check out resources like The American Heart Association or ChooseMyPlate.gov.
Understanding these nutritional aspects allows you to enjoy your favorite dessert with a bit more awareness. So go ahead, treat yourself, but don’t forget to balance it with healthy options throughout your day!
FAQs about Red Velvet Cake
What makes red velvet cake different from chocolate cake?
You might wonder, what sets red velvet cake apart from a classic chocolate cake? While both cakes share cocoa as an ingredient, the magic of red velvet lies in its balanced flavor and striking color. The subtle cocoa flavor in red velvet is often complemented by buttermilk, which adds a slight tanginess. Moreover, the vibrant red hue, traditionally achieved with beet juice or red food coloring, gives it an eye-catching appeal that chocolate cake simply doesn’t have.
Can I make red velvet cake ahead of time?
Absolutely! One of the great things about red velvet cake is that it can be made in advance. If you’re preparing for a special occasion, consider baking the cake layers a day or two ahead of time. Just make sure to wrap them in plastic wrap to keep them moist. You can also whip up the cream cheese frosting ahead of time and refrigerate it. When you’re ready to serve, just assemble your cake, and you’ll have a stunning dessert with minimal last-minute effort.
How should I store leftover red velvet cake?
If you’re lucky enough to have leftovers, storing your red velvet cake properly is key to keeping it fresh. Here’s how to do it:
- At Room Temperature: If you plan to enjoy it within a couple of days, simply cover it with a cake dome or plastic wrap to keep it from drying out.
- In the Refrigerator: For longer storage, place slices in an airtight container and refrigerate. It should stay delicious for up to a week.
- Freezing: You can also freeze layers or slices by wrapping them well in plastic wrap, then foil. When you’re ready to indulge, just allow it to thaw in the fridge overnight.
For more tips on baking and storage, check out The Spruce Eats for expert advice!
Conclusion on Red Velvet Cake
Final Thoughts and Encouragement to Try the Recipe
Red velvet cake is not just a dessert; it’s an experience that can brighten any occasion. This regal cake, with its striking red hue and velvety texture, never fails to impress. I encourage you to roll up your sleeves and give this recipe a try—you won’t regret it!
Feel free to experiment a bit; baking is as much about creativity as it is about following a recipe. Whether you enjoy it plain or dressed up with cream cheese frosting, red velvet cake is sure to bring joy to your table. For more tips on baking, check out this thoughtful guide. Happy baking!
Red Velvet Cake: Indulgent Recipe to Impress Your Guests
Learn how to create a luxurious red velvet cake that is sure to wow your guests with its rich flavor and stunning appearance.
- Prep Time: 20 minutes
- Cook Time: 30 minutes
- Total Time: 50 minutes
- Yield: 12 servings 1x
- Category: Desserts
- Method: Baking
- Cuisine: American
- Diet: Vegetarian
Ingredients
- 2 cups all-purpose flour
- 1 1/2 cups granulated sugar
- 1 teaspoon baking soda
- 1 teaspoon salt
- 1 teaspoon cocoa powder
- 1 cup vegetable oil
- 1 cup buttermilk, room temperature
- 2 large eggs, room temperature
- 2 tablespoons red food coloring
- 1 teaspoon vanilla extract
- 1 teaspoon white vinegar
Instructions
- Preheat your oven to 350°F (175°C). Grease and flour two 9-inch round baking pans.
- In a large bowl, sift together the flour, sugar, baking soda, salt, and cocoa powder.
- In another bowl, whisk together the oil, buttermilk, eggs, food coloring, vanilla, and vinegar until well combined.
- Gradually add the wet ingredients to the dry ingredients and mix until just combined.
- Divide the batter evenly between the prepared pans.
- Bake for 25-30 minutes, or until a toothpick inserted comes out clean.
- Let the cakes cool in the pans for 10 minutes before transferring to a wire rack to cool completely.
Notes
- For the best flavor, let the cake sit for a day before serving.
- Serve with cream cheese frosting for an indulgent treat.
Nutrition
- Serving Size: 1 slice
- Calories: 350
- Sugar: 30g
- Sodium: 250mg
- Fat: 20g
- Saturated Fat: 3g
- Unsaturated Fat: 15g
- Trans Fat: 0g
- Carbohydrates: 40g
- Fiber: 1g
- Protein: 4g
- Cholesterol: 50mg
Keywords: red velvet cake, dessert, cake recipe