Introduction to Red Velvet Cake
A Brief History of Red Velvet Cake
If you’ve ever marveled at the stunning red hue of a red velvet cake, you’re not alone! This delightful dessert has a fascinating history. The notion of red velvet cake dates back to the early 20th century and is often associated with the South, particularly during the Great Depression when cocoa was scarce. The cake was a way to add a bit of luxury to simpler ingredients with its rich flavors and striking color. Interestingly, the powdered cocoa developed a reddish hue when combined with acidic ingredients like buttermilk and vinegar. Its popularity soared through the years, famously featured in the 1989 movie “Steel Magnolias,” which helped catapult it into mainstream culture source.
Why Red Velvet Cake is a Young Professional’s Favorite
So, why do so many young professionals find themselves enchanted by red velvet cake? The reasons are compelling. First off, it’s a showstopper! The vibrant red color is ideal for Instagram feeds and adds a touch of elegance to any gathering. Moreover, its unique flavor is a delightful blend of chocolate, vanilla, and a hint of tanginess from the buttermilk.
Many young professionals cherish the experiences attached to baking and sharing this cake with friends. It’s a crowd-pleaser, perfect for birthdays, office celebrations, or even just a cozy night in. Have you ever hosted a gathering where red velvet cake became the conversation starter? Its allure and richness make it unforgettable.
What Makes it Unique from Other Cakes
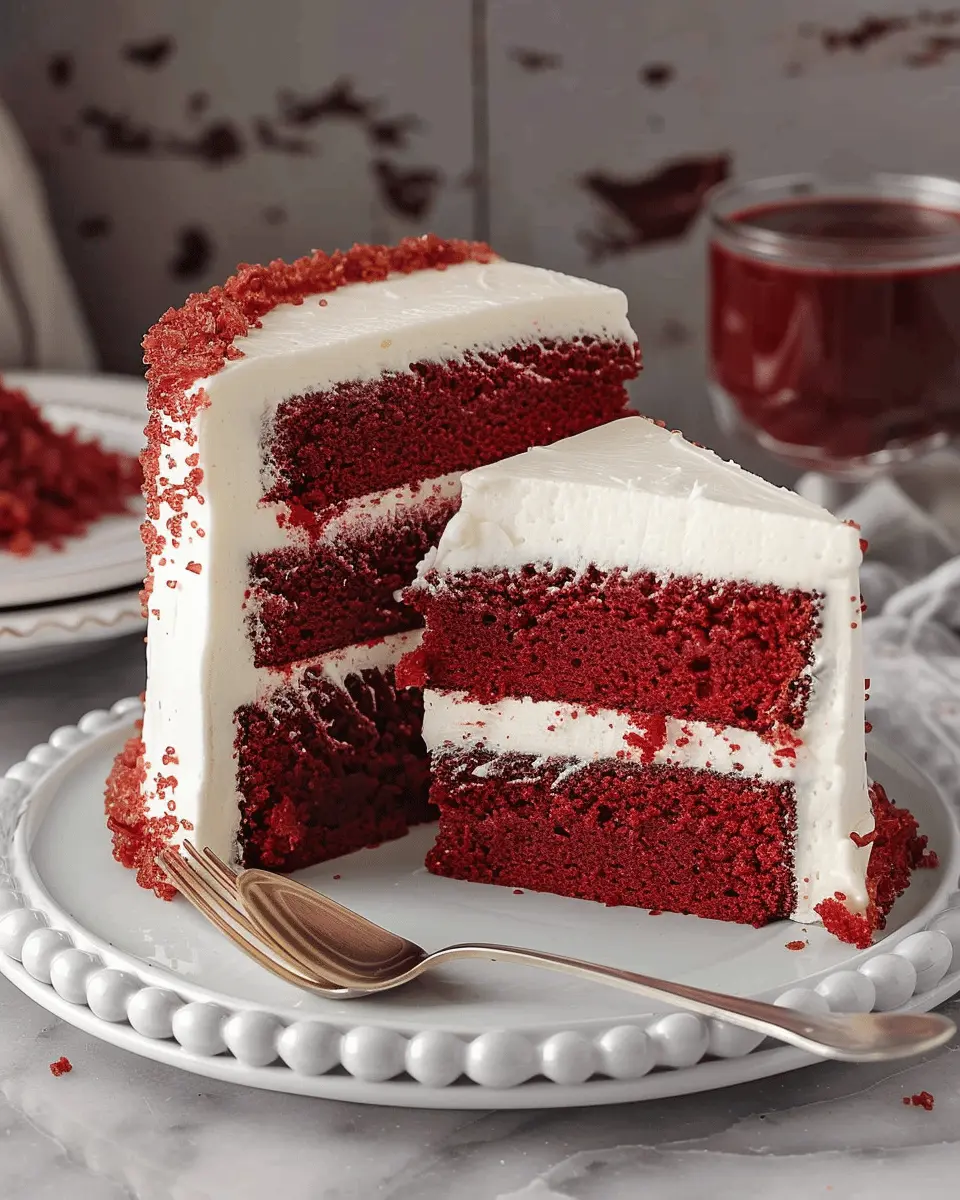
What sets red velvet cake apart from other cakes? Well, it’s the combination of its visual appeal and unique flavor profile. This cake typically features a soft, velvety crumb and a luscious cream cheese frosting, unlike typical chocolate or vanilla cakes. The interaction between the cocoa powder and acidic components gives it that distinct flavor twist that keeps everyone guessing.
Additionally, the cake’s versatility allows it to shine in various forms—from cupcakes to layer cakes—making it adaptable for any occasion. If you’re curious to dive deeper, check out this insightful article about cake variations.
In essence, red velvet cake is more than just a dessert; it’s an experience that resonates with those looking to sweeten their lives with a little flair.
Ingredients for Red Velvet Cake
Creating the perfect red velvet cake is an art! Whether you’re preparing for a special celebration or just craving something delicious, knowing your ingredients is key. Let’s break it down.
Essential Ingredients for the Cake
To whip up a scrumptious red velvet cake, you’ll need:
- All-purpose flour: 2 ½ cups for that soft texture
- Granulated sugar: 1 ½ cups to add sweetness
- Cocoa powder: 1 tablespoon for a hint of chocolate
- Baking soda: 1 teaspoon for that fluffy rise
- Vegetable oil: 1 cup, helping to keep the cake moist
- Buttermilk: 1 cup to give that tangy flavor
- Eggs: 2 large for binding everything together
- Vinegar: 1 teaspoon, which interacts with the baking soda for leavening
- Red food coloring: 2 tablespoons to give it that iconic hue
- Vanilla extract: 1 teaspoon for an aromatic touch
Find out more about how these ingredients work together from the experts at King Arthur Baking.
Necessary Ingredients for Cream Cheese Frosting
A red velvet cake wouldn’t be complete without its creamy companion! For the frosting, gather:
- Cream cheese: 8 ounces, softened for a luxurious consistency
- Unsalted butter: ½ cup, also softened, for that rich flavor
- Powdered sugar: 4 cups, ensuring the frosting is sweet yet smooth
- Vanilla extract: 1 teaspoon to enhance the flavor
These simple ingredients create a frosting that’s both tangy and sweet! The result? A match made in dessert heaven. Don’t miss checking this handy guide on frosting for more tips!
Preparing Red Velvet Cake
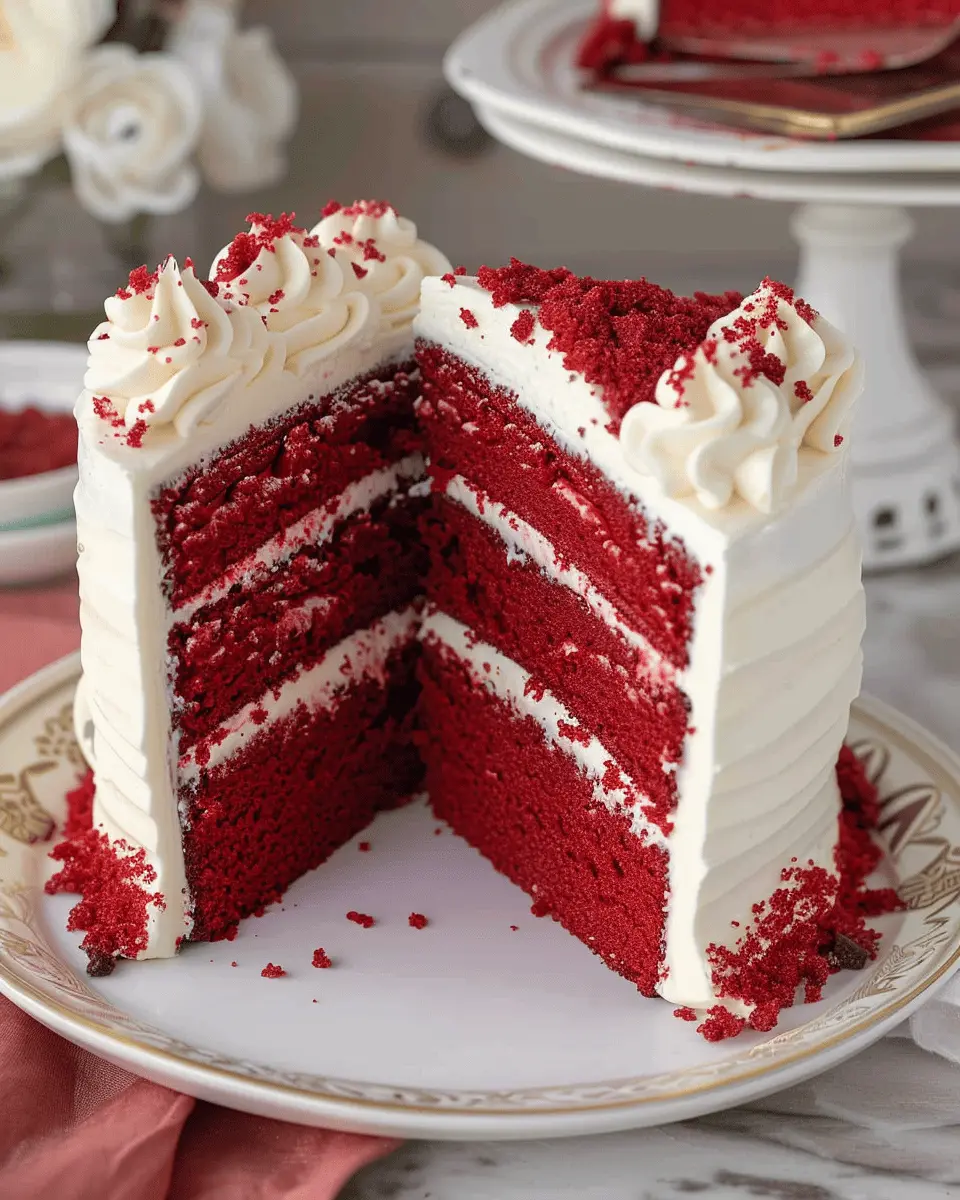
When you think of a classic dessert that can steal the show at any gathering, red velvet cake comes to mind. Its vibrant color and velvety texture make it a standout choice, and the preparation is just as delightful as the final product. Let’s walk through the steps to make your red velvet cake irresistible!
Getting Your Baking Pans Ready
First things first! We want to ensure our cake layers come out beautifully without sticking to the pans. Here’s how to do it:
- Grease the Pans: Use a light layer of butter or a non-stick cooking spray to coat the bottoms and sides of two 9-inch round baking pans.
- Line with Parchment Paper: For added security, cut circles of parchment paper to fit the bottoms of the pans and place them in. This will help the layers release effortlessly.
Preparation is key here, as nobody wants a stuck cake! If you want more info on cake pan preparation, you can check out Baking Basics.
Blending the Dry Ingredients
Next, let’s gather our dry ingredients. This is integral to achieving that signature red velvet cake flavor and texture.
- In a medium bowl, whisk together:
- 2 ½ cups all-purpose flour
- 1 ½ cups granulated sugar
- 1 teaspoon baking soda
- 1 teaspoon salt
- 1 tablespoon unsweetened cocoa powder
Take a moment to really whisk those ingredients together! This helps to evenly distribute everything, ensuring your cake rises beautifully.
Creaming Butter and Sugar
Now, let’s move on to one of the most satisfying parts: creaming butter and sugar. Grab your stand mixer or a good ol’ whisk—either works!
- In a large bowl, beat together:
- 1 cup (2 sticks) unsalted butter (softened at room temperature)
- 1 ½ cups granulated sugar
Cream until the mixture is light and fluffy, approximately 3-4 minutes. This step is essential because it incorporates air into your batter, giving your cake that delightful structure.
Adding the Wet Ingredients
At this stage, we’re going to introduce the wet ingredients that will work in harmony with the dry.
- Add 2 large eggs, one at a time, ensuring they’re fully incorporated before adding the next.
- Mix in:
- 1 cup buttermilk (a must for that delicious tang)
- 1 tablespoon vanilla extract
- 1 tablespoon vinegar
- 2 tablespoons red food coloring
Feel free to adjust the food coloring based on how deep you want that red hue to be; the more, the merrier!
Creating the Cake Batter
Now that we’ve combined both our dry and wet ingredients, it’s time to bring them together.
- Gradually add the dry mixture to the wet ingredients, mixing on low speed until just combined.
Be cautious not to overmix, as this can lead to a tough cake. You want it to remain tender and fluffy!
Baking the Cake Layers
With the batter ready, it’s time for the oven magic!
- Preheat your oven to 350°F (175°C).
- Divide the batter evenly between the prepared pans and smooth the tops.
Bake for approximately 25-30 minutes, or until a toothpick inserted into the center comes out clean. The aroma wafting through your kitchen will be hard to resist!
Cooling the Cake to Perfection
Once your layers are baked, patience is key!
- Remove the cakes from the oven and place them on a wire rack for about 10-15 minutes.
- After that, carefully run a knife around the edges and flip them out onto the rack. Let them cool completely before frosting, as warm cake makes for a gooey disaster.
In no time, you’ll have a stunning red velvet cake ready to be dressed in cream cheese frosting. Stay tuned for the decorating section, where we’ll take your cake from fantastic to fabulous!
Variations on Red Velvet Cake
When it comes to red velvet cake, creativity knows no bounds! This delightful dessert has various adaptations that cater to different dietary preferences and occasions. Let’s explore some delicious variations that you can easily whip up to impress your friends and family.
Gluten-Free Red Velvet Cake
Craving that classic red velvet cake but need to dodge gluten? Fear not! You can achieve a moist and decadent gluten-free version using alternatives like almond flour or gluten-free all-purpose flour. Be sure to also select gluten-free buttermilk (simply mix milk with a dash of lemon juice). This will keep your cake fluffier without compromising on flavor. For a fantastic gluten-free cake recipe, check out resources from Celiac Disease Foundation.
Vegan Red Velvet Options
If you’re looking for a plant-based take on this beloved treat, a vegan red velvet cake can easily satisfy your cravings. Replace the eggs with flaxseed meal or unsweetened applesauce, and swap regular buttermilk for a mixture of almond milk and apple cider vinegar. Don’t forget to use vegan cream cheese for the icing! You can find some amazing vegan recipes on Minimalist Baker that will make your taste buds sing.
Red Velvet Cupcakes
Not in the mood for a whole cake? Let’s get personal with red velvet cupcakes! These are perfectly portioned, and their cuteness makes them ideal for parties or cozy nights in. Simply follow your red velvet cake recipe but divide the batter among cupcake liners. Bake for about 18-20 minutes, top with cream cheese frosting, and watch them disappear in no time.
With these variations, your celebration will be deliciously inclusive for everyone. So whether it’s a casual gathering or a special occasion, there’s always a way to indulge in the unmistakable flavor of red velvet cake.
Cooking Tips and Notes for Red Velvet Cake
Tips for Perfect Cake Layers
To achieve luscious layers in your red velvet cake, consider using room-temperature ingredients. Eggs, butter, and buttermilk blend more smoothly, creating that velvety texture we love. When measuring flour, spoon it into your measuring cup and level it off — this helps avoid a dense cake. Don’t forget to cool the layers completely before frosting; this prevents the frosting from melting into a gooey mess!
Cream Cheese Frosting Tips
A rich cream cheese frosting is essential for your red velvet cake. For the best consistency, ensure your cream cheese is at room temperature for easy mixing. Use a high-fat cream cheese for a richer flavor. If your frosting seems too runny, simply add a little powdered sugar until it’s the perfect spreading consistency.
Storing Leftover Cake
If you have leftovers (which is rare!), wrap your red velvet cake in plastic wrap and store it in an airtight container at room temperature for up to three days. You can also refrigerate it for a week, but let it come to room temperature before serving for the best taste. For longer storage, consider freezing individual slices!
For more baking tips, check out King Arthur Baking. Happy baking!
Serving Suggestions for Red Velvet Cake
Ideal Pairings for Red Velvet Cake
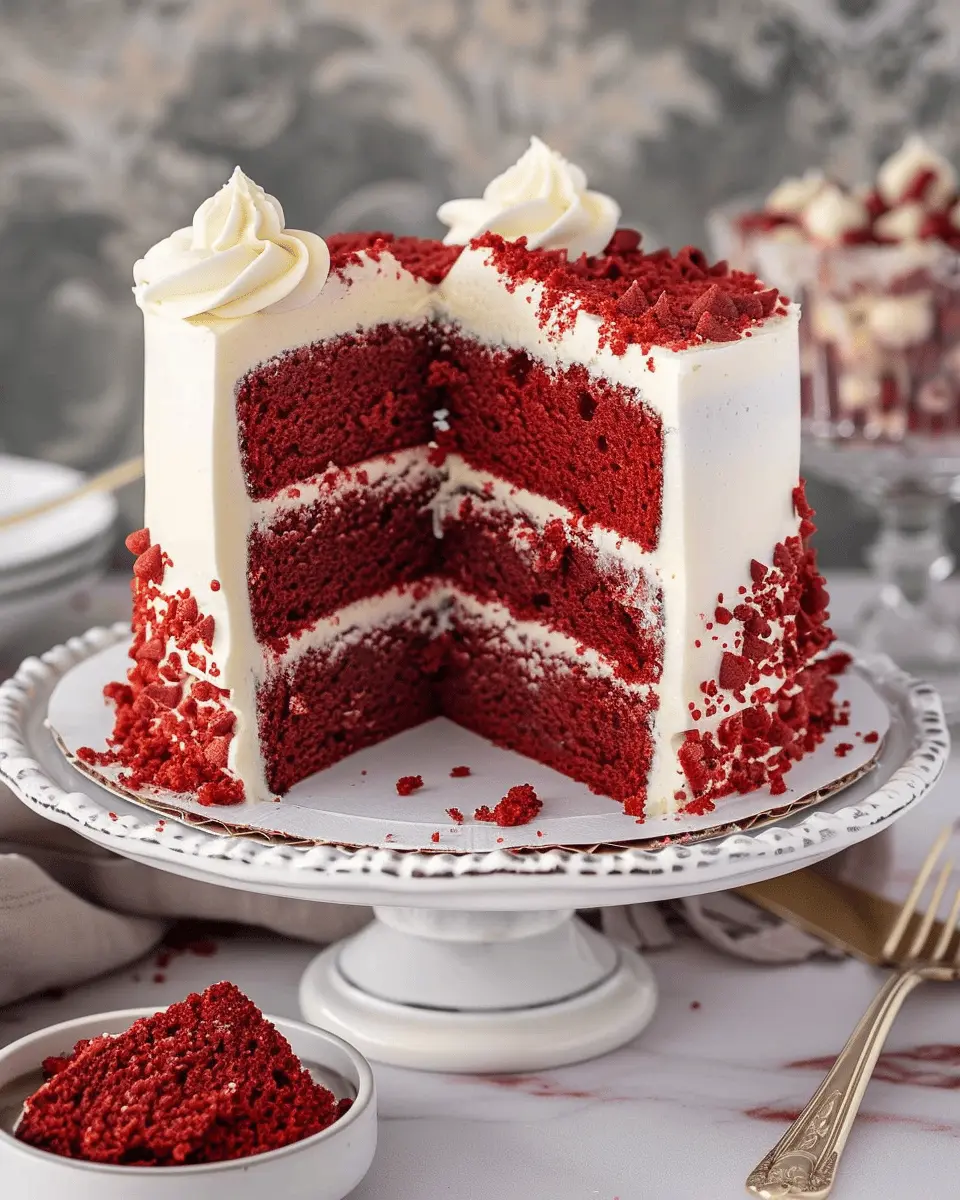
When it comes to enjoying your red velvet cake, think outside the box! Pair it with a dollop of lightly sweetened whipped cream or a scoop of rich vanilla ice cream for a luscious contrast. If you’re feeling adventurous, why not serve it alongside fresh strawberries or a tangy raspberry coulis? The vibrant red of the cake alongside these fruits creates a stunning visual feast that tastes even better!
You could also consider complementing your dessert with a soothing cup of herbal tea or a sparkling lemonade; these choices enhance the cake’s flavors without overpowering them.
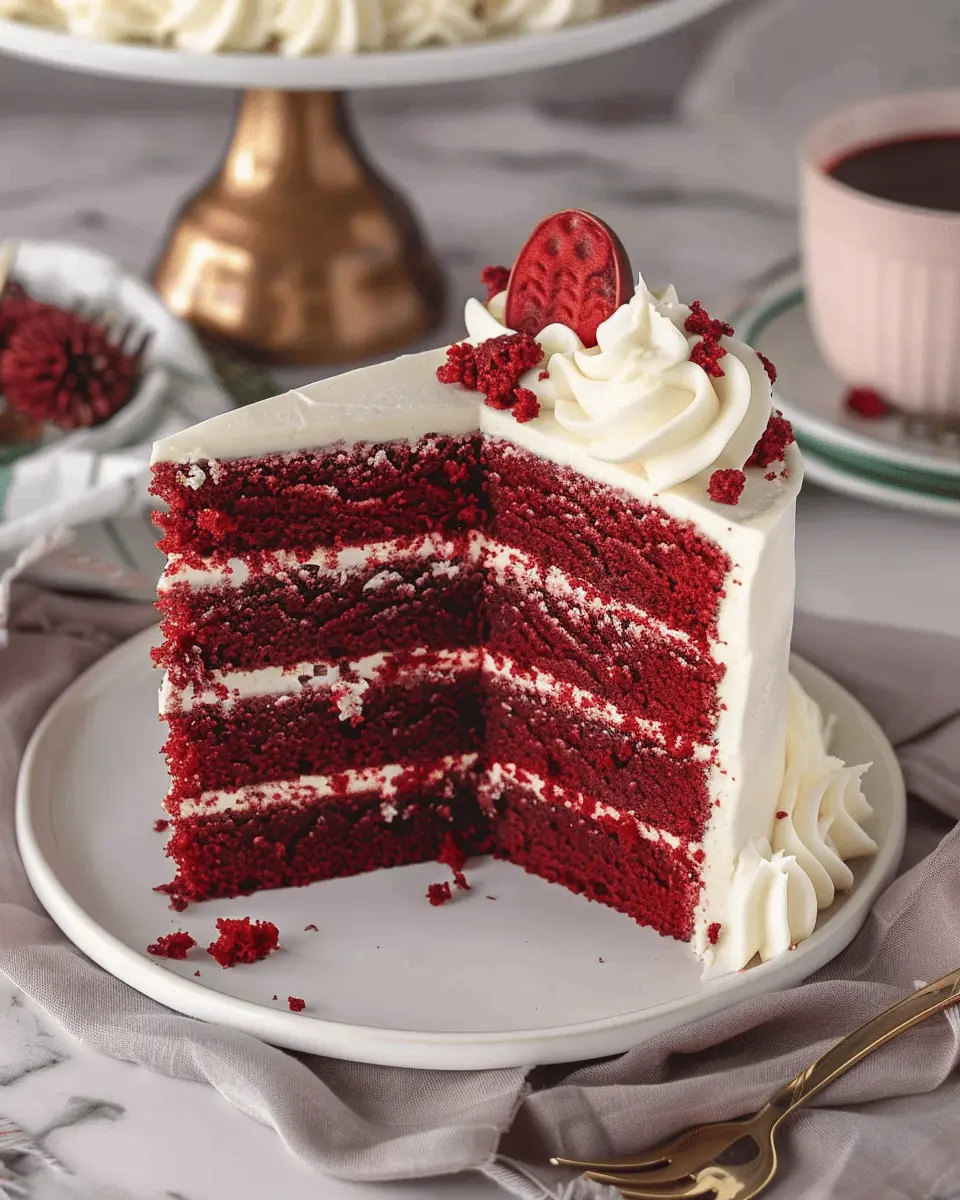
Presentation Ideas
The presentation of your red velvet cake can elevate its appeal even further. A simple yet effective way is to dust a little cocoa powder or powdered sugar on top before serving. Consider using a cake stand to give it that bakery-worthy look — an effortless way to impress your guests.
Don’t forget about garnishes! Fresh mint leaves or a sprinkle of chocolate shavings can add that extra touch. For more creative presentation tips, explore ideas from Food Network or Taste of Home.
With these suggestions, your red velvet cake will not only taste amazing but also look irresistible!
Time Breakdown for Red Velvet Cake
Preparation Time
Making an irresistible red velvet cake begins with about 20-30 minutes of prep. This includes gathering your ingredients (flour, sugar, cocoa powder, and those essential red food coloring) and mixing everything until you achieve that perfect batter consistency.
Baking Time
Next, it’s all about patience. Bake the cake layers in a preheated oven for 25-30 minutes. Keep an eye on them; they should spring back when gently pressed and a toothpick should come out clean.
Total Time
In total, you’re looking at around 1 to 1.5 hours from start to finish. This includes both prep and baking time. Once baked, let your cake cool before frosting and indulging in a slice of this classic dessert.
Need tips on cake batter consistency? Check out Nerdy Mamma for essential baking tips that will elevate your cake game!
Nutritional Facts for Red Velvet Cake
Caloric Information
When indulging in a slice of red velvet cake, you can expect about 350-400 calories per serving. This delightful dessert is more than just a treat; it’s a luxurious experience combining flavors and textures that captivate the palate.
Breakdown of Macros
Let’s break down the macronutrients:
- Carbohydrates: Approximately 50-55 grams
- Proteins: Roughly 5-6 grams
- Fats: About 20-22 grams
These values can vary based on the specific recipe and serving size, but this rough estimation will help you plan your portion.
Additional Nutritional Insights
In addition to calories and macros, some red velvet cake recipes may also incorporate ingredients like yogurt or buttermilk, contributing beneficial probiotics. If you’re mindful of added sugars, consider using a sugar substitute or reducing the sugar content for a healthier twist. For more nutritional information, check out reputable sources like USDA FoodData Central or consult a nutritionist for personalized advice.
Next time you slice into that rich, velvety goodness, you’ll appreciate not only the flavor but a bit of the nutrition packed inside!
FAQ about Red Velvet Cake
What is the origin of red velvet cake?
The red velvet cake has a storied history that many food enthusiasts adore. Originating in the late 19th century, this unique dessert has roots in both the American South and Canadian traditions. It gained popularity during the Great Depression when the cocoa powder used in the recipe became more accessible. Many people associate it with the luxurious texture and vibrant color derived from the addition of cocoa powder and buttermilk. The cake’s signature red hue was initially achieved using beet juice or food coloring, creating a dessert that piqued the curiosity of many. For a deep dive into its history, check out this resource.
How can I make a red velvet cake less sweet?
Not a fan of desserts that are overly sweet? You’re not alone! To tone down the sweetness in your red velvet cake, consider these tips:
- Reduce the Sugar: Cut back on the sugar in the cake batter by about 20%. You can still achieve moistness by adding extra buttermilk.
- Balance with Acid: Incorporate a touch more cocoa powder or even a splash of vinegar to enhance flavor without adding sweetness.
- Frosting Alternatives: Use a cream cheese frosting with less sugar or opt for a whipped cream alternative, which will still provide that luscious texture without being overwhelmingly sweet.
Can I make this cake ahead of time?
Absolutely! Preparing your red velvet cake ahead of time can be a real lifesaver, especially for busy schedules. You can bake the cake layers in advance and wrap them tightly in plastic wrap, storing them in the refrigerator for up to three days. Alternatively, they can be frozen for longer storage—just remember to let them thaw overnight in the fridge before frosting.
If you’re looking for easy baking hacks, consider checking out this guide to keep your cakes tasting fresh whether they’re made in advance or enjoyed the same day!
Conclusion on Red Velvet Cake
Final Thoughts on Baking Red Velvet Cake
As you wrap up your journey into the world of red velvet cake, it’s clear this dessert is more than just a feast for the taste buds; it’s a delightful celebration of color and flavor. Each layer offers a chance to impress your friends and spark joy in every bite.
Remember, the secret to a moist cake is all in the mixing and the ingredients you choose. Don’t hesitate to experiment with different frostings or fillings—cream cheese is a classic, but have you tried a tangy lemon zest? The sky’s the limit! For more insights on perfecting your baking skills, check out the resources at King Arthur Baking or Bon Appétit. So go ahead, gather your loved ones, and enjoy the bliss of homemade red velvet cake!
Red Velvet Cake: The Best Indulgent Treat for Any Occasion

A rich and velvety cake that’s perfect for celebrations and special occasions. Indulge in the layers of flavor and color that make red velvet cake a timeless favorite.
- Prep Time: 20 minutes
- Cook Time: 30 minutes
- Total Time: 50 minutes
- Yield: 12 servings 1x
- Category: Dessert
- Method: Baking
- Cuisine: American
- Diet: Vegetarian
Ingredients
- 2 1/2 cups all-purpose flour
- 1 1/2 cups granulated sugar
- 1 cup vegetable oil
- 1 cup buttermilk
- 2 large eggs
- 2 tablespoons red food coloring
- 1 teaspoon vanilla extract
- 1 teaspoon baking soda
- 1 teaspoon white vinegar
- 1 teaspoon cocoa powder
- 1/2 teaspoon salt
Instructions
- Preheat the oven to 350°F (175°C).
- In a large bowl, mix the flour, cocoa powder, baking soda, and salt in one bowl.
- In another bowl, combine the sugar and vegetable oil, then add the eggs one at a time.
- Mix in the buttermilk, vanilla extract, and red food coloring.
- Gradually add the dry ingredients to the wet mixture, mixing until smooth.
- Add the vinegar and mix well.
- Pour the batter into prepared cake pans and bake for 25-30 minutes.
- Let cool before frosting.
Notes
- For an extra touch, top with cream cheese frosting.
- Feel free to adjust the amount of red food coloring for desired color intensity.
Nutrition
- Serving Size: 1 slice
- Calories: 350
- Sugar: 25g
- Sodium: 300mg
- Fat: 18g
- Saturated Fat: 3g
- Unsaturated Fat: 15g
- Trans Fat: 0g
- Carbohydrates: 45g
- Fiber: 1g
- Protein: 4g
- Cholesterol: 50mg
Keywords: red velvet cake, dessert, cake recipes, baking, indulgent treats