Introduction to Red Velvet Cheesecake Bliss
What is Red Velvet Cheesecake Bliss?
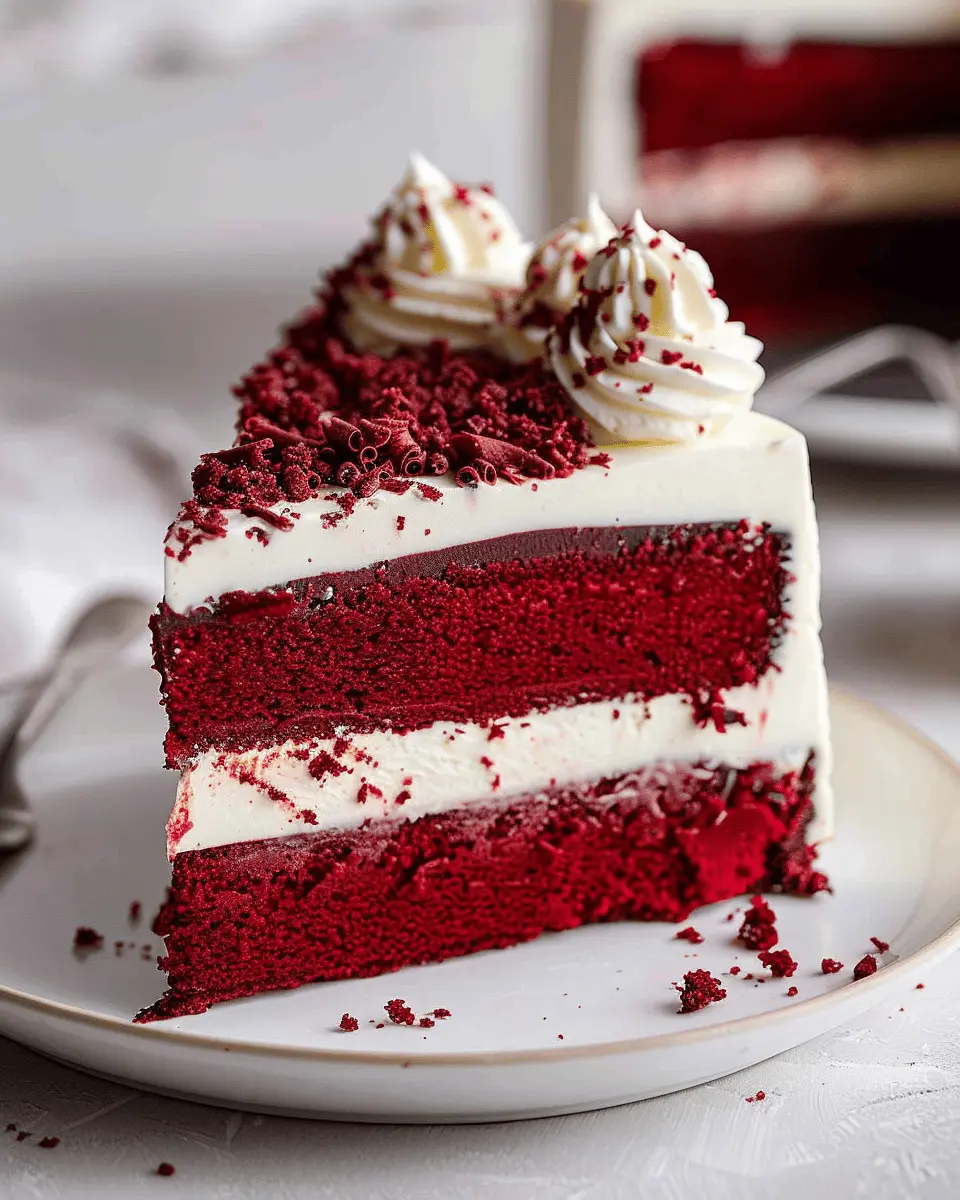
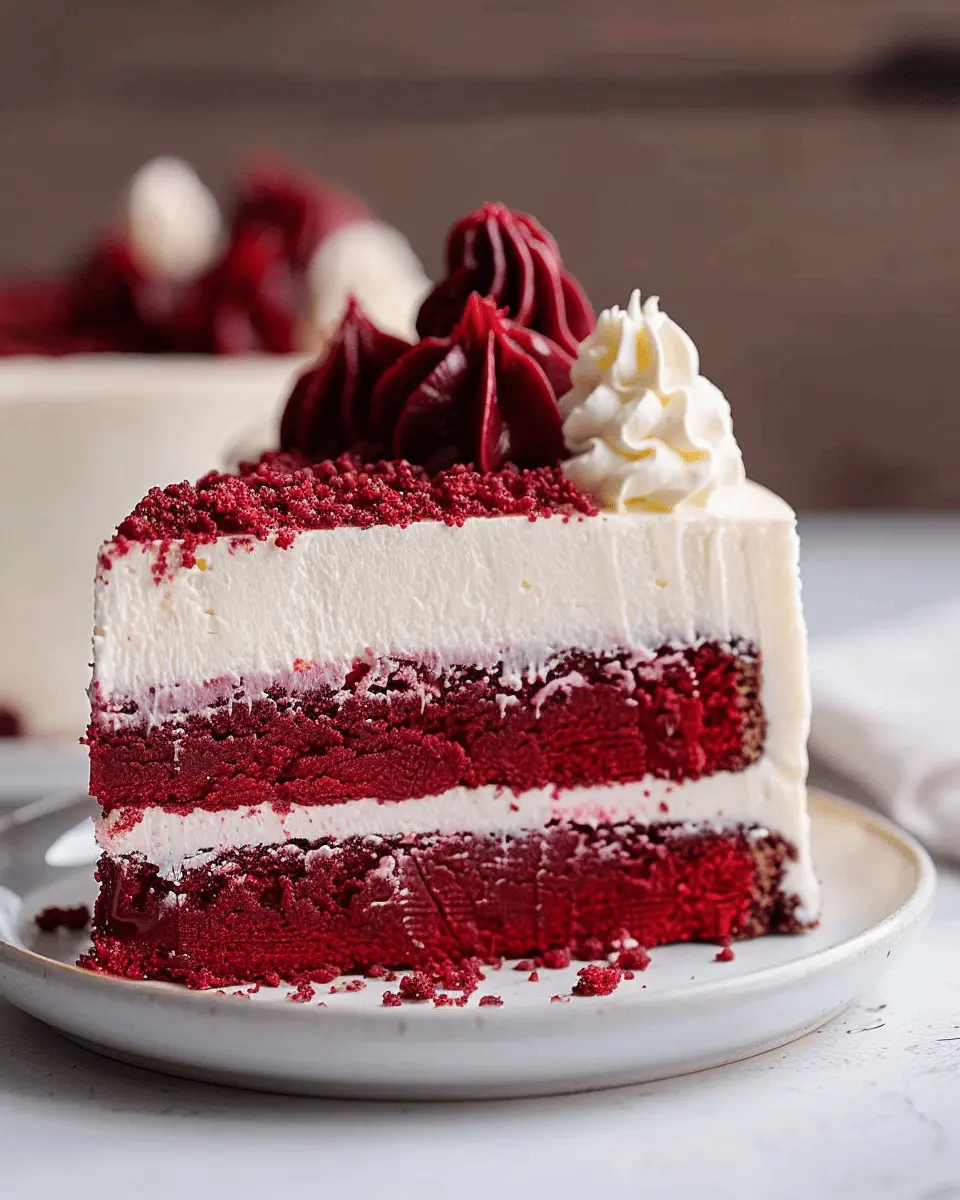
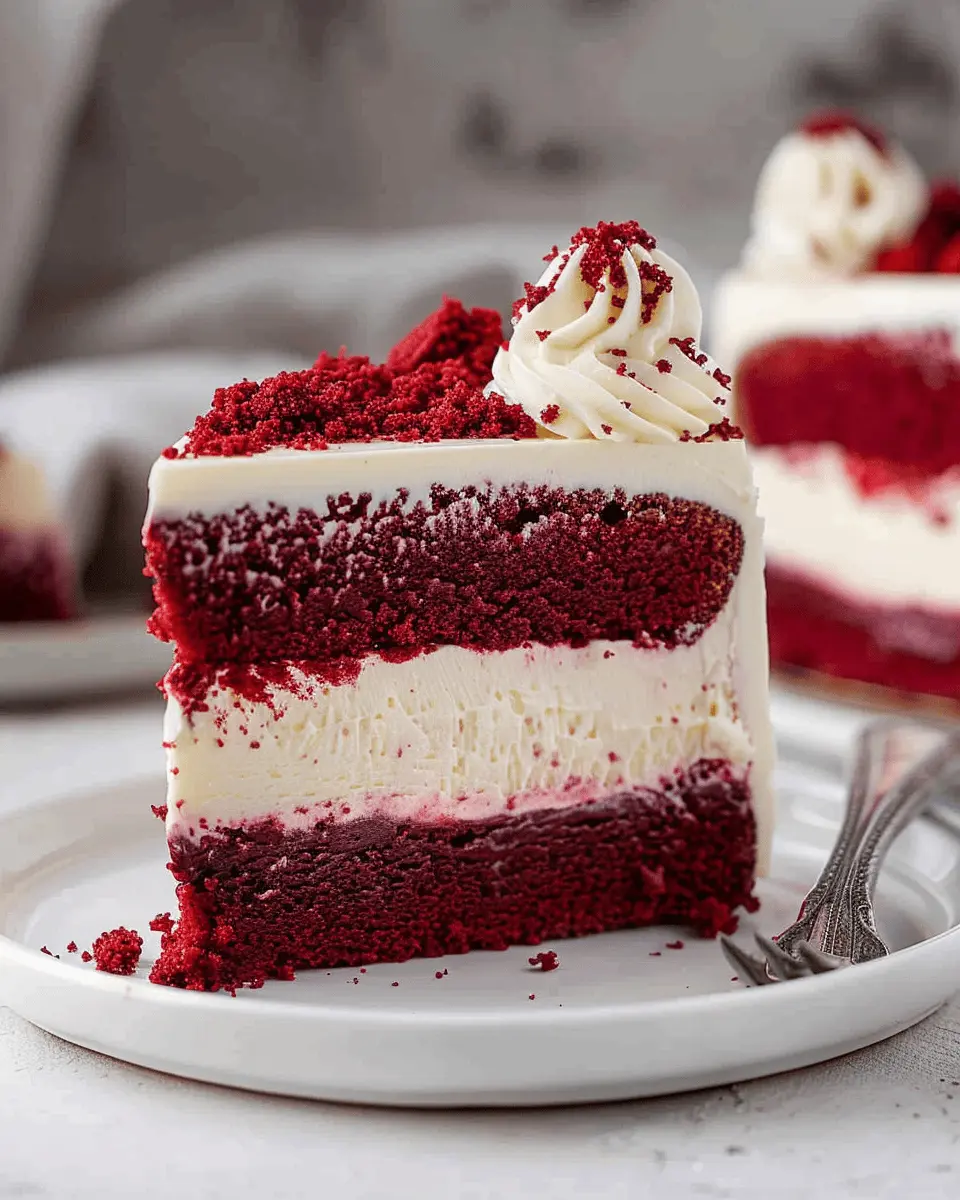
Red Velvet Cheesecake Bliss is a delectable dessert that combines the rich, velvety texture of classic red velvet cake with the creamy indulgence of cheesecake. Imagine sinking your fork into a layer of luscious red velvet cake, only to be met with the smooth, tangy delight of cheesecake beneath. This harmonious blend creates a treat that is not only visually stunning but also a feast for the taste buds. The striking red color is perfect for special occasions or just an ordinary day when you want to treat yourself.
Why is This Dessert So Appealing to Young Professionals?
For young professionals, the allure of red velvet cheesecake bliss lies in its perfect balance of sophistication and comfort. In today’s fast-paced world, where time is precious, this dessert offers an easy way to impress friends at gatherings or enjoy a personal moment of indulgence.
- Showstopper Dessert: Its vibrant color and elegant presentation can instantly elevate any event, making it a go-to choice for potlucks or celebrations.
- Sweet Reward: After a busy week, treating yourself to a slice (or two) of this dessert becomes not just permissible but celebrated.
- Versatility: Whether paired with a robust coffee or a cozy herbal tea, the flavors of red velvet complement a variety of beverages, making it perfect for both casual and formal settings.
A Personal Story About Discovering Red Velvet Cheesecake
I still remember the first time I encountered red velvet cheesecake bliss. It was at a friend’s birthday dinner, the moment I walked into the restaurant, the sight of the luscious cake brought an instant sense of joy. There it was, a towering masterpiece of red and cream, beckoning me to take a bite. That first taste was nothing short of magical; the delightful symmetry of the cake and the cheesecake layer had me vowing to recreate this marvel in my own kitchen.
From that day forward, I began experimenting with different recipes, learning about the method and care that goes into making red velvet cheesecake bliss. I discovered that it’s not just a dessert; it’s an experience that brings people together, creating shared memories and joyful moments.
If you’re curious to learn more about the history of red velvet cake, check out this article that delves into its origins and evolution. Trust me, the more you know about this beloved dessert, the more you’ll cherish every bite!

Ingredients for Red Velvet Cheesecake Bliss
When it comes to creating the ultimate red velvet cheesecake bliss, having the right ingredients is key. Let’s break it down into three delicious components: the cheesecake, the red velvet cake, and the cream cheese frosting.
Ingredients for the Cheesecake
- 16 oz cream cheese (softened)
- 1 cup granulated sugar
- 2 large eggs
- 1 teaspoon vanilla extract
- 1 teaspoon lemon juice
- A pinch of salt
This creamy layer adds a rich, tangy flavor that complements the cake perfectly. Make sure your cream cheese is at room temperature for the smoothest texture.
Ingredients for the Red Velvet Cake
- 2 cups all-purpose flour
- 1 ½ cups granulated sugar
- 1 cup vegetable oil
- 1 cup buttermilk
- 2 large eggs
- 1 tablespoon cocoa powder
- 1 tablespoon red food coloring
- 1 teaspoon baking soda
- 1 teaspoon vanilla extract
- 1 teaspoon vinegar
The vibrant color and subtle cocoa flavor make this cake a showstopper! Did you know that red velvet cake originated in the South?
Ingredients for the Cream Cheese Frosting
- 1 cup cream cheese (softened)
- ½ cup unsalted butter (softened)
- 4 cups powdered sugar
- 1 teaspoon vanilla extract
- A splash of milk (to adjust consistency)
This frosting is the cherry on top! It’s fluffy, sweet, and perfectly balanced with the tang from the cream cheese, making your red velvet cheesecake bliss truly unforgettable.
Once you gather these ingredients, you’re all set to create a dessert that’s as indulgent as it is visually stunning! If you’re looking to dive deeper into the history of red velvet cake, check out this article for some fascinating insights.
Preparing Red Velvet Cheesecake Bliss
Getting ready to make a show-stopping dessert like Red Velvet Cheesecake Bliss is a delightful adventure. Layers of rich, velvety cake paired with creamy cheesecake, all topped off with luscious cream cheese frosting—what’s not to love? Whether you’re celebrating a special occasion or just want to treat yourself, this dessert is sure to impress. Let’s walk through the steps to create this culinary masterpiece!
Making the Cheesecake
First, let’s start with the cheesecake layer. This will be the foundation of your red velvet cheesecake bliss. Here’s what you need to gather:
- Ingredients:
- 2 packages (8 oz each) of cream cheese, softened
- 1 cup granulated sugar
- 1 teaspoon vanilla extract
- 2 large eggs
- 1 cup sour cream
- Preheat your oven to 325°F (160°C).
- In a large mixing bowl, beat the softened cream cheese until smooth.
- Gradually add in the sugar, mixing until fully combined.
- Mix in the vanilla extract and then add the eggs one at a time.
- Finally, stir in the sour cream until your mixture is creamy and homogenous.
Once mixed, you can pour this delicious filling into a prepared springform pan, smoothing the top with a spatula. Bake for about 45 minutes until set but slightly jiggly in the center. Allow it to cool while you prepare the red velvet cake.
Preparing the Red Velvet Cake
Now, it’s time for the star of the show—the red velvet cake. This cake is what gives our dessert its stunning color and flavor. Here’s your checklist:
- Ingredients:
- 2 cups all-purpose flour
- 1 ½ cups granulated sugar
- 1 cup vegetable oil
- 1 cup buttermilk
- 2 large eggs
- 2 tablespoons red food coloring
- 1 teaspoon baking soda
- 1 teaspoon vanilla extract
- 1 teaspoon white vinegar
- ½ teaspoon salt
- 2 tablespoons cocoa powder
- In a large bowl, mix together the flour, sugar, cocoa powder, and salt.
- In another bowl, whisk together the buttermilk, oil, eggs, food coloring, vanilla, and vinegar.
- Slowly combine the wet and dry ingredients until just mixed.
Pour this lush batter into a greased 9-inch round cake pan. Bake at 350°F (175°C) for 30-35 minutes or until a toothpick comes out clean. Allow the cakes to cool completely, making this the perfect moment to sip your favorite non-alcoholic beverage and enjoy some downtime.
Crafting the Cream Cheese Frosting
No cheesecake is complete without a decadent frosting. Here’s how to whip up a delightful cream cheese frosting:
- Ingredients:
- 1 cup butter, softened
- 8 oz cream cheese, softened
- 4-5 cups powdered sugar
- 1 teaspoon vanilla extract
- Beat the softened butter and cream cheese together until smooth.
- Gradually add in the powdered sugar until it reaches your desired consistency.
- Finally, mix in the vanilla extract.
This creamy topping not only enhances the flavor of your layers but also adds a beautiful finish to the overall dessert.
Assembling the Red Velvet Cheesecake Bliss
Once all your components are ready, it’s time for the fun part—putting everything together!
- Take your cooled cheesecake layer and place it as the base.
- Gently remove the red velvet cake layers from their pans. Place one layer on top of the cheesecake.
- Spread a layer of cream cheese frosting over the red velvet cake.
- Add the second red velvet layer and frost the top and sides as you desire. You can even get creative with sprinkles or chocolate shavings!
Chilling and Finishing Touches
After assembling your red velvet cheesecake bliss, it’s crucial to let it chill. This allows all the flavors to meld beautifully. Pop it in the fridge for at least 4 hours, or if you can wait overnight, you’ll be rewarded with an even richer experience.
When you’re ready to serve, slice it with a hot knife for clean cuts, and enjoy every delectable layer this wonderful dessert offers. Share it with friends or keep it all to yourself—you deserve it!
By following these steps, you’re well on your way to impressing friends and family. Enjoy the process and relish the delicious results of your red velvet cheesecake bliss!
Variations on Red Velvet Cheesecake Bliss
Red velvet cheesecake bliss can take many forms, and each variation brings something unique to the table. Whether you’re planning a special gathering or just indulging in a sweet craving, here are some delightful alternatives to consider.
Mini Red Velvet Cheesecakes
If you love the idea of portion control, mini red velvet cheesecakes are the way to go. These bite-sized treats are perfect for gatherings or when you want to satisfy your sweet tooth without going overboard. You can easily make these by baking your cheesecake batter in a muffin tin lined with paper cups. Just remember to adjust the baking time; they usually take about 15-20 minutes. Serve them on a decorative platter for an eye-catching dessert display!
Gluten-Free Options for Red Velvet Cheesecake
For those with gluten sensitivities, don’t fret! You can enjoy red velvet cheesecake bliss without the gluten. Simply swap out regular flour for almond flour or a gluten-free blend. Many gluten-free baking mixes work wonderfully, providing that light yet rich texture we all love. Also, check resources like Gluten-Free Watchdog for tips on safe brands.
Vegan Adaptations for the Cheesecake
Craving a plant-based version of this decadent dessert? You can easily create vegan red velvet cheesecake bliss by using cashews for the creamy filling and a combination of coconut cream and coconut milk for that luscious texture. Sweeten it with maple syrup or agave and use a vegan crust made from crushed nuts and dates. The result? A cheesecake that’s just as delicious while being kinder to our furry friends!
With these variations, there’s no reason not to dive into a slice of red velvet cheesecake bliss. What’s your favorite twist on this classic dessert?
Baking notes for Red Velvet Cheesecake Bliss
Common pitfalls to avoid
Embarking on your red velvet cheesecake bliss journey can be exciting but fraught with challenges. A common pitfall is overmixing the batter — this can lead to a dense texture. Remember, gentle folding is key when incorporating the wet and dry ingredients. Also, ensure your cream cheese is at room temperature to avoid those pesky lumps.
Ingredient substitutions for red velvet cheesecake
If you’re missing some ingredients, don’t worry! For a healthier twist, swap regular cream cheese with Greek yogurt for a lighter result. Need a gluten-free option? Almond flour can seamlessly replace all-purpose flour. And if you’re out of food coloring, pure beet juice can provide that signature red hue, plus a nutritional boost!
Best practices for achieving the perfect texture
Achieving that luscious, creamy texture in your red velvet cheesecake bliss often hinges on baking temperature. Bake at a consistent temperature and avoid opening the oven door frequently. Once baked, allow it to cool gradually in the oven to prevent cracking, ensuring it’s perfectly indulgent when you slice in!
For more tips, check out King Arthur Baking for expert baking advice!
Serving suggestions for Red Velvet Cheesecake Bliss
How to present your cheesecake beautifully
Presentation is key when it comes to showcasing your red velvet cheesecake bliss. Start by placing your stunning cheesecake on a decorative cake stand. Use a cake server to slice perfect, even pieces. A light dusting of cocoa powder or powdered sugar adds a touch of elegance, while a drizzle of chocolate sauce enhances the rich color contrast of your cheesecake.
Pairing suggestions with non-alcoholic beverages
Complement your cheesecake with refreshing non-alcoholic beverages. Here are a few delightful options:
- Iced coffee or cold brew: The coffee’s slight bitterness balances the sweetness.
- Sparkling water with a splash of citrus: This adds a refreshing zing that cleanses the palate.
- Herbal tea: A calming chamomile or refreshing mint tea pairs beautifully.
These choices not only enhance the flavors of your red velvet cheesecake bliss but also keep your gathering light and enjoyable.
Creative garnishing ideas for added flair
To elevate your dessert presentation, think about these garnishing ideas:
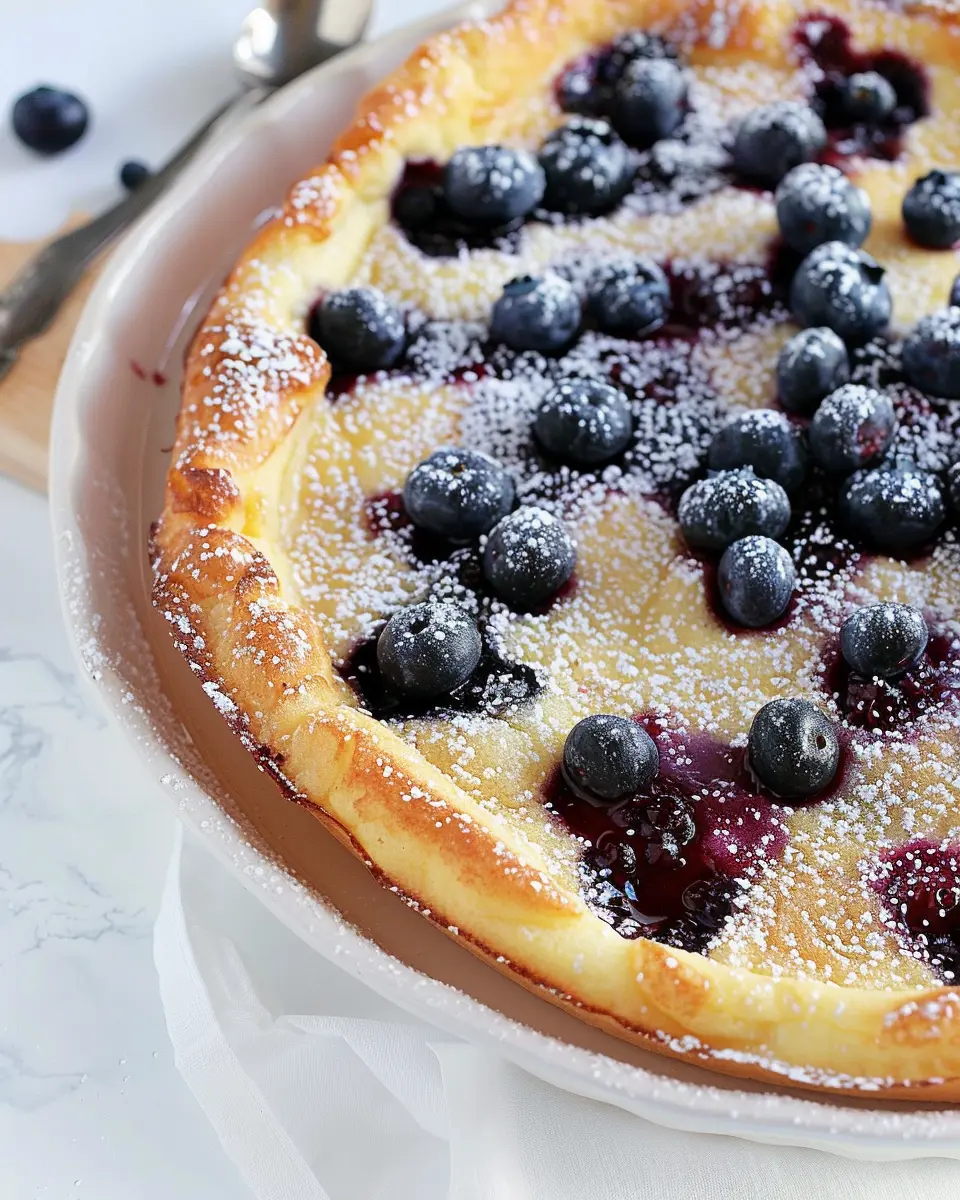
- Fresh berries: Strawberries or raspberries add a pop of color and tartness.
- Chocolate curls: Just a few stacked on top can bring an upscale feel.
- Whipped cream: A dollop on the side adds a creamy compliment to every bite.
Each of these finishing touches not only enhances your cheesecake’s aesthetic but also creates a delightful taste experience. Want to know more about impressing your guests? Check out Martha Stewart’s entertaining tips here.
By following these suggestions, you will take your red velvet cheesecake bliss to the next level and create an unforgettable dessert experience.
Time details for Red Velvet Cheesecake Bliss
Preparation time
To whip up your scrumptious Red Velvet Cheesecake Bliss, you’ll need about 20-30 minutes of preparation. This step includes gathering your ingredients, mixing the velvety batter, and preparing your cheesecake filling. It’s a wonderfully engaging process that fills your kitchen with delightful aromas!
Baking time
The baking process takes roughly 45-60 minutes. This is when your cheesecake will rise and set to perfection. Consider this your moment to unwind; perhaps enjoy a cup of coffee or catch up on a favorite playlist while you wait.
Total time
In total, you’ll spend about 1 hour and 30 minutes from start to finish. With a little patience and the right techniques, you’ll create a show-stopping dessert that’s sure to impress friends and family alike. For more tips on achieving the perfect cheesecake texture, check out resources like The Cheesecake Factory or New York Times Cooking for inspiration.
Nutritional information for Red Velvet Cheesecake Bliss
Calories
Indulging in a slice of red velvet cheesecake bliss can be a delightful experience, but it’s good to know what you’re savoring! Each serving typically contains around 350 calories. This makes it a treat that you can enjoy as part of a balanced diet without too much guilt.
Nutritional breakdown
Here’s a closer look at the nutritional content of this decadent dessert:
- Carbohydrates: Approximately 30g
- Protein: About 6g
- Fat: Roughly 22g
- Sugar: Around 18g
While enjoying red velvet cheesecake bliss, you can appreciate not only its rich flavor but also its unique combination of ingredients that make it both creamy and indulgent. For more insights on dessert nutrition, consider exploring findings from organizations like the American Heart Association. Remember, moderation is key when indulging in sweets!
FAQs about Red Velvet Cheesecake Bliss
Can I make this ahead of time?
Absolutely! You can prepare red velvet cheesecake bliss a day or two in advance. After baking, allow it to cool completely, cover it tightly, and refrigerate. This not only saves you time but can also enhance the flavors, making every slice even more delightful when served.
How should I store leftovers?
If you find yourself with leftover slices (though we doubt that will happen!), store them in an airtight container in the fridge. They’ll stay fresh for up to five days. Just be sure to let them sit at room temperature for about 15-20 minutes before enjoying a slice—this will help restore that creamy texture. If you want to keep it longer, you can freeze individual slices wrapped in plastic wrap and then aluminum foil. When you’re ready to indulge again, just defrost in the fridge overnight.
What makes red velvet cake different from regular chocolate cake?
This is a great question! While both red velvet cake and chocolate cake use cocoa powder, the standout feature of red velvet is its vibrant red color, which is often achieved through the addition of food coloring. Additionally, red velvet typically has a touch of buttermilk and vinegar, giving it a subtle tanginess that balances the sweetness. The cream cheese frosting often used also adds a rich, silky finish that sets it apart from your standard chocolate cake.
For a deeper dive into the difference in flavor profiles, check out resources like Serious Eats and Epicurious. They have fantastic articles that discuss the history and nuances of cakes, making it a perfect read for baking enthusiasts!
Conclusion on Red Velvet Cheesecake Bliss
Recap of the joys of homemade desserts
Making desserts at home can be a rewarding experience. There’s something special about creating delicious treats from scratch—it’s a chance to show off your culinary skills and experiment with flavors. Plus, sharing homemade goodies can deepen connections with friends and family, making gatherings even more memorable.
Try Your Hand at Red Velvet Cheesecake Bliss
If you haven’t already, I highly encourage you to try crafting this mouthwatering Red Velvet Cheesecake Bliss. It combines the classic red velvet flavor with the creamy richness of cheesecake, making it a perfect showstopper for any occasion. Don’t be intimidated; the joy of baking is all in the experience and flavors you’ll create.
Savor Each Bite
As you indulge in your creation, take a moment to savor each bite. Appreciate the layers of flavor and texture. Remember, good food is not just about taste, but also about the memories you create while enjoying it. So gather your loved ones, slice your cheesecake, and dive into the blissful experience!
Red Velvet Cheesecake Bliss: The Best Indulgent Treat at Home
Indulge in the rich and luxurious flavor of Red Velvet Cheesecake Bliss, the perfect dessert for any occasion.
- Prep Time: 30 minutes
- Cook Time: 30 minutes
- Total Time: 1 hour
- Yield: 8 servings 1x
- Category: Dessert
- Method: Baking
- Cuisine: American
- Diet: Vegetarian
Ingredients
- 2 cups all-purpose flour
- 1 cup granulated sugar
- 1 teaspoon baking soda
- 1 teaspoon baking powder
- 1 teaspoon salt
- 1 teaspoon cocoa powder
- 1 cup vegetable oil
- 1 cup buttermilk
- 2 large eggs
- 2 tablespoons red food coloring
- 1 teaspoon vanilla extract
- 1 teaspoon white vinegar
- 16 ounces cream cheese, softened
- 1 cup powdered sugar
- 1 teaspoon vanilla extract
- 1 cup heavy whipping cream
Instructions
- Preheat the oven to 350°F (175°C). Grease and flour two 9-inch round cake pans.
- In a large bowl, whisk together flour, sugar, baking soda, baking powder, salt, and cocoa powder.
- In another bowl, mix oil, buttermilk, eggs, food coloring, vanilla extract, and vinegar.
- Combine the wet and dry ingredients until just mixed.
- Divide the batter evenly between the prepared pans and bake for 25-30 minutes.
- Let the cakes cool completely before removing from the pans.
- In a separate bowl, beat the cream cheese with powdered sugar and vanilla extract until smooth.
- In another bowl, whip the heavy cream until stiff peaks form and fold into the cream cheese mixture.
- Once the cakes are cooled, spread a layer of the cream cheese mixture between the layers and on top of the cake.
Notes
- For an extra touch, add chocolate shavings on top.
- This cake tastes even better the next day after the flavors meld.
Nutrition
- Serving Size: 1 slice
- Calories: 450
- Sugar: 30g
- Sodium: 300mg
- Fat: 25g
- Saturated Fat: 10g
- Unsaturated Fat: 15g
- Trans Fat: 0g
- Carbohydrates: 45g
- Fiber: 2g
- Protein: 5g
- Cholesterol: 80mg
Keywords: Red Velvet Cheesecake, dessert, indulgent treat, homemade cheesecake